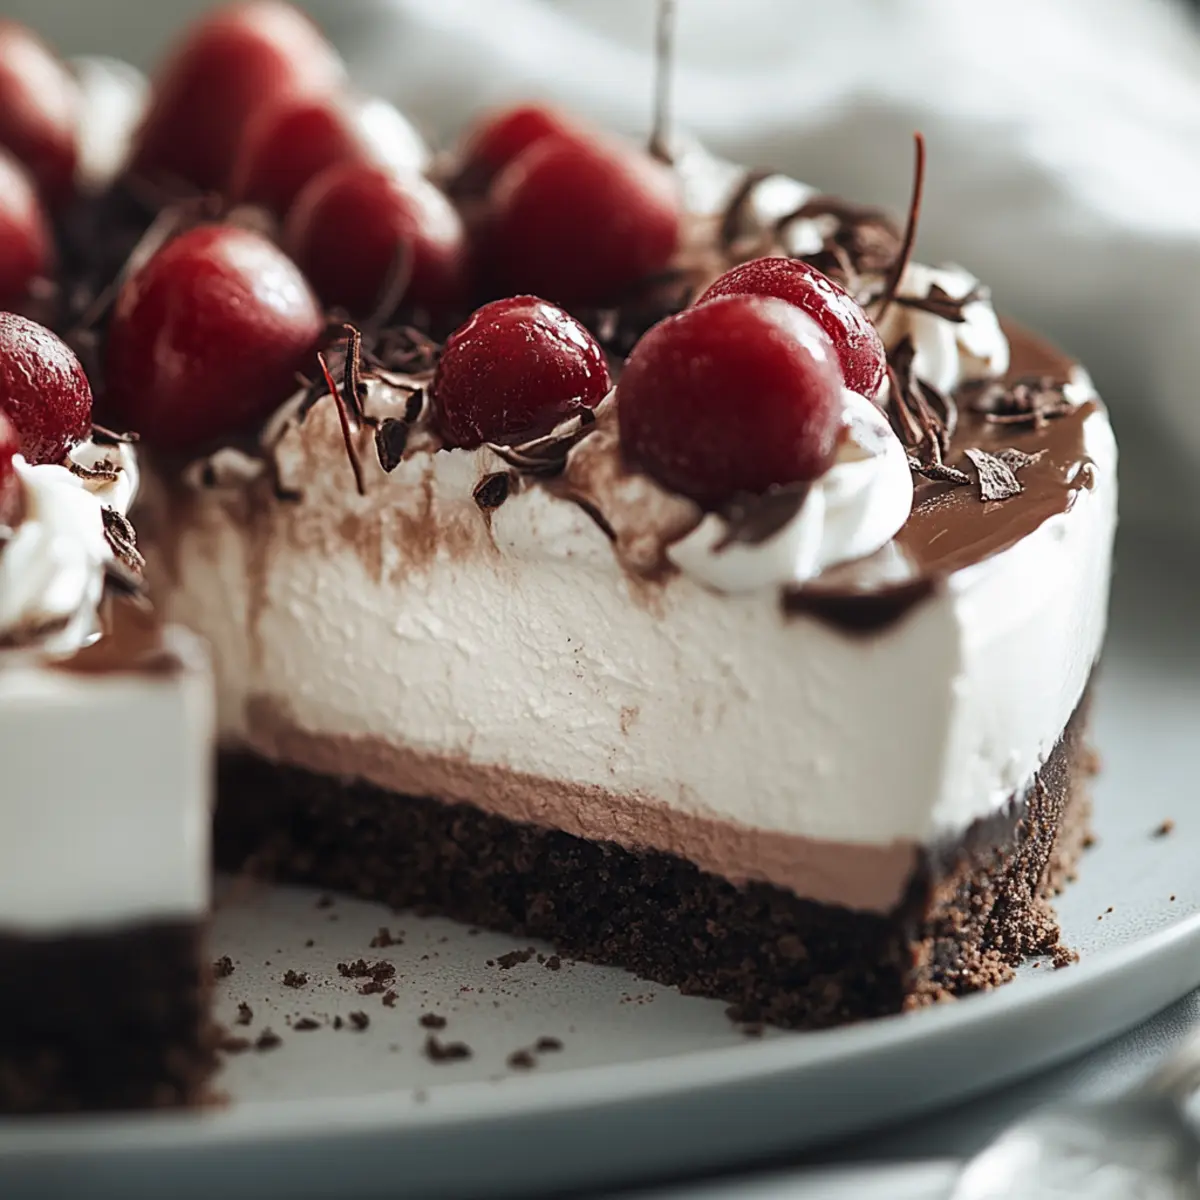
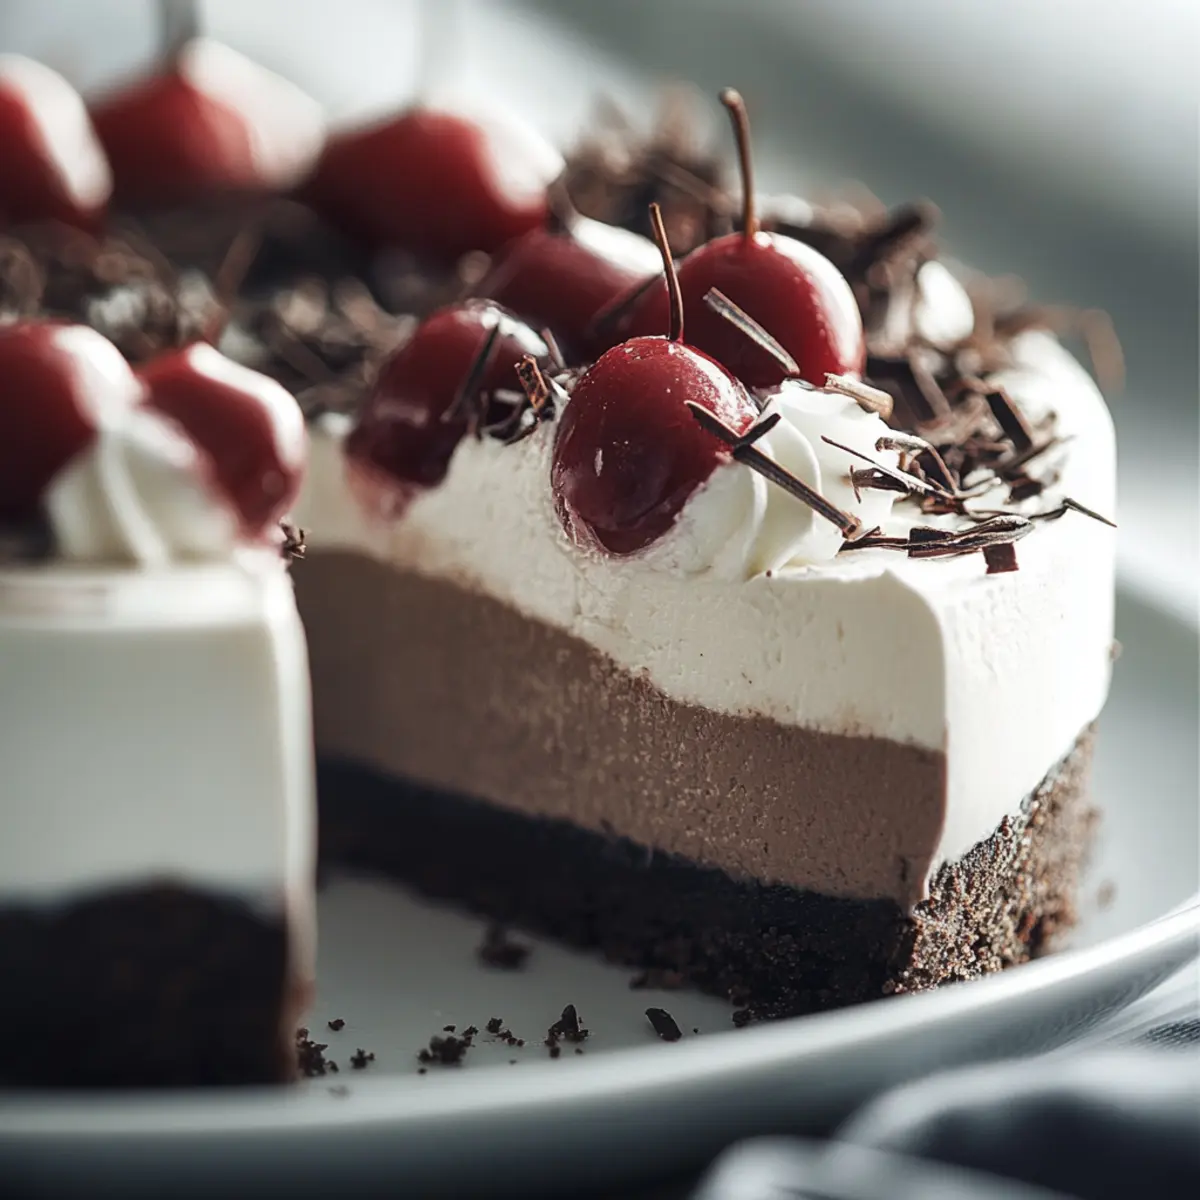
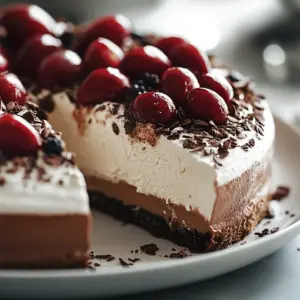
There’s something magical about the combination of chocolate and cherry that transports me straight to cozy nights spent sharing dessert with friends. This Black Forest Cheesecake captures that essence perfectly, blending a rich chocolate crust with a silky cream cheese filling that makes it a showstopper at any gathering. The best part? It’s surprisingly easy to whip up, making it ideal for both seasoned bakers and novices looking to impress. Not only is it a delightful treat that will have your loved ones coming back for seconds, but it also holds beautifully in the fridge, so you can prepare it ahead of time. Ready to create a dessert that’s bound to steal the spotlight? Let’s dive into this decadently delicious recipe.
Why is Black Forest Cheesecake a Must-Try?
Heavenly flavors collide in every bite—rich chocolate crust, creamy filling, and tart cherry topping create a taste sensation that’s hard to resist. Easy to make, this cheesecake requires just a few simple steps to achieve stunning results. Perfect for gatherings, it’s sure to steal the spotlight and impress your guests. Make ahead convenience allows you to chill it overnight for a stress-free dessert. With decadence that feels like a special treat, this Black Forest Cheesecake will quickly become your go-to indulgence!
Black Forest Cheesecake Ingredients
• Here’s everything you need to create this decadent dessert!
For the Crust
- Chocolate cookie crumbs – for that rich, chocolatey base; feel free to use gluten-free cookies if needed.
- Granulated sugar – adds sweetness to balance the chocolate.
- Melted butter – helps bind the crust together, making it perfectly firm.
For the Filling
- Cream cheese – softened, for a luscious and creamy texture.
- Granulated sugar – used for sweetness, ensuring a balanced flavor in the filling.
- Large eggs – these act as a binder and create a light, fluffy cheesecake.
- Semisweet chocolate – melted and slightly cooled; it’s the star that adds rich chocolate flavor to the filling.
- Sour cream – adds a touch of tanginess and smoothness to the cheesecake.
- Vanilla extract – for a warm, aromatic flavor that complements the chocolate beautifully.
For the Topping
- Heavy cream – whipped to pipe around the edges for an elegant finish.
- Powdered sugar – sweetens the whipped cream, giving it a delicate texture.
- Vanilla extract – enhances the flavor of the whipped cream.
- Cherry pie filling – for that classic Black Forest touch; you can use homemade if you prefer!
- Chocolate shavings – a delightful garnish that adds a touch of elegance to your Black Forest Cheesecake.
With these ingredients, you're all set to create an unforgettable dessert that will leave everyone wanting more!
Step‑by‑Step Instructions for Black Forest Cheesecake
Step 1: Preheat and Prepare
Preheat your oven to 325°F (160°C) and grab a 9-inch springform pan. Grease the inside well and wrap the exterior with aluminum foil to prevent any water leaks during baking. This ensures a perfect environment for your Black Forest Cheesecake to bake evenly and keep that lovely texture.
Step 2: Make the Crust
In a mixing bowl, combine 1 ½ cups of chocolate cookie crumbs with ¼ cup of granulated sugar and 6 tablespoons of melted butter. Stir until the mixture resembles wet sand. Firmly press it into the bottom of the prepared springform pan to create an even layer. Bake the crust in the preheated oven for 10 minutes, then let it cool completely before adding the cheesecake filling.
Step 3: Blend the Filling
In a large mixing bowl, beat 24 ounces of softened cream cheese with 1 cup of granulated sugar until smooth and creamy. This process should take about 3-4 minutes on medium speed. Once combined, add 3 large eggs one at a time, mixing thoroughly after each addition. You want a silky texture that will make the cheesecake rich and indulgent.
Step 4: Combine Ingredients
Now, gently stir in 8 ounces of slightly cooled, melted semisweet chocolate, ½ cup of sour cream, and 1 teaspoon of vanilla extract into the cream cheese mixture. Mix until everything is fully combined, and the batter is smooth and luscious. This will give the cheesecake its delightful chocolate flavor, making your Black Forest Cheesecake truly unforgettable.
Step 5: Pour Filling Over Crust
Carefully pour the creamy cheesecake filling over the cooled crust in the springform pan. Gently tap the pan on the counter to release any trapped air bubbles, ensuring a flawless texture. Next, place the springform pan inside a larger roasting pan and pour hot water around it until it reaches halfway up the sides of the springform. This will create a moist environment while baking.
Step 6: Bake the Cheesecake
Bake the cheesecake in the oven for 55 to 65 minutes, or until the center is set but still has a slight jiggle. The outer edges should appear firm and slightly puffed. Once done, turn off the oven and crack the door open, allowing the cheesecake to cool gradually for about 1 hour to prevent cracks from forming.
Step 7: Chill the Cheesecake
After cooling in the oven, let your Black Forest Cheesecake come to room temperature before transferring it to the refrigerator. Cover it and chill for at least 4 hours, or overnight if possible. This chilling time will help deepen the flavors and ensure a creamy texture that everyone will love.
Step 8: Prepare the Topping
When you're ready to serve, whip 1 cup of heavy cream with 2 tablespoons of powdered sugar and 1 teaspoon of vanilla extract until soft peaks form. This fluffy whipped cream makes an elegant topping for your cheesecake. Be gentle to keep the texture light and airy, perfect for enhancing each bite of the rich Black Forest Cheesecake.
Step 9: Assemble and Garnish
Top the chilled cheesecake with a generous amount of cherry pie filling, spreading it evenly for a beautiful presentation. Pipe the whipped cream around the edges for a charming finish, and finish with delightful chocolate shavings for a touch of elegance. Your stunning Black Forest Cheesecake is now ready to impress!
Black Forest Cheesecake Variations
Embrace your inner chef and personalize your Black Forest Cheesecake with these fun twists that will excite your taste buds!
-
Gluten-Free Crust: Swap chocolate cookie crumbs with gluten-free cookies for a delectable, inclusive dessert. Your gluten-free friends will love it just as much!
-
Nutty Crunch: Add ½ cup of finely chopped nuts, like pecans or walnuts, to the cookie crumb crust for an extra layer of texture. It brings a delightful surprise with every bite.
-
Dairy-Free Alternative: Use vegan cream cheese and coconut cream to replace the heavy cream for a delicious dairy-free treat. It’s a perfect option for those seeking plant-based goodness.
-
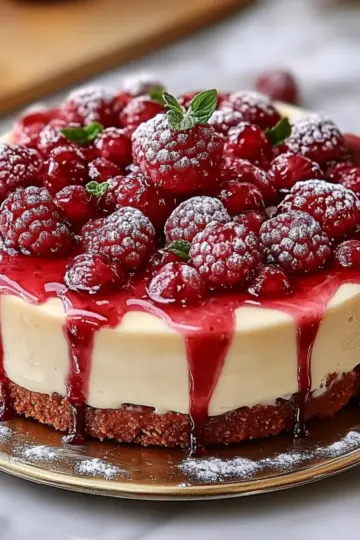
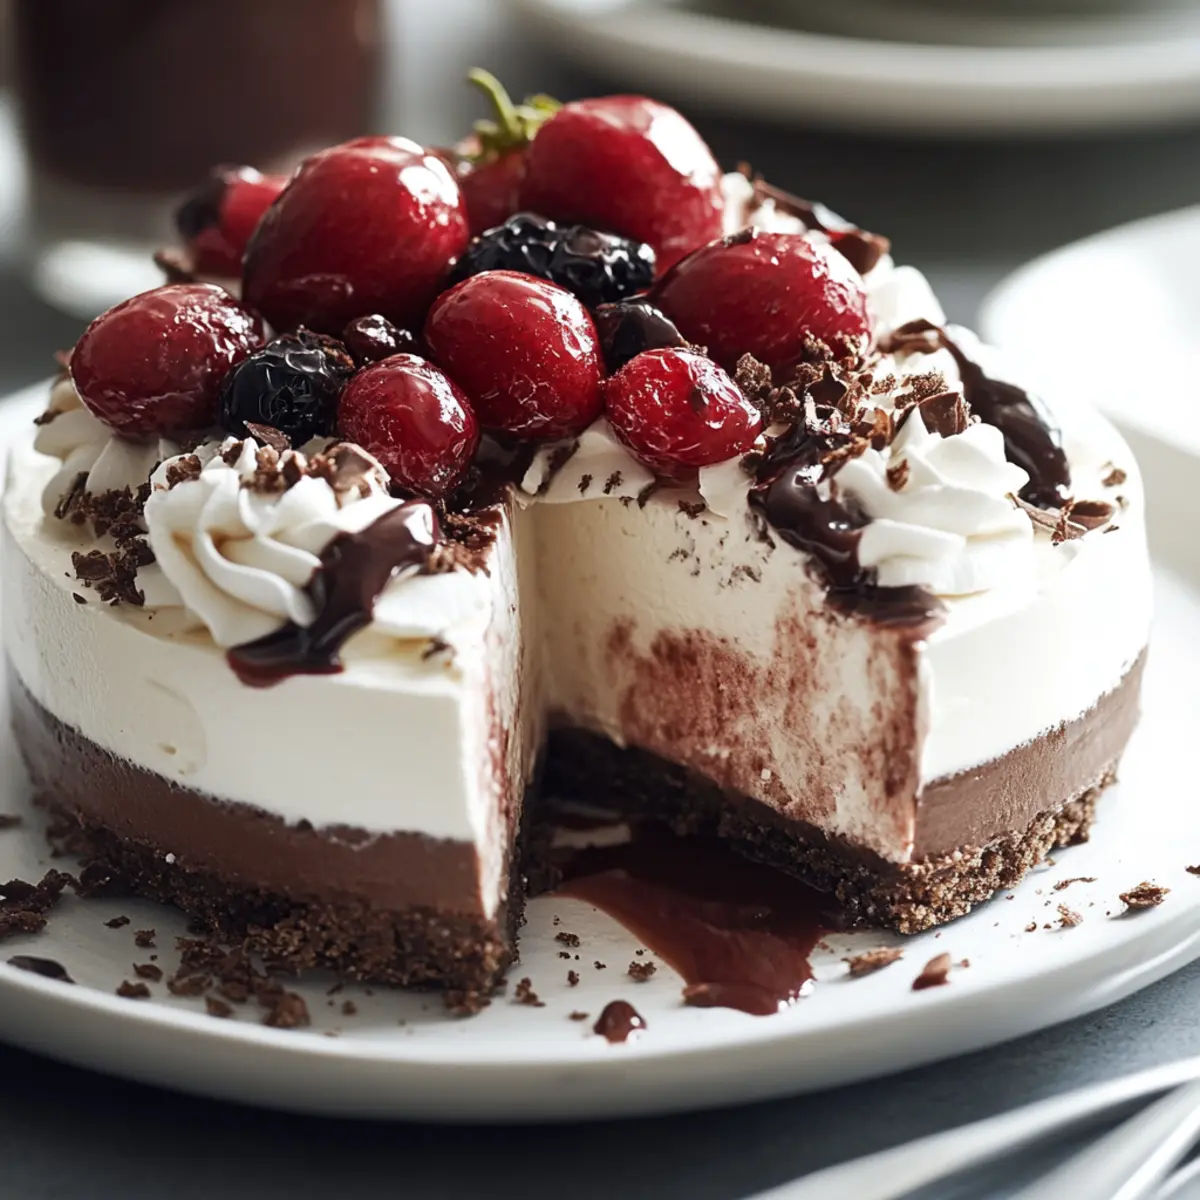
Berry Bliss: For a fruity twist, use a mix of mixed berry pie filling instead of cherry. Strawberries and blueberries pair beautifully with chocolate!
-
Mint Chocolate: Stir in 1 teaspoon of peppermint extract into the cheesecake filling for a refreshing minty flavor that dances on your palate. It adds a festive touch, great for the holidays!
-
Extra Cocoa: If you love deep chocolate flavor, blend in 2 tablespoons of cocoa powder with the cream cheese mixture. This makes the cheesecake even richer and oh-so-chocolatey.
-
Spiced Cheesecake: Add a pinch of cinnamon or a dash of nutmeg to the filling for a warm, spicy undertone that enhances the richness of the chocolate.
-
Lemon Zest: Brighten the flavor profile by mixing in the zest of one lemon into the filling. The citrus will cut through the richness and add a refreshing contrast.
Feel free to experiment and discover your new favorite version of this beloved cheesecake!
Make Ahead Options
These Black Forest Cheesecake options are perfect for busy home cooks looking to save time without sacrificing flavor! You can prepare the crust and filling up to 3 days in advance. Start by making the crust and allowing it to cool completely, then store it covered in plastic wrap in the refrigerator. For the filling, combine all the ingredients but refrain from pouring it over the crust until you're ready to bake. Just before serving, simply whip the cream and top the cheesecake with cherry filling and chocolate shavings. With this make-ahead strategy, you’ll create a show-stopping dessert with minimal effort when your guests arrive—it's just as delicious, and all you have to do is assemble!
Expert Tips for Black Forest Cheesecake
• Room Temperature Ingredients: Ensure all ingredients, especially cream cheese and eggs, are at room temperature for smoother mixing and a creamy texture.
• Water Bath Tip: When using a water bath, be sure to tightly wrap the springform pan in aluminum foil to prevent water from seeping in. This keeps your Black Forest Cheesecake from becoming soggy.
• Check for Doneness: The cheesecake should still have a slight jiggle in the center when you take it out of the oven. It will firm up as it cools.
• Chill Overnight: For the best flavor and texture, let your cheesecake chill overnight. This extra time allows the flavors to meld beautifully.
• Whip Cream Gently: When whipping your cream, beat just until soft peaks form to maintain a light, airy topping that won’t overpower the cheesecake.
• Customize Your Topping: Feel free to get creative with toppings! Fresh cherries or chocolate curls can make your Black Forest Cheesecake even more delightful.
What to Serve with Black Forest Cheesecake?
Create a memorable dining experience by pairing this rich dessert with delicious side dishes and drinks that complement its decadent flavors.
-
Fresh Berries: A medley of strawberries, raspberries, and blueberries adds a refreshing touch, balancing the richness of the cheesecake wonderfully.
-
Coffee or Espresso: The earthy notes of a well-brewed cup of coffee amplify the chocolate flavors in the cheesecake, creating a cozy, comforting end to your meal.
-
Vanilla Ice Cream: This classic combination offers a lovely creamy contrast to the dense cheesecake, enhancing each bite and making it even more indulgent.
-
Chocolate Truffles: For chocolate lovers, a side of rich homemade truffles intensifies the dessert experience, providing multiple layers of chocolate bliss.
-
Whipped Cream Fraiche: A dollop of lightly tart whipped cream fraiche perfectly balances the sweetness of the Black Forest Cheesecake, giving your guests a delightful surprise.
-
Pecan Caramel Sauce: Drizzling warm pecan caramel over each slice elevates the dessert with an extra layer of flavor and texture that’s hard to resist.
-
Hazelnut Liqueur: A glass of chilled hazelnut liqueur serves as a delightful after-dinner drink, enhancing the chocolate notes of the cheesecake’s flavor profile.
-
Chocolate Covered Cherries: These sweet bites echo the cheesecake’s topping while offering a fun, interactive way to enjoy those classic cherry flavors.
-
Mint Tea or Lemonade: A refreshing mint tea or a zesty lemonade can cleanse the palate, providing a bright contrast to the cheesecake’s decadent sweetness.
How to Store and Freeze Black Forest Cheesecake
Fridge: Keep your Black Forest Cheesecake covered in an airtight container in the refrigerator for up to 5 days to maintain its delightful creaminess and fresh flavors.
Freezer: If you want to save leftovers, wrap individual slices tightly in plastic wrap and store them in a freezer-safe container for up to 2 months. Thaw in the fridge overnight before enjoying.
Reheating: While this cheesecake is best served chilled, if you prefer it at room temperature, simply let it sit out for about 30 minutes before serving. Avoid microwave reheating to maintain its delightful texture.
Serving Tip: Garnish with fresh cherry or whipped cream just before serving for an added touch of elegance!
Black Forest Cheesecake Recipe FAQs
How can I select the best ingredients for my Black Forest Cheesecake?
Absolutely! For the chocolate cookie crumbs, look for a rich chocolate flavor and avoid any with too many dark spots, as they may not be as fresh. The cream cheese should be softened and at room temperature to ensure a creamy filling. When selecting eggs, pick ones that are free-range for a fresher taste. Lastly, using high-quality semisweet chocolate will enhance the overall flavor of your cheesecake.
How should I store my Black Forest Cheesecake?
Your Black Forest Cheesecake can be stored in the refrigerator for up to 5 days. Make sure to cover it with plastic wrap or place it in an airtight container to prevent it from absorbing any odors. I often place a piece of parchment paper between the cheesecake and the wrap to avoid any sticking. If you plan to enjoy it later, chilling it helps to maintain that creamy texture!
Can I freeze Black Forest Cheesecake, and if so, how?
Yes, you can freeze your Black Forest Cheesecake! To do this, wrap individual slices tightly in plastic wrap, and then place them in a freezer-safe container or a resealable plastic bag. This way, they can be stored for up to 2 months. When you’re ready to enjoy a slice, simply transfer it to the fridge overnight to thaw. Avoid thawing in the microwave, as this can ruin the texture.
What are some common troubleshooting tips if my cheesecake cracks?
Very common! If your cheesecake cracks during baking, it usually means that it was baked at too high of a temperature or for too long. To prevent this in the future, ensure you bake at 325°F (160°C) and check for doneness—a slight jiggle in the center is perfect. Additionally, cooling it slowly in the oven by cracking the door open will also help minimize cracking. Remember to tap the pan to release air bubbles before baking, too!
Are there any dietary considerations I should keep in mind?
Yes! For those with dietary restrictions, you can easily make a gluten-free version by using gluten-free chocolate cookies for the crust. If allergies to eggs or dairy are a concern, some egg substitutes, like flaxseed meal or silken tofu, can work in place of eggs. Additionally, ensuring all chocolate and pie filling is free from allergens is essential. If you’re serving this to guests, consider checking their dietary needs beforehand.
How long does the cheesecake need to chill for the best flavor?
For the most indulgent flavor, I highly recommend chilling your blackberry cheesecake for at least 4 hours, but overnight is even better! This extended chilling allows the flavors to meld beautifully, giving you that silky, creamy texture that melts in your mouth. If you're in a pinch, however, even a 4-hour chill will still yield a delicious result!
Indulgent Black Forest Cheesecake That’ll Wow Your Guests
Equipment
- 9-inch springform pan
- mixing bowls
- whisk
- electric mixer
- Roasting pan
- Aluminum foil
Ingredients
For the Crust
- 1 ½ cups chocolate cookie crumbs gluten-free option available
- ¼ cup granulated sugar
- 6 tablespoons melted butter
For the Filling
- 24 ounces cream cheese softened
- 1 cup granulated sugar
- 3 large eggs
- 8 ounces semisweet chocolate melted and slightly cooled
- ½ cup sour cream
- 1 teaspoon vanilla extract
For the Topping
- 1 cup heavy cream whipped
- 2 tablespoons powdered sugar
- 1 teaspoon vanilla extract
- 1 can cherry pie filling homemade optionally
- to taste chocolate shavings
Instructions
Preparation Steps
- Preheat your oven to 325°F (160°C) and grease a 9-inch springform pan, wrapping the exterior with aluminum foil.
- In a bowl, combine chocolate cookie crumbs, granulated sugar, and melted butter. Press into the prepared pan to form the crust.
- Bake the crust for 10 minutes, then let it cool completely.
- In a large mixing bowl, beat cream cheese and sugar until smooth. Add eggs one at a time, mixing well after each.
- Stir in melted chocolate, sour cream, and vanilla until fully combined.
- Pour the filling over the cooled crust and create a water bath by placing the springform in a larger pan filled with hot water.
- Bake for 55 to 65 minutes until the center is set with a slight jiggle.
- Let cool gradually in the oven for about 1 hour, then chill for at least 4 hours in the refrigerator.
- Whip heavy cream with powdered sugar and vanilla until soft peaks form.
- Top the cheesecake with cherry pie filling, pipe whipped cream around edges, and garnish with chocolate shavings before serving.