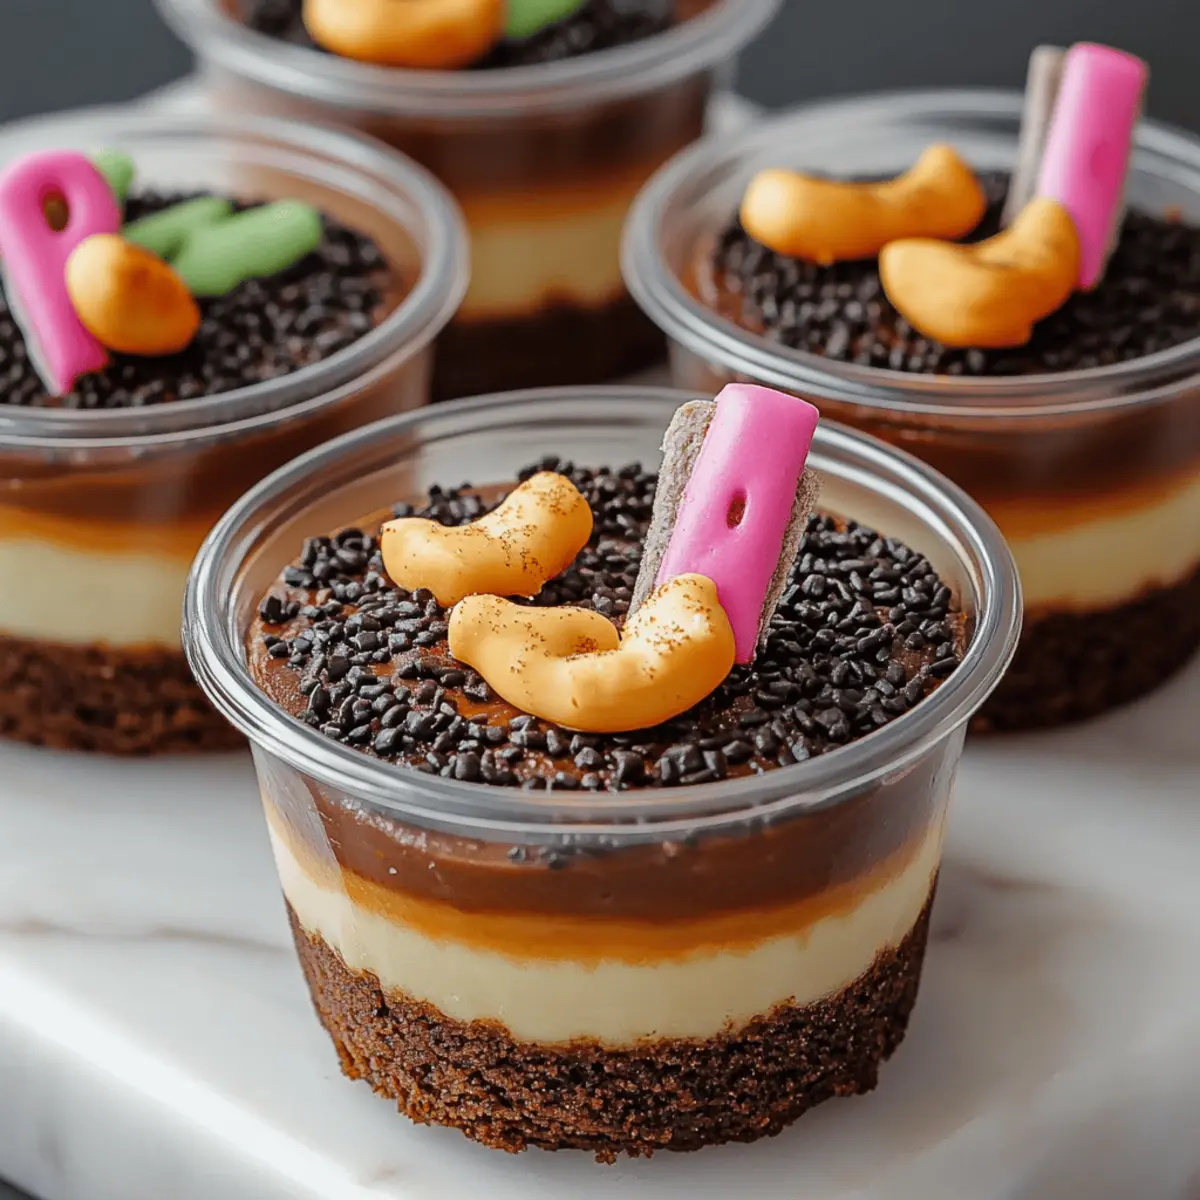
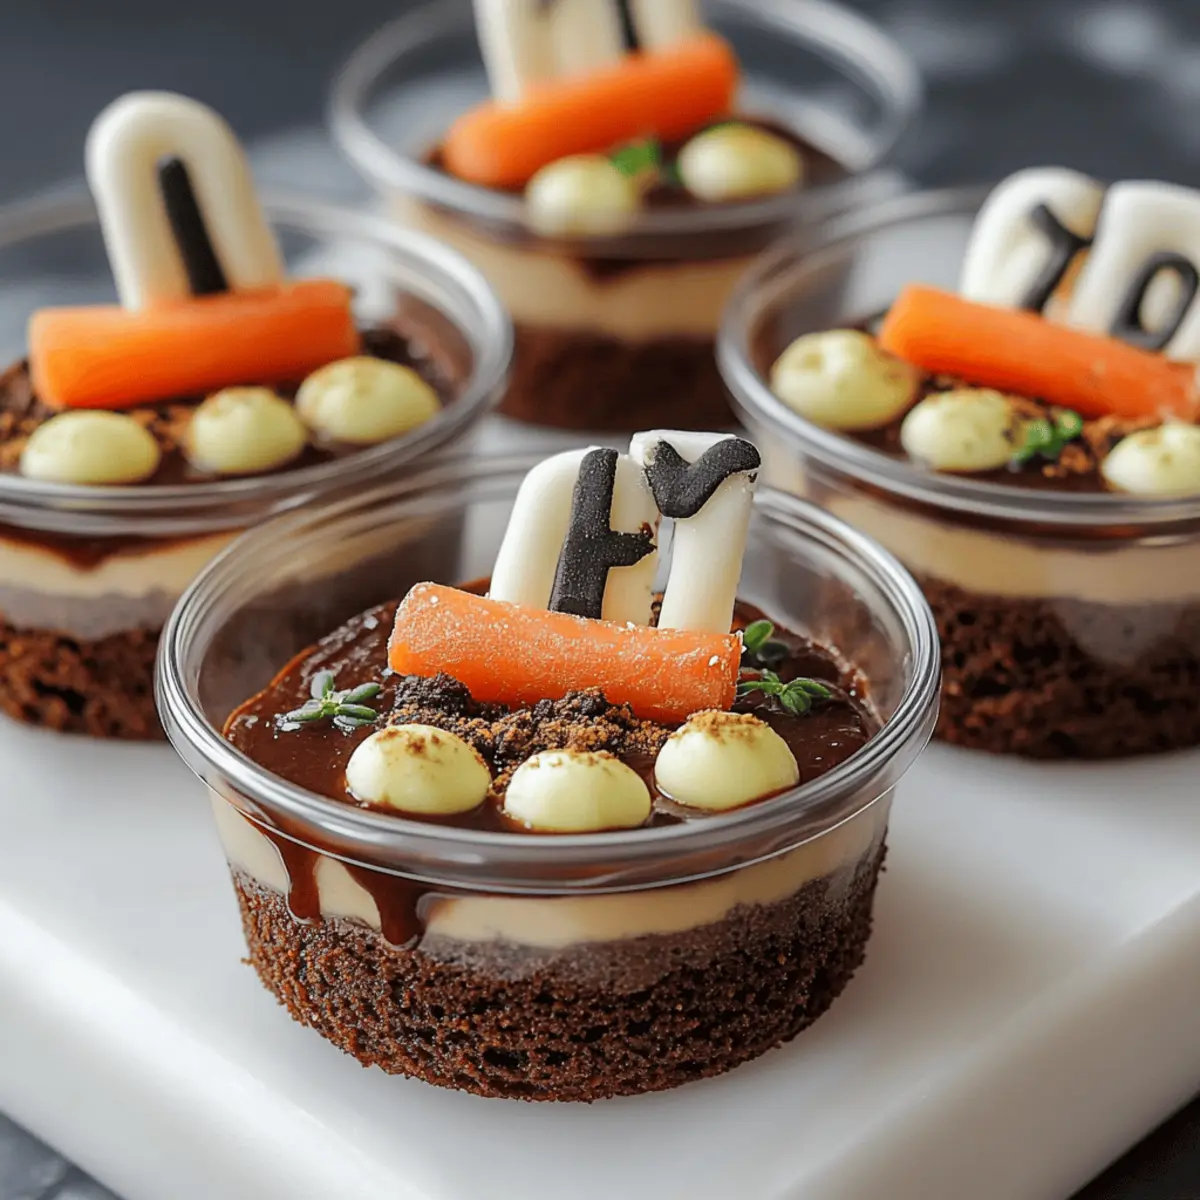
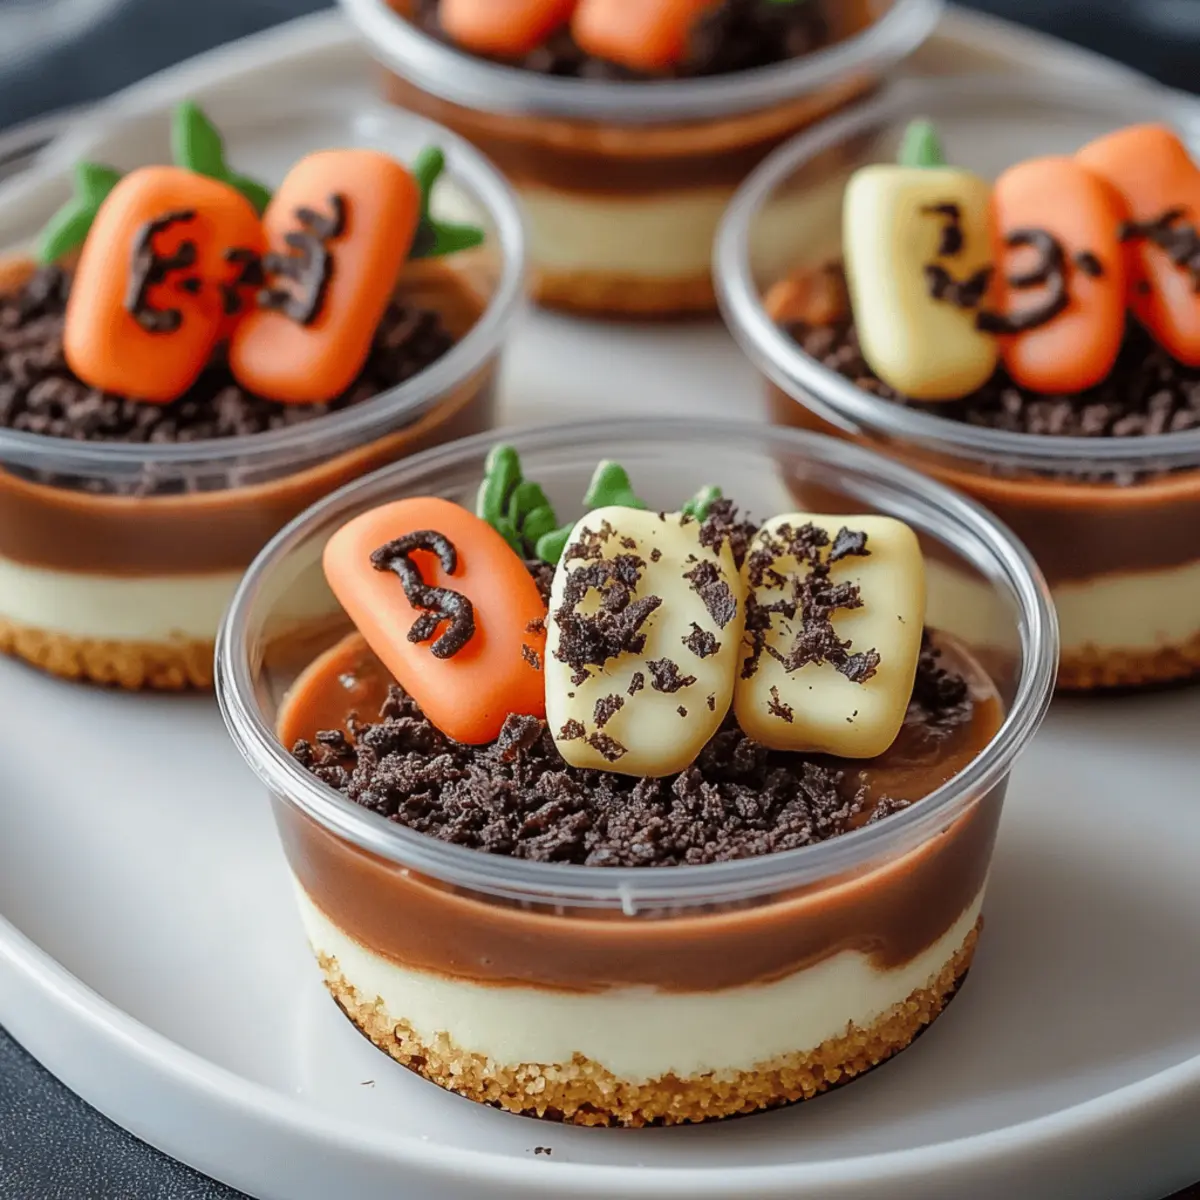
The moment I spied the Halloween section at the local store, my mind exploded with ideas for festive treats. If you've ever wanted a simple yet stunning dessert to wow guests at your spooky gathering, allow me to introduce you to Halloween Dirt Cups – Graveyard Pudding Dessert With Cookie Crumble. Not only do these creepy cups look delightfully eerie with their chocolate soil and gummy worms, but they also come together in just 20 minutes! Plus, they're a fantastic way to engage your little ones in the kitchen, creating fun memories while decorating their very own dessert masterpieces. Ready to dig into some frightfully delicious fun? Let's unearth the simple steps to whip up these Halloween Dirt Cups!
What Makes Halloween Dirt Cups So Fun?
Easy to Assemble: These Halloween Dirt Cups come together quickly, making them a fantastic choice for last-minute gatherings or parties.
Creepy Yet Tasty: The combination of creamy chocolate pudding and cookie crumbs creates a dessert that’s both spooky and delicious.
Perfect for Kids: Involve your little ones in the fun! They’ll love creating their own edible graveyard with gummy worms and tombstones.
Versatile Decorating Options: Get creative by customizing the toppings — candy pumpkins or edible grass can add another layer of fun to your spooky aesthetic.
Crowd-Pleasing Treat: These treats are a hit with both kids and adults, ensuring your Halloween celebrations are filled with smiles and sweet indulgence.
Halloween Dirt Cups Ingredients
For the Pudding Mixture
• Instant chocolate pudding mix – This provides the rich, chocolatey flavor base.
• Cold milk – Using cold milk helps achieve the perfect creamy texture.
• Whipped topping – Make sure it's thawed to fold it in smoothly for that heavenly lightness.
For the Topping
• Chocolate sandwich cookies – Crushed to create the "dirt," these add a satisfying crunch.
• Black decorating gel or melted chocolate – Use this to write "RIP" on your tombstones for a touch of spooky charm!
• Gummy worms – These tasty little critters are a fun surprise peeking out from the dessert.
• Oval cookies – Perfect for creating your edible tombstones!
Additional Decorations
• Candy pumpkins – Add these for a pop of color and festive flair.
• Edible grass (green sprinkles) – Sprinkle some on for a bit of spooky scenery.
With these ingredients for your Halloween Dirt Cups, you’re all set for a fun and deliciously creepy dessert that your guests will love!
Step‑by‑Step Instructions for Halloween Dirt Cups – Graveyard Pudding Dessert With Cookie Crumble
Step 1: Prepare the Pudding Mixture
In a large mixing bowl, whisk together the instant chocolate pudding mix and 2 cups of cold milk for about 2 minutes until the mixture thickens to a smooth consistency. Next, gently fold in the thawed whipped topping until fully combined, creating a light and airy pudding that will serve as the base for your Halloween Dirt Cups.
Step 2: Crush the Cookies
Place the chocolate sandwich cookies into a food processor and pulse them until fine crumbs form, resembling soil. Alternatively, you can put the cookies in a zip-top bag and crush them with a rolling pin for a more hands-on approach. This cookie crumble will be your delightful "dirt" topping, adding both texture and a rich chocolate flavor.
Step 3: Assemble the Pudding Cups
Carefully divide the fluffy pudding mixture among clear plastic cups, filling each cup about three-quarters full for the best presentation. Once filled, sprinkle a generous layer of crushed cookie crumbs on top, creating the appearance of freshly dug dirt for your eerie Halloween Dirt Cups.
Step 4: Decorate the Tombstones
Using black decorating gel or melted chocolate, write "RIP" on each oval cookie to craft spooky tombstones. Allow the writing to set for about 5 minutes before moving on. This little detail adds a charmingly creepy touch to your Halloween Dirt Cups, making them even more festive.
Step 5: Add the Tombstones and Worms
Once the tombstones are set, insert one cookie tombstone into the top of each pudding cup. For an extra creepy surprise, add a gummy worm or two, arranging them to peek out from the cookie crumble "soil" as if they're emerging from the ground, further enhancing the spookiness of your Halloween Dirt Cups.
Step 6: Chill Before Serving
Place your assembled Halloween Dirt Cups in the refrigerator to chill for at least 30 minutes. This cooling step helps the flavors to meld beautifully and allows the pudding to set, ensuring that your delightful graveyard pudding dessert is perfectly refreshing when it's time to serve to your eager guests.
Make Ahead Options
These Halloween Dirt Cups are excellent for meal prep, allowing you to enjoy the spooky fun without the last-minute rush! You can prepare the pudding mixture and crush the cookies up to 24 hours in advance, simply refrigerate the pudding in an airtight container to maintain its creamy texture. When you're ready to serve, assemble the cups by layering the pudding and cookie crumbs, then finish by decorating with tombstones and gummy worms. This way, you'll have a frightfully delightful dessert that’s just as delicious and fresh as if you made it on the spot!
Halloween Dirt Cups – Customizations Galore
Feel free to get creative and personalize your Halloween Dirt Cups with these fun and festive variations!
- Dairy-Free: Substitute the milk with a plant-based alternative like almond or oat milk for a creamy, lactose-free treat.
- Vegan Option: Use vegan whipped topping and ensure your cookie selection is dairy-free to make this dessert suitable for vegans.
- Gluten-Free: Look for gluten-free chocolate sandwich cookies and use cornstarch to thicken the pudding if needed.
- Flavor Infusion: Add a splash of vanilla or almond extract to the pudding mixture for a delightful flavor twist that elevates the chocolate.
- Nutty Crunch: Incorporate crushed nuts like almonds or walnuts between the pudding and dirt layers for an added texture that’s both crunchy and delicious.
- Extra Spooky: Sprinkle edible glitter or worm-shaped candies on top for an added element of fun that will enchant kids and adults alike.
- Heat It Up: For a spicy twist, sprinkle a dash of cayenne or chili powder in the pudding for a surprising yet delicious kick!
- Candy Crazy: Amp up the sweetness with assorted Halloween candy pieces mixed in, like mini chocolate bars or spooky gummy candies for extra festive flair.
Storage Tips for Halloween Dirt Cups
Fridge: Store your assembled Halloween Dirt Cups in an airtight container in the refrigerator for up to 3 days. This keeps them fresh and delicious for your next spooky gathering.
Freezer: If you need to store them longer, you can freeze the pudding mixture (without the cookie crumble and toppings) for up to 2 months. Just thaw in the fridge before serving.
Reheating: There's no need to reheat these delightful desserts; they are best enjoyed cold. Simply prepare them ahead of time and keep them chilled until party time!
Pre-Assembly: If you plan on serving later, assemble the pudding cups without the toppings, cover tightly, and add the cookie crumble and decorations right before serving for the best presentation.
What to Serve with Halloween Dirt Cups
Looking to complement your delightfully spooky dessert with the perfect accompaniments?
-
Classic Vanilla Ice Cream: The creamy texture of vanilla ice cream adds a refreshing contrast to the rich and chocolatey dirt cups. A scoop beside your pudding will delight every guest.
-
Pumpkin Spice Cookies: These soft, spiced cookies resonate with the autumn theme, adding a festive touch that pairs beautifully with the sweetness of your dirt cups.
-
Fresh Fruit Salad: A bright, zesty mix of fruits like apples and oranges provides a refreshing, juicy balance to the rich pudding dessert, making it a welcome addition to your Halloween spread.
-
Chocolate Mousse: Serve this rich, silky dessert alongside the dirt cups for an indulgent combination that chocolate lovers will adore. The textures will delight as the mousse melts in your mouth.
-
Hot Chocolate: Delight your guests with cups of creamy hot chocolate, spiced with cinnamon or topped with marshmallows. The warmth and richness create a cozy ambiance, enhancing the excitement of your Halloween gathering.
-
Candy Corn Treats: This iconic Halloween candy will not only add a festive flair to your table, but the sweet crunch of candy corn makes for a fun juxtaposition with the creamy dirt cups.
-
Caramel Apples: The crisp freshness of apples drizzled with warm caramel echoes the fall season, bringing both flavor and texture that contrasts engagingly with the pudding and cookie layers.
-
Spooky-Themed Drinks: Consider concocting ghostly cocktails or mocktails for adults and kids alike. Drinks like a ‘Witch’s Brew’ made from lime sherbet and soda can add a festive mood to your party.
With these delightful pairings, your Halloween Dirt Cups will shine even brighter during your festive celebration!
Tips for the Best Halloween Dirt Cups
-
Mix Thoroughly: Make sure to whisk the pudding mix and milk for the full 2 minutes. This ensures a thick, creamy consistency for your Halloween Dirt Cups.
-
Cookie Crumble Texture: For the best "dirt" texture, aim for fine cookie crumbs. Use a food processor or crush cookies in a zip-top bag to avoid chunky bits.
-
Tombstone Stability: Allow the black decorating gel to set completely on the cookies before adding them to the cups. This prevents them from sliding and keeps your spooky presentation intact.
-
Chill Time Matters: Don’t skip the chilling step! Allow at least 30 minutes in the refrigerator for the pudding to firm up, enhancing the overall taste and texture.
-
Engage the Kids: Involve your little ones in writing on the tombstones or adding gummy worms. It makes for a fun family activity and sparks creativity in decorating these spooky treats!
Halloween Dirt Cups Recipe FAQs
How do I choose ripe ingredients for my Halloween Dirt Cups?
Absolutely! For the best taste and texture, make sure your whipped topping is properly thawed; it should be soft and spreadable but not watery. The chocolate sandwich cookies should be fresh—check for any signs of staleness, like a loss of crunch. Gummy worms should be chewy and free of any discoloration, ensuring they're fun to eat!
How should I store my Halloween Dirt Cups, and how long do they last?
Store your assembled Halloween Dirt Cups in an airtight container in the refrigerator for up to 3 days. This keeps them fresh and ready for your guests. If you have leftovers, I recommend enjoying them within that time for the best flavor and texture.
Can I freeze my Halloween Dirt Cups?
Certainly! You can freeze the pudding mixture (without the cookie crumbs and toppings) for up to 2 months. To do so, prepare the pudding mixture and place it in an airtight container. When you're ready to serve, thaw it overnight in the refrigerator. Just remember to add your cookie crumble and decorations just before serving for the best presentation!
What should I do if my pudding mixture isn't thickening?
Very well! If your pudding mix isn't thickening, ensure you're whisking it thoroughly for the full 2 minutes with the cold milk as specified in the recipe. If it's still too runny, give it a little more time in the refrigerator after mixing, as chilling can help it set. Sometimes, instant pudding can be finicky, so try to avoid adding too much milk.
Are there any dietary considerations I should be aware of for my Halloween Dirt Cups?
Yes! If serving to guests with dietary restrictions, make sure to check for allergies, especially with the whipped topping and cookies, as they may contain gluten or dairy. For a gluten-free option, look for gluten-free chocolate pudding mix and cookies. If you're concerned about sugar, you can find sugar-free versions of the pudding mix or whipped topping. Always double-check ingredient labels to ensure they're safe for everyone!
Can I make Halloween Dirt Cups ahead of time?
Absolutely! You can prepare the pudding mixture ahead of time and store it in the refrigerator for up to a day prior to assembly. When you're ready to serve, just fill the cups and top with cookie crumbs and decorations for that fresh appearance. It’s a great way to alleviate stress before your Halloween festivities!
Spooky Halloween Dirt Cups - Best Graveyard Pudding Dessert
Equipment
- mixing bowl
- food processor
- zip-top bag
- Rolling Pin
- clear plastic cups
Ingredients
For the Pudding Mixture
- 1 box instant chocolate pudding mix This provides the rich, chocolatey flavor base.
- 2 cups cold milk Using cold milk helps achieve the perfect creamy texture.
- 1 container whipped topping Make sure it's thawed to fold it in smoothly.
For the Topping
- 1 package chocolate sandwich cookies Crushed to create the "dirt."
- 1 tube black decorating gel Use this for writing on cookies.
- 1 cup gummy worms These tasty little critters are a fun surprise.
- 4 cookies oval cookies Perfect for creating your edible tombstones.
Additional Decorations
- 1 cup candy pumpkins Add these for a pop of color.
- 1 cup edible grass (green sprinkles) Sprinkle some on for a bit of spooky scenery.
Instructions
Step-by-Step Instructions
- In a large mixing bowl, whisk together the instant chocolate pudding mix and cold milk for about 2 minutes until thickened.
- Gently fold in the thawed whipped topping until fully combined, creating a light and airy pudding.
- Carefully divide pudding mixture among clear plastic cups, filling each cup about three-quarters full.
- Sprinkle a layer of crushed cookie crumbs on top, creating the appearance of freshly dug dirt.
- Write 'RIP' on each oval cookie using black decorating gel or melted chocolate to craft tombstones.
- Allow the writing to set for about 5 minutes before moving on.
- Insert one cookie tombstone into the top of each pudding cup and add gummy worms.
- Place assembled cups in the refrigerator to chill for at least 30 minutes before serving.