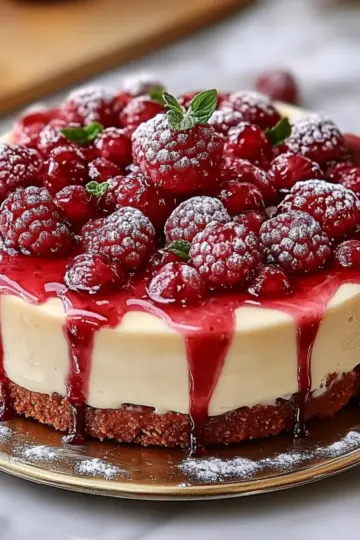
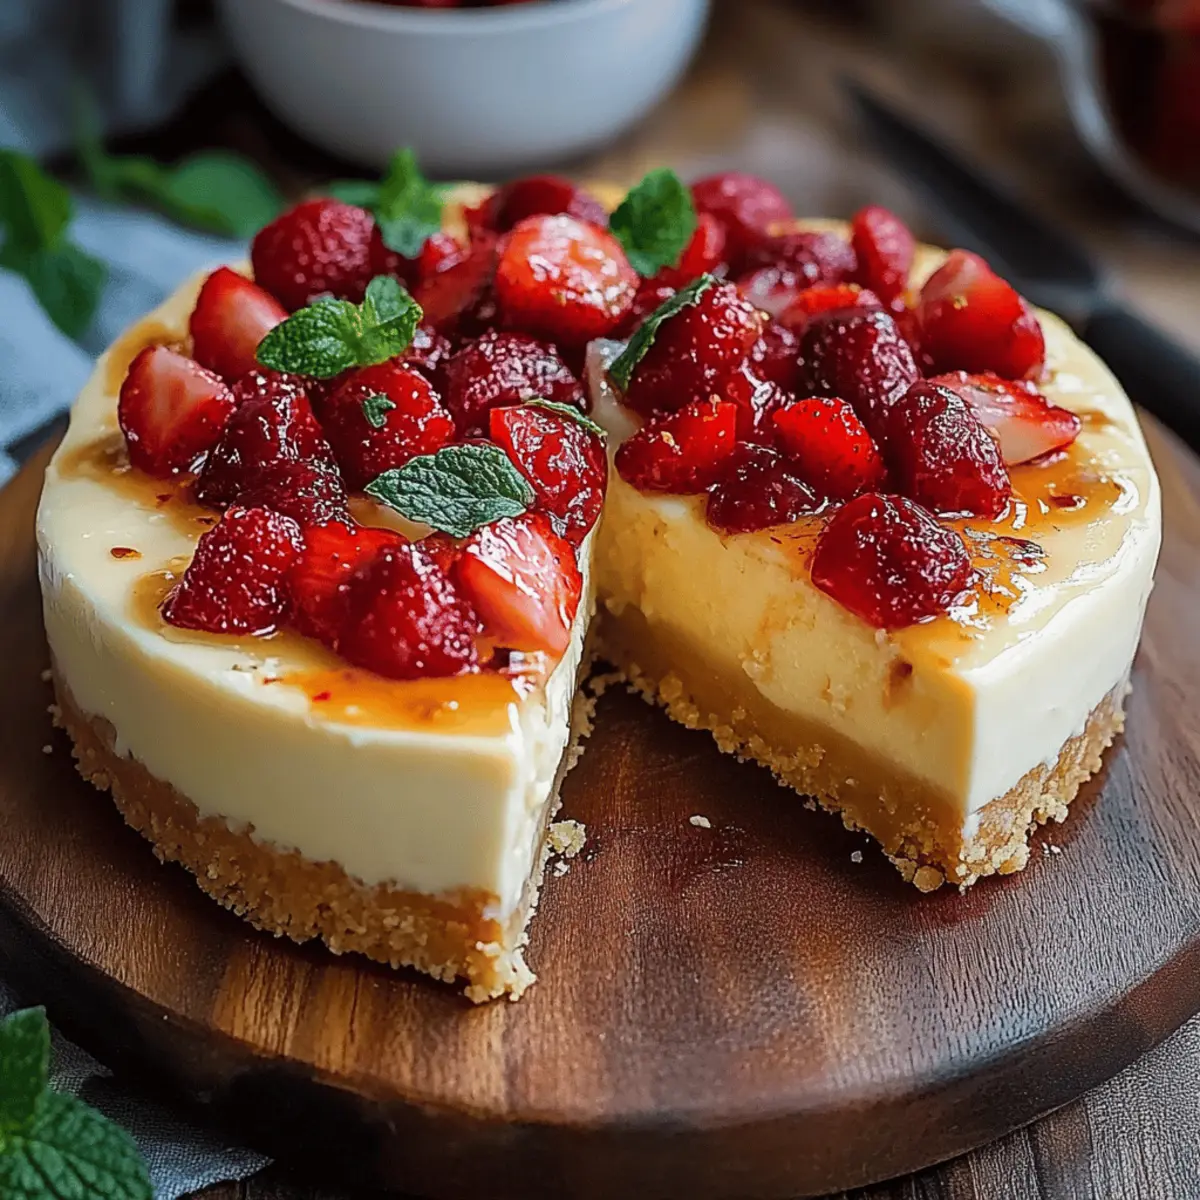
The moment I discovered how easy it is to whip up a dreamy Keto Cheesecake without even turning on the oven, I was hooked. There's something incredibly satisfying about crafting a rich, creamy dessert that not only pleases the palate but is also low in carbs. This delightful no-bake cheesecake strikes the perfect balance—smooth and luscious while being easy to prepare in just 20 minutes. Plus, it's a fantastic crowd-pleaser that won't sabotage your healthy eating goals. Whether you're hosting a dinner party or simply indulging on a cozy night in, this Keto Cheesecake offers a slice of happiness, no guilt required! Curious about how to make this happen? Let's dive into the simple steps that will elevate your dessert game.
Why is this Keto Cheesecake amazing?
No-Bake Convenience: Skip the oven with this effortless recipe, ready in just 20 minutes!
Decadent Creaminess: The combination of cream cheese and whipped cream creates a velvety texture that melts in your mouth.
Low-Carb Delight: Enjoy a guilt-free treat that aligns with your keto lifestyle, without sacrificing flavor.
Crowd-Pleasing Dessert: Perfect for gatherings, impress friends and family with a show-stopping cheesecake they'll rave about.
Versatile and Customizable: Add your favorite toppings or mix-ins to make it uniquely yours!
Keto Cheesecake Ingredients
• Dive into the world of low-carb delights with my delightful Keto Cheesecake ingredients!
For the Crust
- 2 cups almond flour – Ideal for that perfect keto-friendly base, creating a nutty flavor and texture.
- ¼ cup granulated sweetener – Choose your favorite keto sweetener for a guilt-free sweetness.
- ¼ cup unsalted butter – Adds richness and helps bind your crust together beautifully.
For the Filling
- 8 ounces cream cheese – Make sure it's softened to create a smooth and creamy texture.
- ½ cup granulated sweetener – This keeps your cheesecake delectably sweet and low in carbs.
- 1 teaspoon vanilla extract – Infuses the filling with a warm, comforting aroma.
- 1 cup heavy whipping cream – Whip this until stiff peaks form for a fluffy, dreamy filling.
Optional Toppings
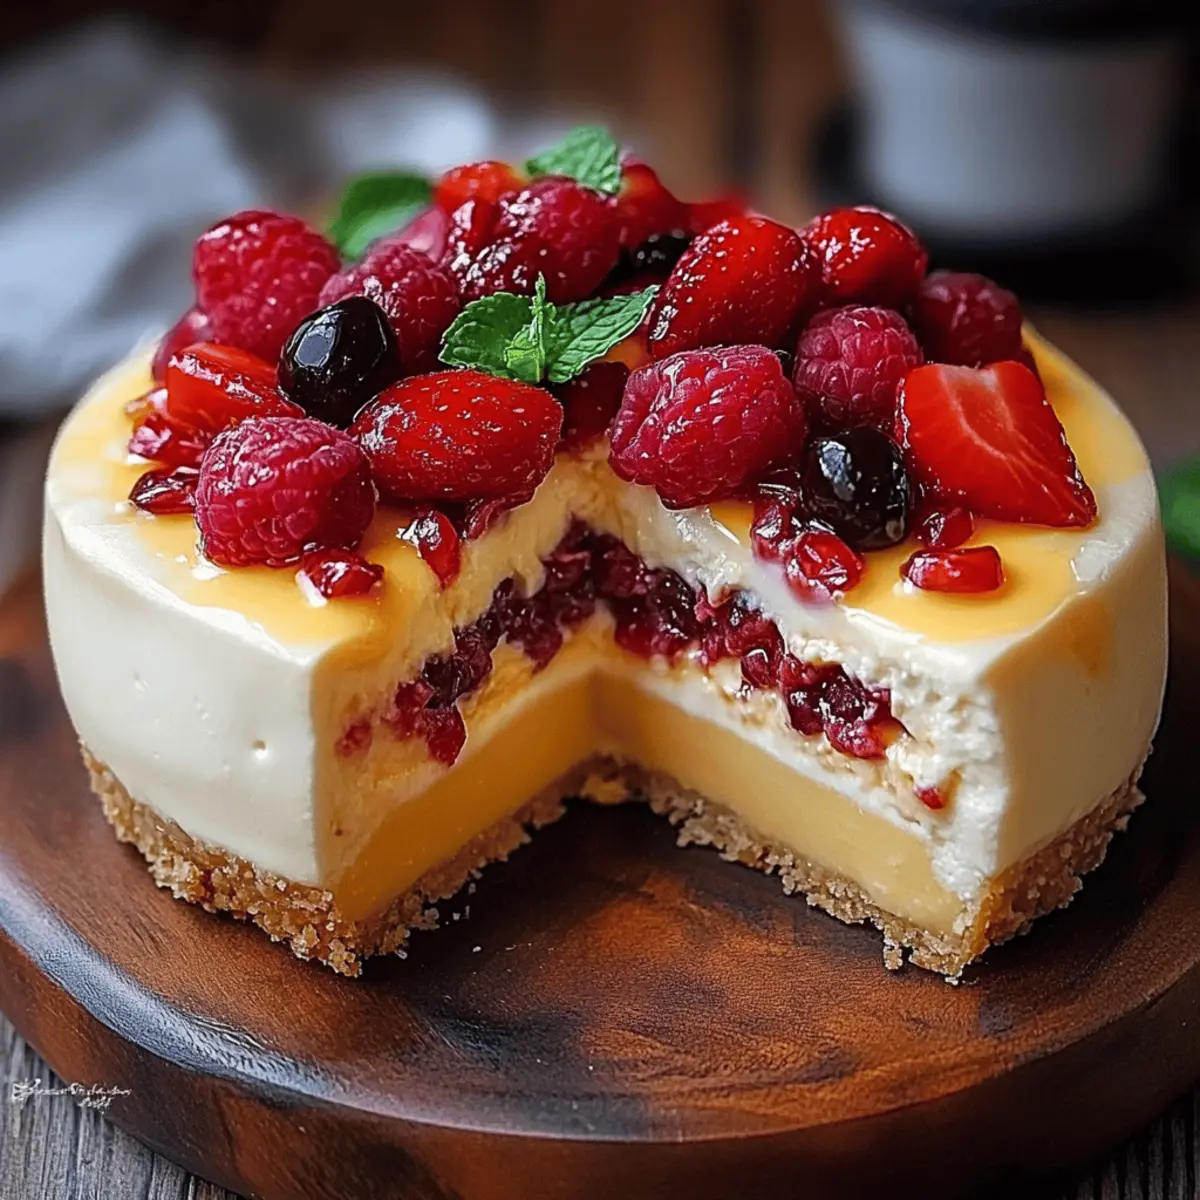
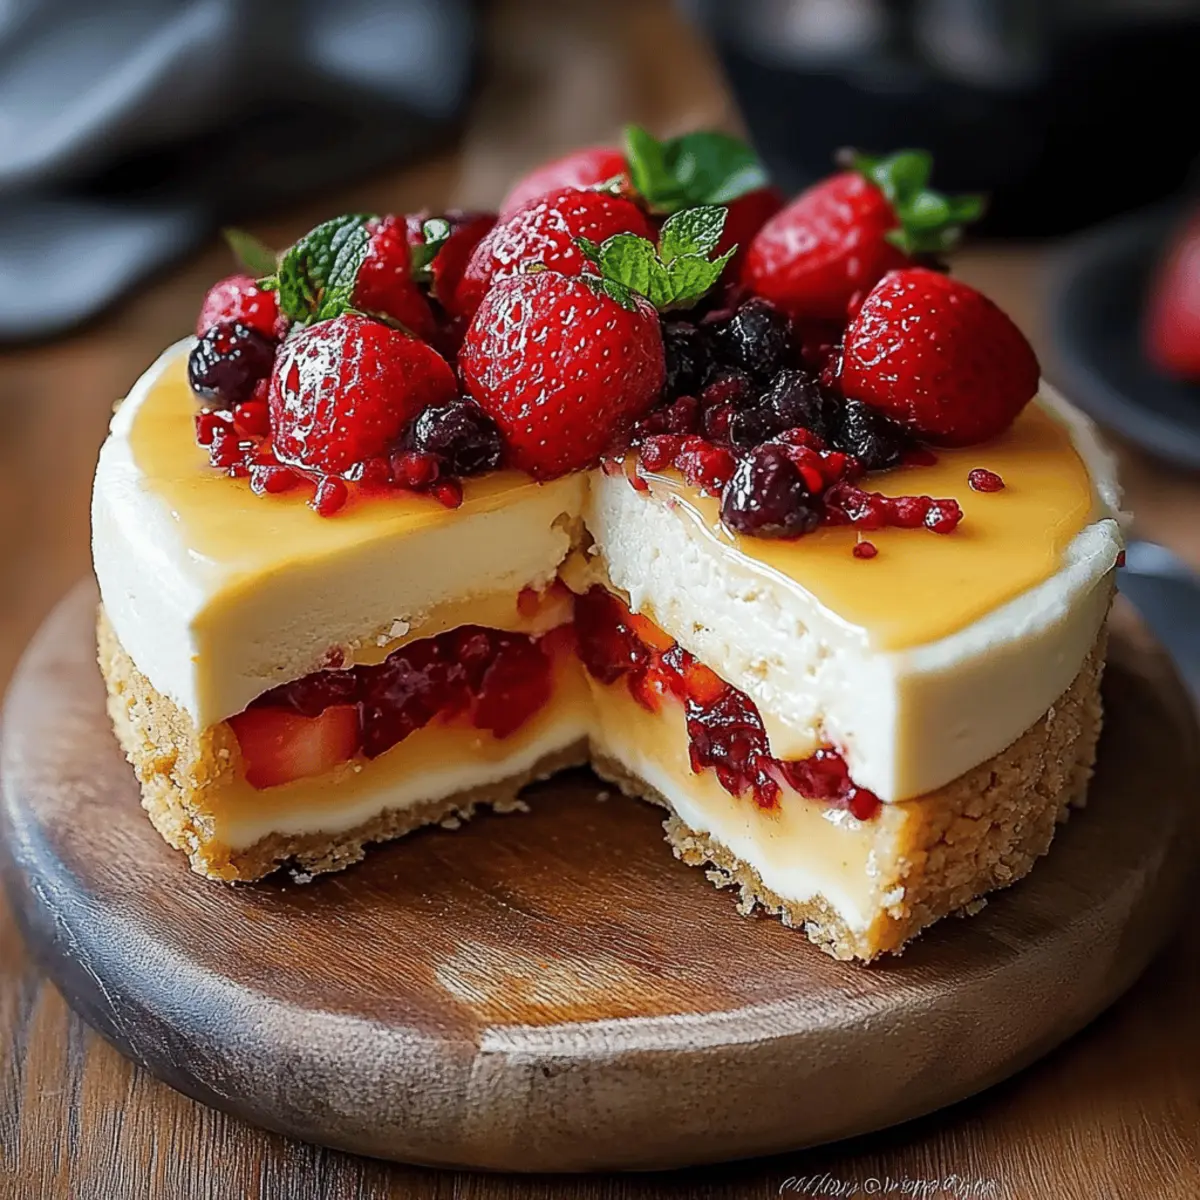
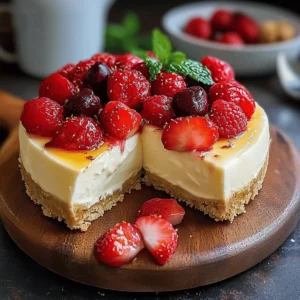
- Fresh berries – Add some juicy berries on top for a touch of natural sweetness and a pop of color.
- Sugar-free chocolate shavings – Sprinkle these on for a chocolatey finish without the carbs.
Now you're ready to create a keto masterpiece that will wow your taste buds!
Step‑by‑Step Instructions for Keto Cheesecake
Step 1: Prepare the Crust
In a medium bowl, combine 2 cups of almond flour and ¼ cup of granulated sweetener. Pour in ¼ cup of melted unsalted butter and mix until you achieve a crumbly texture. Press this mixture firmly into the bottom of a 9-inch springform pan, ensuring an even layer that takes on a golden hue. This will be the sturdy, delicious base of your Keto Cheesecake.
Step 2: Blend the Filling
In a large mixing bowl, beat 8 ounces of softened cream cheese with ½ cup of granulated sweetener using a hand mixer. Continue mixing until the mixture is smooth and creamy, about 2-3 minutes. Add 1 teaspoon of vanilla extract and blend for another minute until fully combined, creating a luscious filling that sets the stage for the heavenly Keto Cheesecake.
Step 3: Whip the Cream
In a separate cold mixing bowl, pour in 1 cup of heavy whipping cream. Whip the cream with an electric mixer on medium-high speed until stiff peaks form, which should take about 3-5 minutes. This fluffy whipped cream will add lightness to your Keto Cheesecake filling, providing that dreamy consistency we all love and crave.
Step 4: Combine the Mixtures
Carefully fold the whipped cream into the cream cheese mixture using a spatula, being gentle to maintain the airy texture. Continue folding until the two mixtures are fully incorporated, resulting in a light and velvety filling. This creamy concoction is the heart of your flavorful Keto Cheesecake, promising a delightful bite every time.
Step 5: Fill the Crust
Pour the cheesecake filling into the prepared crust, using a spatula to spread it evenly across the top. Smooth out the surface, ensuring it's level and visually appealing. This will be the final step before the cheesecake firms up beautifully, ready to be chilled into a molten indulgence of the Keto Cheesecake.
Step 6: Chill and Set
Cover the springform pan with plastic wrap and place it in the refrigerator for at least 4 hours, or until set. This step is crucial as it allows the flavors to meld and the cheesecake to firm up. You'll know it's ready when it holds its shape and has a satisfying firmness to the touch, promising a divine treat.
Step 7: Serve and Enjoy
Once thoroughly chilled, carefully release the cheesecake from the springform pan. Slice into even pieces and serve plain or topped with fresh berries or sugar-free chocolate shavings for a delightful finish. This indulgent Keto Cheesecake is now ready to wow your taste buds and make any occasion feel special!
Expert Tips for Keto Cheesecake
-
Choose the Right Sweetener: Not all sweeteners are created equal. Opt for erythritol or stevia to keep your Keto Cheesecake low-carb without sacrificing taste.
-
Soften Cream Cheese: Ensure your cream cheese is at room temperature before mixing; this prevents lumps and creates a smooth filling.
-
Whip Cream Properly: When whipping the heavy cream, be patient and stop once you see stiff peaks. Over-whipping can lead to a grainy texture.
-
Chill Thoroughly: Allow the cheesecake to set in the fridge for at least 4 hours. This helps the flavors meld beautifully and gives you a firm slice.
-
Customize Toppings: Fresh berries or sugar-free chocolate shavings can elevate your Keto Cheesecake, adding both beauty and flavor to your dish.
Make Ahead Options
These Keto Cheesecake preparations are perfect for busy weeknights! You can prepare the crust and filling up to 24 hours in advance, making it a fantastic option for meal prepping. To do this, simply follow the crust and filling steps through Step 5, then cover the filled crust tightly with plastic wrap and refrigerate. This will help the cheesecake flavors develop beautifully while ensuring it remains fresh and delicious. When you're ready to serve, just allow it to chill for an additional 4 hours if needed, then slice and garnish with your favorite toppings. You'll have an impressive dessert with minimal last-minute effort, ready to delight your guests!
How to Store and Freeze Keto Cheesecake
Fridge: Store your Keto Cheesecake in an airtight container in the fridge for up to 5 days to maintain its creamy texture and delicious flavors.
Freezer: For longer storage, wrap individual slices tightly in plastic wrap, then place them in a freezer-safe container. They can last up to 3 months in the freezer.
Thawing: To enjoy frozen slices, move them to the fridge for several hours or overnight to allow them to thaw slowly while retaining their delightful taste.
Reheating: This cheesecake is best served chilled, so avoid reheating. Instead, enjoy it cold straight from the fridge for the ultimate experience!
Keto Cheesecake Variations & Substitutions
Feel free to get creative and personalize your Keto Cheesecake to suit your taste preferences!
-
Nut-Free Crust: Replace almond flour with finely ground sunflower seeds for a nut-free version that still holds up beautifully.
For those with nut allergies, this twist keeps the crunchy base intact while being safe for everyone. -
Chocolate Lover's Delight: Stir in a few tablespoons of unsweetened cocoa powder to the filling for a rich chocolate cheesecake.
The deep flavor of chocolate elevates this dessert into a truly indulgent treat! -
Berry Infusion: Blend in a cup of pureed fresh berries like strawberries or raspberries to the cream cheese mixture for a fruity undertone.
This vibrant addition not only looks stunning but also adds a refreshing zing to each bite. -
Sugar-Free Caramel: Drizzle a homemade sugar-free caramel sauce over the top to add a decadent layer of sweetness.
This simple topping can transform your cheesecake into a true show-stopper on any dessert table. -
Coconut Twist: Use coconut cream instead of heavy whipping cream for a tropical coconut flavor with a silky texture.
A sprinkle of toasted coconut flakes on top will enhance the coconut vibe even further! -
Spiced Pumpkin: For a fall-inspired treat, add a half cup of pumpkin puree and a teaspoon of pumpkin pie spice to the filling.
Celebrate the season with this delightful, spiced variation that’s perfect for autumn gatherings. -
Cheesecake Bites: Pour the filling into mini muffin tins instead of a springform pan for bite-sized cheesecake treats.
These little delights are perfect for parties and are so easy to share with friends and family! -
Zesty Lemon: Fold in the zest of one lemon and a bit of lemon juice for a bright, tangy flavor that cuts through the sweetness.
This refreshing twist is uplifting and perfect for those who enjoy a citrus touch in their desserts.
What to Serve with No-Bake Cheesecake
Elevate your no-bake cheesecake experience with delightful pairings that promise to elevate every bite.
-
Fresh Berries: A medley of strawberries, blueberries, and raspberries adds a refreshing, juicy contrast to the creamy cheesecake. These vibrant fruits not only enhance the flavors but also bring a pop of color to your dessert table.
-
Chocolate Drizzle: A rich, sugar-free chocolate sauce drizzled over each slice offers a luxurious touch that complements the cheesecake's sweetness, making every bite decadent.
-
Whipped Cream: A dollop of lightly sweetened whipped cream on top amplifies the creamy texture, inviting you to take another blissful bite. The airy texture beautifully balances the denser cheesecake beneath it.
-
Nutty Brittle: Crushed almond or pecan brittle sprinkled on top brings a crunchy texture that contrasts wonderfully with the cake’s creamy interior. The added nuttiness enhances the overall flavor profile.
-
Coffee: A warm cup of freshly brewed coffee pairs effortlessly with the cheesecake's sweetness, offering a delightful balance that wakes up the palate. The rich, aromatic flavors create a comforting end to your meal.
-
Ice Cream: For a heartier dessert, serve a scoop of low-carb vanilla ice cream alongside your cheesecake. The silky ice cream adds a cool contrast and a delightful creaminess that takes dessert to the next level.
-
Mint Leaves: Fresh mint leaves sprinkled on top not only look stunning but also introduce a refreshing herbal note that invigorates your taste buds, rejuvenating your dessert experience.
-
Sugar-Free Lemon Curd: A tangy lemon curd adds a zesty brightness that cuts through the richness of the cheesecake, creating an unexpected yet delightful taste adventure.
-
Sparkling Water: Crisp, flavored sparkling water serves as a refreshing beverage option that complements the dessert without overwhelming it. It's an elegant way to cleanse the palate while enjoying your cheesecake.
Keto Cheesecake Recipe FAQs
What type of almond flour should I use?
You should opt for finely ground almond flour for the best results. It ensures a smooth and consistent crust that binds well without being too coarse or grainy, providing a delightful texture for your Keto Cheesecake.
How should I store my Keto Cheesecake?
Absolutely! Store your Keto Cheesecake in an airtight container in the fridge for up to 5 days to keep it fresh and creamy. Be sure to tightly cover it to prevent any odors from affecting the flavor. If you want to keep it longer, wrap individual slices in plastic wrap and store them in a freezer-safe container.
Can I freeze my Keto Cheesecake?
Very much so! To freeze your cheesecake, wrap each slice tightly in plastic wrap and place them in a freezer-safe container. This way, you preserve the texture and taste. Your Keto Cheesecake can be stored in the freezer for up to 3 months without losing its deliciousness.
What should I do if my cheesecake is too soft?
If your cheesecake is too soft, it's likely didn’t set for long enough in the fridge. Ensure you chill your cheesecake for at least 4 hours, or overnight if you can, to allow it to firm up. If you’re following these steps and it’s still soft, try adding more whipping cream next time, whipping it a bit longer for stiffer peaks before folding it into the cream cheese mixture.
Is this recipe safe for pets or those with dairy allergies?
Unfortunately, this Keto Cheesecake is not safe for pets, especially for dogs, due to the cream cheese and heavy cream. If you have a dairy allergy, consider substituting with plant-based cream cheese alternatives and coconut cream for whipping. These adjustments can help you create a dairy-free version while still enjoying a delicious treat.
What can I use instead of sugar?
If you're looking for sugar alternatives, I recommend using erythritol or stevia as they are keto-friendly. Erythritol is particularly favored for its minimal aftertaste, keeping your Keto Cheesecake sweet without the carbs. Just be mindful of the measurement, as some sweeteners can be more potent than sugar.
Indulgent Keto Cheesecake That'll Wow Your Taste Buds
Equipment
- 9-inch springform pan
- mixing bowls
- electric mixer
- spatula
Ingredients
For the Crust
- 2 cups almond flour Ideal for that perfect keto-friendly base, creating a nutty flavor and texture.
- ¼ cup granulated sweetener Choose your favorite keto sweetener for a guilt-free sweetness.
- ¼ cup unsalted butter Adds richness and helps bind your crust together beautifully.
For the Filling
- 8 ounces cream cheese Make sure it's softened to create a smooth and creamy texture.
- ½ cup granulated sweetener This keeps your cheesecake delectably sweet and low in carbs.
- 1 teaspoon vanilla extract Infuses the filling with a warm, comforting aroma.
- 1 cup heavy whipping cream Whip this until stiff peaks form for a fluffy, dreamy filling.
Optional Toppings
- Fresh berries Add some juicy berries on top for a touch of natural sweetness and a pop of color.
- Sugar-free chocolate shavings Sprinkle these on for a chocolatey finish without the carbs.
Instructions
Step-by-Step Instructions for Keto Cheesecake
- In a medium bowl, combine 2 cups of almond flour and ¼ cup of granulated sweetener. Pour in ¼ cup of melted unsalted butter and mix until you achieve a crumbly texture. Press this mixture firmly into the bottom of a 9-inch springform pan.
- In a large mixing bowl, beat 8 ounces of softened cream cheese with ½ cup of granulated sweetener using a hand mixer until smooth and creamy, about 2-3 minutes. Add 1 teaspoon of vanilla extract and blend for another minute until fully combined.
- In a separate cold mixing bowl, whip 1 cup of heavy whipping cream on medium-high speed until stiff peaks form, about 3-5 minutes.
- Carefully fold the whipped cream into the cream cheese mixture using a spatula, until fully incorporated.
- Pour the cheesecake filling into the prepared crust and smooth out the top.
- Cover the springform pan with plastic wrap and place it in the refrigerator for at least 4 hours, or until set.
- Once thoroughly chilled, carefully release the cheesecake from the springform pan. Slice into even pieces and serve plain or topped with fresh berries or sugar-free chocolate shavings.