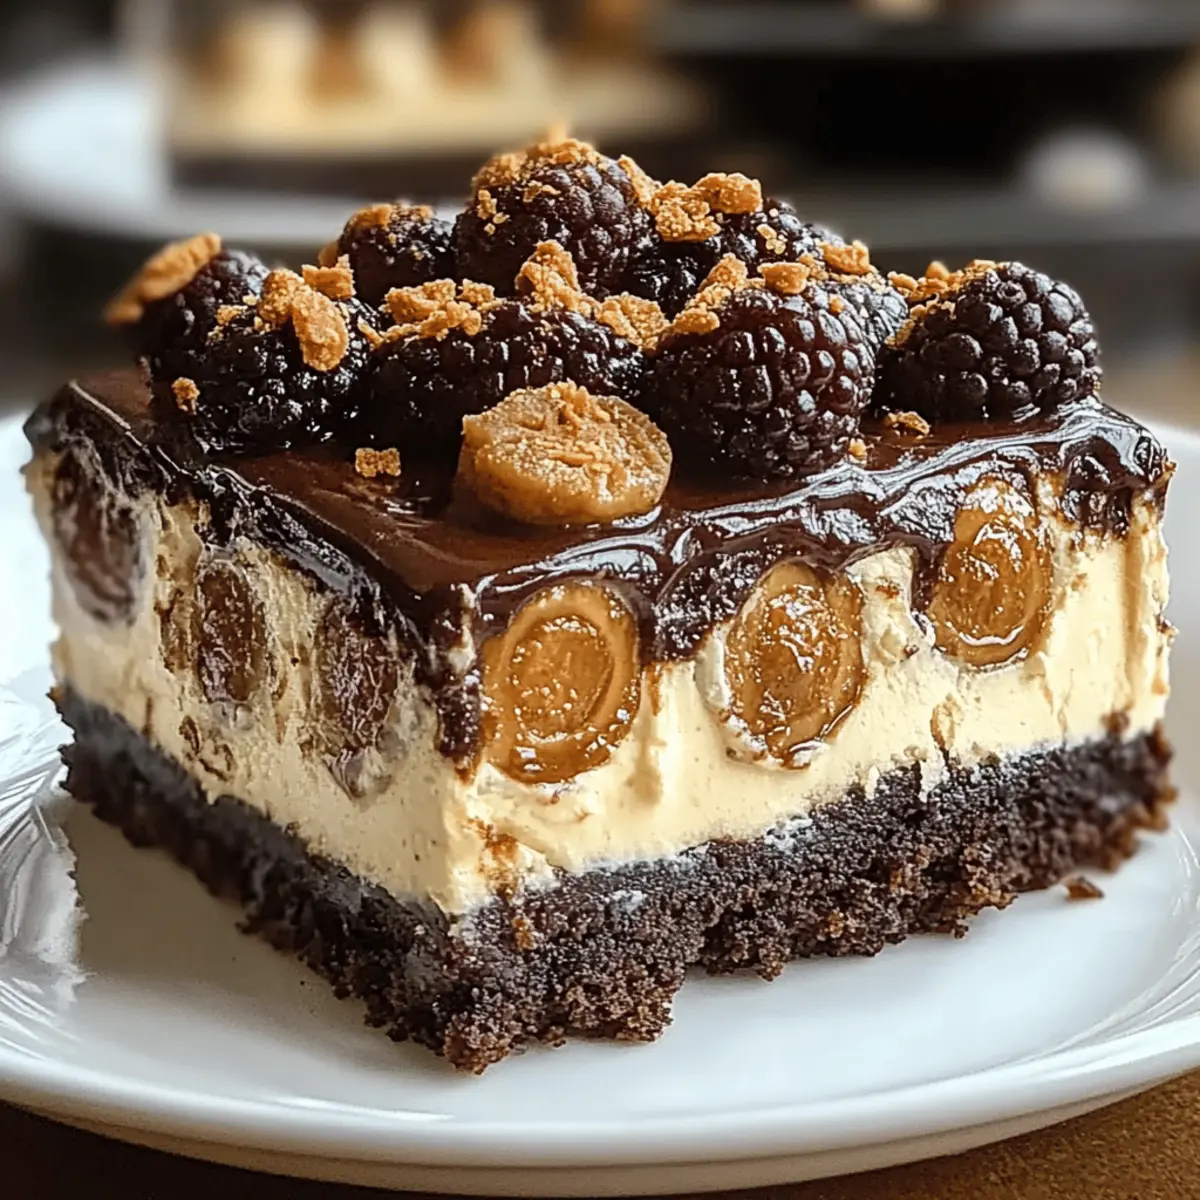
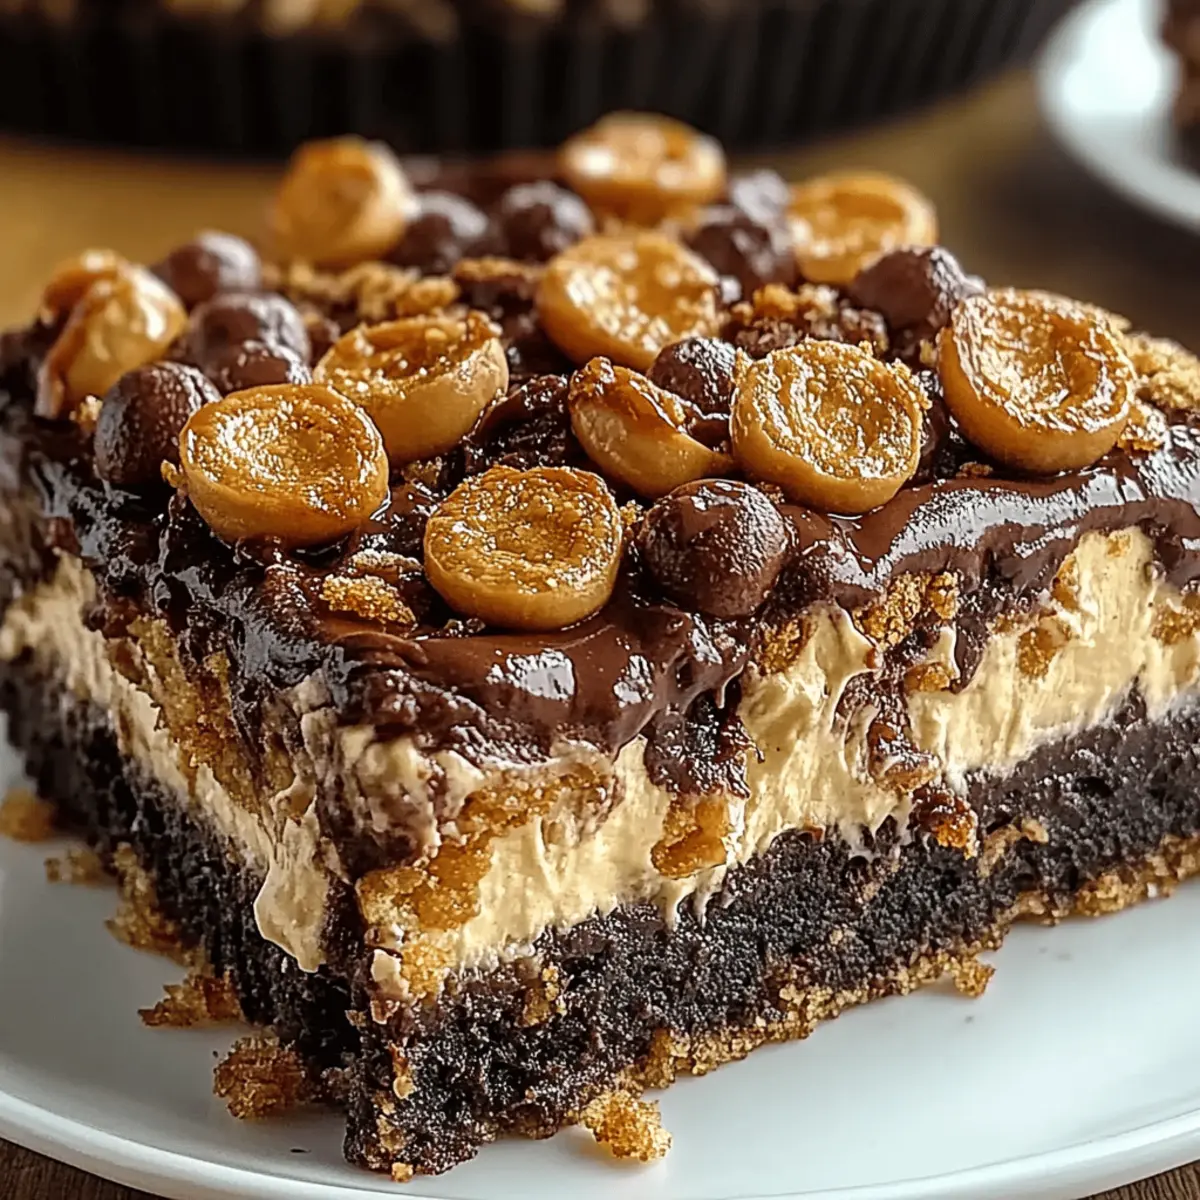
As I watched the clouds roll across the sky one afternoon, I couldn't help but feel a craving for something sweet that mirrored the unpredictability of the weather. That's when I decided to whip up my Reese’s Peanut Butter Earthquake Cake, a delightful treat that combines rich chocolate cake with a creamy peanut butter surprise. This recipe is not just an indulgence; it’s incredibly quick to prepare, making it perfect for busy days when a dessert is non-negotiable. Plus, its deliciously gooey texture (thanks to that marbled peanut butter layer) has a magical way of turning any gathering into a celebration. So, are you ready to get your hands dirty and create something truly unforgettable? Let’s dive into this delicious adventure together!
What makes this cake a crowd-pleaser?
Irresistible Combination: The blend of chocolate and creamy peanut butter creates a flavor combo that’s hard to resist!
Visually Stunning: The marbled effect gives it an eye-catching appeal, making it a showstopper at parties.
Quick & Easy: With just 15 minutes of prep, you’ll have a delightful dessert ready for any occasion.
Versatile Treat: Perfect for birthdays, potlucks, or a sweet finish to your weeknight dinner—everyone will adore it!
Gooey Goodness: The melt-in-your-mouth texture ensures that no one can stop at just one slice!
Don’t miss out on whipping up this Reese’s Peanut Butter Earthquake Cake; it’s bound to become a favorite!
Reese’s Peanut Butter Earthquake Cake Ingredients
For the Cake
• Chocolate cake mix – the base of this cake gives it a rich chocolate flavor that's simply irresistible.
• Water – helps to hydrate the cake mix for a moist texture.
• Vegetable oil – adds moisture and keeps the cake tender.
• Large eggs – act as a binding agent, helping the cake rise beautifully.
For the Peanut Butter Layer
• Creamy peanut butter – provides that delicious, nutty flavor and creamy consistency everyone loves.
• Softened cream cheese – adds richness and makes the peanut butter mixture smooth and luxurious.
• Melted butter – enhances flavor and helps achieve a silky texture in the mixture.
• Powdered sugar – sweetens the peanut butter layer and gives it that perfect creamy finish.
• Vanilla extract – boosts the overall flavor, making every bite memorable.
For the Topping
• Chopped Reese’s Peanut Butter Cups – sprinkles of these delicious candies on top make the cake even more decadent!
This Reese’s Peanut Butter Earthquake Cake is not only straightforward to make but loaded with flavor that will have everyone reaching for seconds.
Step‑by‑Step Instructions for Reese’s Peanut Butter Earthquake Cake
Step 1: Preheat and Prepare the Baking Dish
Begin by preheating your oven to 350°F (175°C). Meanwhile, take a 9×13-inch baking dish and grease it generously with butter or cooking spray. This step is crucial as it ensures that your Reese’s Peanut Butter Earthquake Cake will come out perfectly. You’ll want a nice, non-stick surface for easy removal later.
Step 2: Mix the Cake Batter
In a large mixing bowl, combine the chocolate cake mix, 1 cup of water, ½ cup of vegetable oil, and 3 large eggs. Use a whisk to mix these ingredients until the batter is smooth and velvety, ensuring there are no lumps. This should take about 2-3 minutes. The glossy texture of your batter means you're on the right track!
Step 3: Pour and Spread the Batter
Carefully pour the prepared cake batter into the greased baking dish, making sure to spread it out evenly using a spatula. This step ensures that your Reese’s Peanut Butter Earthquake Cake bakes uniformly. Take a moment to enjoy the rich chocolate aroma that fills your kitchen as you prep for the next steps!
Step 4: Prepare the Peanut Butter Mixture
In another mixing bowl, blend together 1 cup of creamy peanut butter, 8 oz of softened cream cheese, ½ cup of melted butter, 4 cups of powdered sugar, and 1 teaspoon of vanilla extract. Whip this mixture until it's smooth and creamy—this will take about 3-4 minutes. The luxurious texture promises a delightful surprise in every bite of your cake.
Step 5: Create the Marbled Effect
Using a spoon, drop dollops of the creamy peanut butter mixture over the chocolate cake batter. With a knife, gently swirl through the two batters to create a lovely marbled effect. This beautiful pattern adds visual interest and guarantees flavorful bites throughout your Reese’s Peanut Butter Earthquake Cake!
Step 6: Add the Toppings
Sprinkle 1 cup of chopped Reese’s Peanut Butter Cups evenly over the top of the cake batter. Make sure to distribute them well, so every slice of your cake is packed with chocolatey goodness. As the cake bakes, these delightful pieces will melt slightly, enhancing the overall taste and texture.
Step 7: Bake the Cake
Place the baking dish in the preheated oven and bake for 35 to 40 minutes. Check for doneness by inserting a toothpick into the center—if it comes out mostly clean, your cake is ready! The top should have a slight crackle and a rich chocolate hue, inviting you to enjoy the warm flavors.
Step 8: Cool and Serve
Once baked, remove the Reese’s Peanut Butter Earthquake Cake from the oven and let it cool slightly in the pan. This will take about 10-15 minutes. This cooling time allows the flavors to meld beautifully before you cut into it. Slice and serve warm, letting the gooey layers of chocolate and peanut butter shine through!

Make Ahead Options
These Reese’s Peanut Butter Earthquake Cake is perfect for meal prep enthusiasts seeking sweetness amidst their busy schedules! You can prepare the chocolate cake batter and the peanut butter mixture up to 24 hours in advance. Simply mix each component as directed, then cover them tightly with plastic wrap and refrigerate. When you're ready to bake, pour the cake batter into your greased pan, swirl in the chilled peanut butter mixture, sprinkle with the chopped Reese’s Peanut Butter Cups, and bake as instructed. This way, you get to enjoy a delectable dessert with minimal effort while maintaining all the rich flavors and gooey textures that make this cake a showstopper!
How to Store and Freeze Reese’s Peanut Butter Earthquake Cake
Fridge: Store leftover cake in an airtight container for up to 3 days to keep it moist and delicious. Make sure to seal it well to prevent any drying out!
Freezer: Wrap slices individually in plastic wrap, then place them in a freezer-safe bag for up to 2 months. Defrost in the fridge overnight before enjoying again.
Reheating: For a warm slice, microwave for 10-15 seconds or until just heated through. This brings back that gooey goodness from the peanut butter layer, making your Reese’s Peanut Butter Earthquake Cake irresistible!
Room Temperature: If serving the cake the same day, it can sit out for up to 2 hours. Just be sure to cover it to keep those enticing flavors intact!
Variations & Substitutions for Reese’s Peanut Butter Earthquake Cake
Feel free to put your own spin on this delightful cake, as there are numerous ways to make it uniquely yours!
-
Gluten-Free: Substitute the chocolate cake mix with a gluten-free variety to accommodate those with gluten sensitivities.
-
Nut Butter Twist: Replace creamy peanut butter with almond or cashew butter for a different nutty profile. Each nut butter brings a unique flavor, offering a delightful surprise with every bite!
-
Lower Sugar: Use a sugar substitute in the peanut butter mixture to lessen the sweetness while maintaining that creamy texture. This way, you can indulge without the guilt!
-
Extra Chocolate: Add chocolate chips to the cake batter for an ultra-rich chocolate experience. The extra melted chocolate will create a cozy, chocolatey haven that friends and family will adore.
-
Add Heat: Toss in a pinch of cayenne pepper or cinnamon to the cake batter for a hint of warmth. This secret twist will surprise your taste buds while enhancing the overall flavor profile!
-
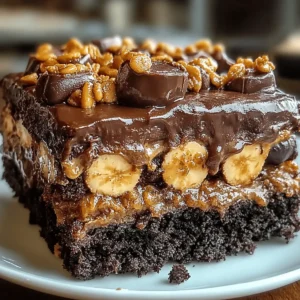
Fruit Fusion: Top the cake with sliced bananas or crushed strawberries for a fresh, fruity burst. The pairing creates a lovely contrast with the chocolate and peanut butter, making each slice feel like a dream.
-
Cream Cheese Frosting: Instead of the peanut butter layer, use a cream cheese frosting on top for a bright and tangy finish. This adds a new dimension of flavor that’s simply irresistible!
-
Sundae Style: Serve warm slices topped with a scoop of vanilla ice cream and a drizzle of chocolate syrup. This irresistible combo will transport you straight to dessert heaven!
Now that you have these fun variations and substitutions, don’t hesitate to play around with flavors and textures until you find your perfect version of the Reese’s Peanut Butter Earthquake Cake!
Helpful Tricks for Reese’s Peanut Butter Earthquake Cake
Perfect Swirls: Ensure your peanut butter mixture is creamy enough to easily swirl into the batter; this creates that desirable marbled effect.
Watch the Bake Time: Keep an eye on your cake towards the end of baking. Overbaking can lead to dryness, which would mask the gooey goodness of your Reese’s Peanut Butter Earthquake Cake.
Use Room Temperature Ingredients: For a smoother peanut butter mixture, make sure the cream cheese and butter are at room temperature before mixing.
Cooling Matters: Allow the cake to cool slightly before serving. This lets the flavors settle and the texture firm up, ensuring each slice is a delight!
Proper Storage: If you have leftovers, store the cake covered in the fridge. This will help maintain the moistness and delicious texture for your next indulgent treat.
What to Serve with Reese’s Peanut Butter Earthquake Cake
Indulging in a slice of this rich, gooey cake is just the beginning of a delightful meal experience.
- Velvety Ice Cream: The creamy texture of vanilla or chocolate ice cream complements the cake’s rich flavors perfectly, creating a blissful contrast.
- Fresh Berries: Juicy strawberries or raspberries add a vibrant, tart contrast, enhancing the sweetness of the cake and adding a refreshing element.
- Whipped Cream: A dollop of airy whipped cream brings a lightness that balances the cake's heaviness, making every bite even more enjoyable.
- Chocolate Sauce: Drizzling warm chocolate sauce over the cake intensifies the chocolate flavors and adds a spectacular touch for true chocolate lovers.
- Coffee or Espresso: A rich cup of coffee enhances the dessert experience. The slightly bitter notes of coffee cut through the sweetness, making it endlessly satisfying.
- Milkshake: A thick, chocolate peanut butter milkshake would elevate the dessert moment to a whole new level of yumminess and nostalgia.
- Nutty Caramel Sauce: A drizzle of caramel sauce infused with a hint of nuts can add an exciting twist, balancing sweet and savory elements beautifully.
- Cheesecake Dippers: For a fun twist, serve slices of cheesecake as dippers alongside the cake—a sweet combination that any dessert lover will crave.
Pairing these delightful accompaniments with your Reese’s Peanut Butter Earthquake Cake will create a full meal experience that everyone will savor.
Reese’s Peanut Butter Earthquake Cake Recipe FAQs
What type of chocolate cake mix should I use?
Absolutely! I recommend using a standard chocolate cake mix for the best results. Choose one that’s marked “moist” on the box for an extra tender cake, or opt for a box labeled “devil’s food” for an even richer chocolate flavor.
How do I store leftovers of the cake?
You can store leftover Reese’s Peanut Butter Earthquake Cake in an airtight container in the fridge for up to 3 days. Make sure it’s completely cooled before sealing it. This helps keep it moist and prevents any drying out, ensuring each slice remains delightful.
Can I freeze the cake, and if so, how?
Yes, you can freeze your Reese’s Peanut Butter Earthquake Cake! First, wrap individual slices in plastic wrap, then place them in a freezer-safe bag or container. This will allow you to enjoy a slice whenever the craving strikes! It should stay good for up to 2 months. When you're ready to indulge, simply thaw in the fridge overnight. For a warm treat, microwave a slice for 10-15 seconds.
What should I do if my cake is dry after baking?
If your cake turns out dry, it’s often due to overbaking. Keep an eye on it as it nears the end of the baking time. A toothpick test is key; take it out when it comes out mostly clean. If you do end up with a dry cake, you can serve it with a scoop of ice cream or drizzle some warm chocolate sauce over the slices to enhance moisture!
Is this cake suitable for those with nut allergies?
Unfortunately, this Reese’s Peanut Butter Earthquake Cake contains peanut butter and Reese’s Peanut Butter Cups, so it’s not safe for those with peanut allergies. If you're looking for nut-free alternatives, consider using sunflower seed butter in place of peanut butter, and make sure to choose safe candies for the topping. Always check labels to avoid any cross-contamination.
How can I tell if the peanut butter mixture is the right consistency?
When mixing the peanut butter layer, you've nailed it if it’s smooth, creamy, and easily spreadable. Aim for a consistency similar to frosting—thick but not clumpy. If it feels too thick, you can add a dash of milk to help it blend better. This will ensure a lovely marbled effect in your cake!
Indulge in Reese’s Peanut Butter Earthquake Cake Bliss
Equipment
- 9×13-inch baking dish
- mixing bowl
- whisk
- spatula
- knife
Ingredients
For the Cake
- 1 box chocolate cake mix
- 1 cup water
- ½ cup vegetable oil
- 3 large eggs
For the Peanut Butter Layer
- 1 cup creamy peanut butter
- 8 oz softened cream cheese
- ½ cup melted butter
- 4 cups powdered sugar
- 1 teaspoon vanilla extract
For the Topping
- 1 cup chopped Reese’s Peanut Butter Cups
Instructions
Step‑by‑Step Instructions
- Preheat your oven to 350°F (175°C) and grease a 9×13-inch baking dish.
- In a large mixing bowl, combine the chocolate cake mix, 1 cup of water, ½ cup of vegetable oil, and 3 large eggs. Whisk until smooth.
- Pour the cake batter into the greased baking dish, spreading it out evenly.
- In another bowl, blend together 1 cup of creamy peanut butter, 8 oz of softened cream cheese, ½ cup of melted butter, 4 cups of powdered sugar, and 1 teaspoon of vanilla extract until smooth.
- Drop dollops of the peanut butter mixture over the cake batter and swirl gently with a knife.
- Sprinkle 1 cup of chopped Reese’s Peanut Butter Cups over the top.
- Bake for 35 to 40 minutes, checking for doneness with a toothpick.
- Let the cake cool in the pan for 10-15 minutes before serving warm.