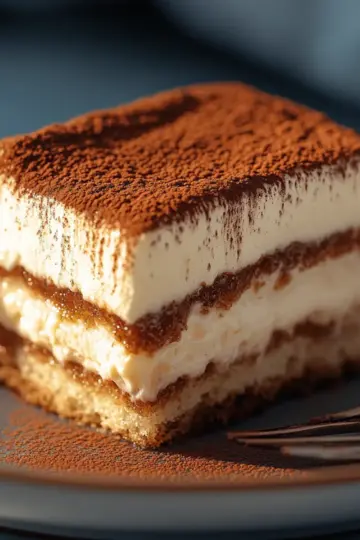
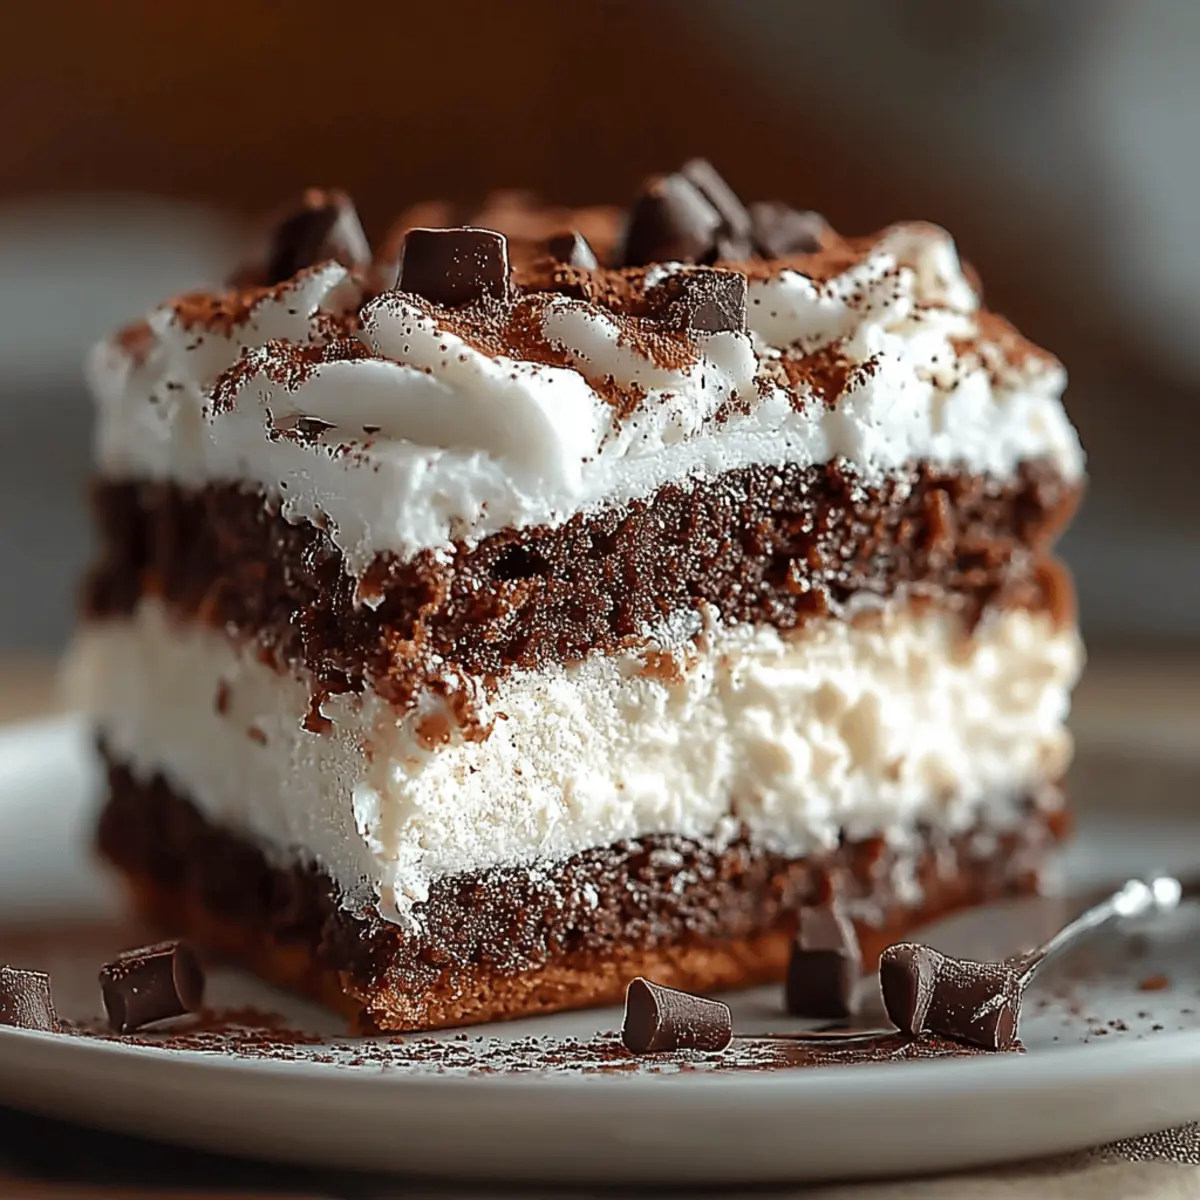
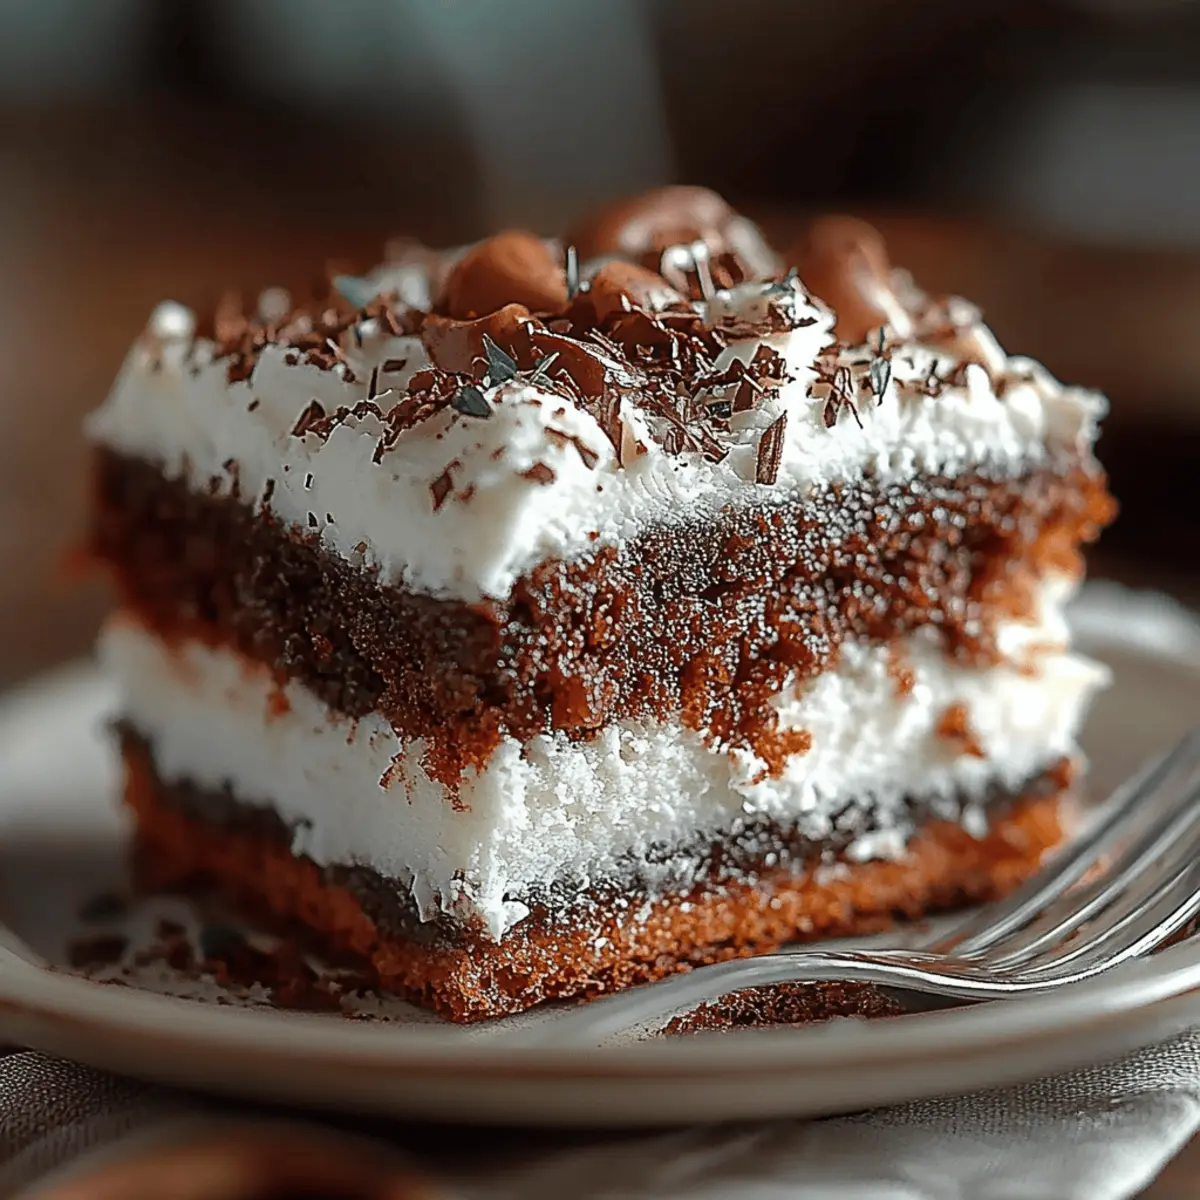
There’s something truly magical about dessert that requires zero baking yet delivers a symphony of flavors and textures. My Brownie Refrigerator Cake effortlessly brings together the rich decadence of brownies, smooth cream cheese, and fluffy whipped topping—making it the perfect treat for any gathering. This no-bake delight is not just a time-saver; it's also a guaranteed crowd-pleaser that keeps beautifully in the fridge. With a creamy chocolate pudding layer and the option to sprinkle in some nuts for extra crunch, it’s a dessert that can adapt to suit any palate. Whether for a picnic, dinner party, or simply an indulgent night in, you'll want this recipe in your back pocket. So, are you ready to create a dessert that will have your loved ones begging for seconds?
Why Is This Brownie Refrigerator Cake Special?
Effortless Creation: This recipe is a breeze to make, requiring no baking at all, allowing you to whip it up in just 20 minutes!
Rich, Lush Layers: Experience the satisfyingly creamy blend of cream cheese and chocolate pudding, creating a luxurious dessert that spoils your taste buds.
Versatile Indulgence: Customize it with your favorite nuts or toppings like chocolate shavings—perfect for any occasion!
Crowd-Pleasing Delight: Serve it chilled at parties, potlucks, or cozy family dinners, and watch it disappear in minutes.
Make-Ahead Magic: This cake only improves overnight in the fridge, making it ideal for stress-free entertaining!
Brownie Refrigerator Cake Ingredients
• Get ready for a no-bake treat that will win your heart!
For the Brownie Base
• Baked brownies – You can use homemade or store-bought brownies; just ensure they’re cooled completely for the best layering.
For the Cream Cheese Mixture
• Cream cheese – Soften it beforehand to achieve that smooth, creamy texture essential for this delightful layer.
• Sweetened condensed milk – This adds sweetness and a luscious creaminess that perfectly balances the chocolate.
• Vanilla extract – A teaspoon enhances all the flavors, making the dessert even more divine.
• Frozen whipped topping – Divided into two portions, this gives the dish a light, airy finish as you fold it in.
For the Chocolate Layer
• Instant chocolate pudding mix – The star of the show that brings rich, chocolaty goodness; make sure to pick a quality brand!
• Cold milk – Essential for reconstituting the pudding mix to achieve that thick and creamy consistency.
Optional Additions
• Chopped pecans or walnuts – For a delightful crunch, mix in these nuts or sprinkle them on top.
• Chocolate shavings or sprinkles – These can be used as garnish for a stunning presentation that makes the dessert even more tempting.
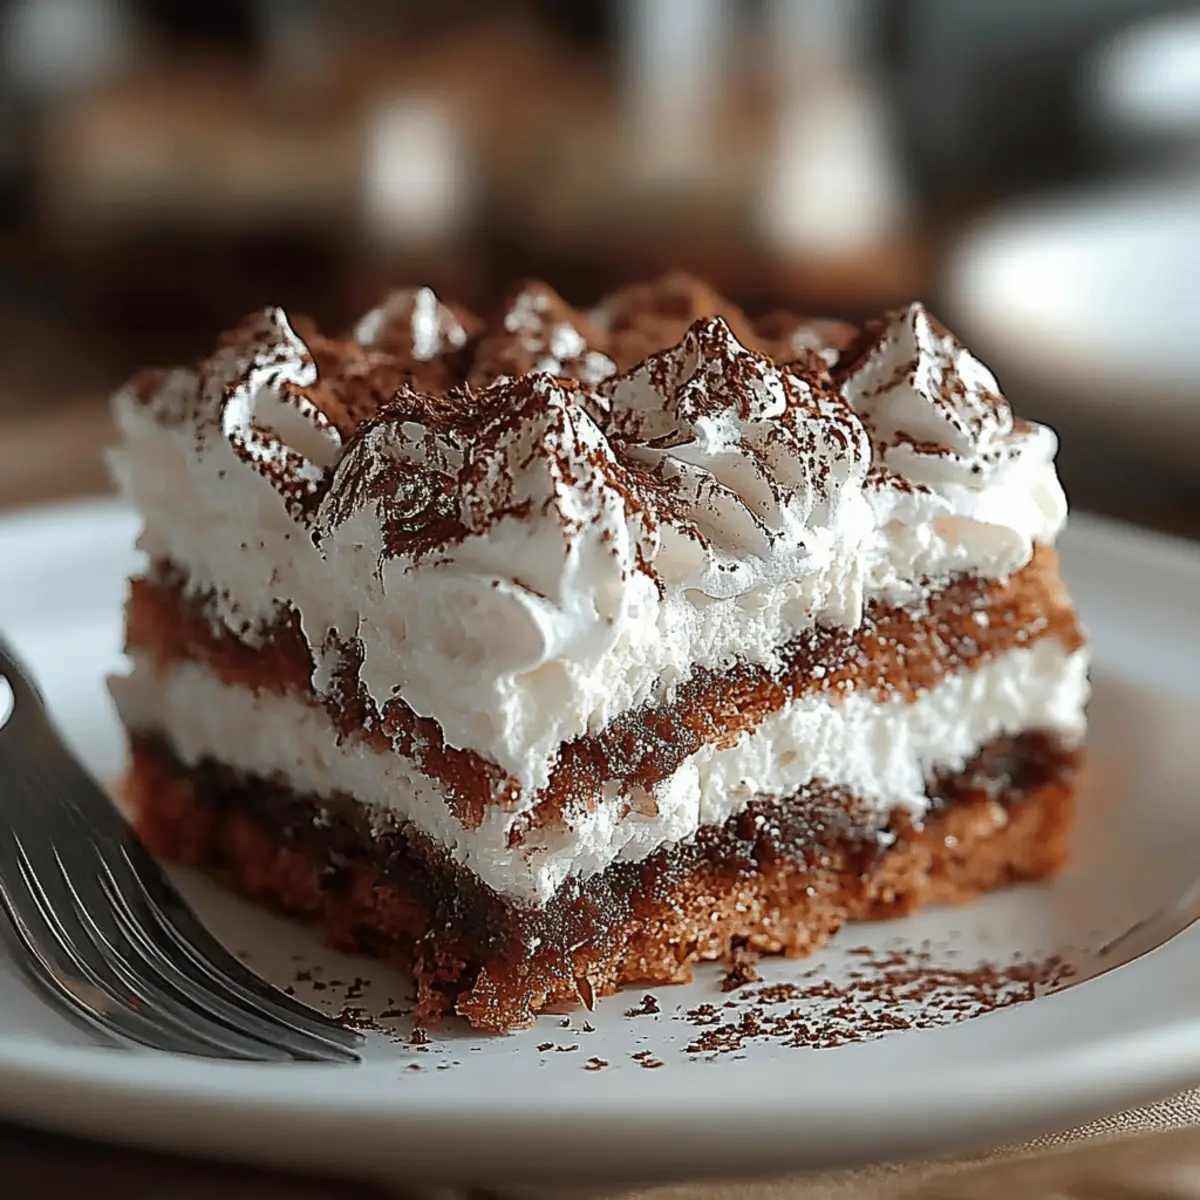
This Brownie Refrigerator Cake is not only visually appealing but is a delicious way to indulge in layers of flavors!
Step‑by‑Step Instructions for Brownie Refrigerator Cake
Step 1: Soften the Cream Cheese
Begin by taking your 8-ounce package of cream cheese out of the refrigerator and allowing it to soften at room temperature for about 30 minutes. This step is crucial as it ensures that the cream cheese will blend smoothly into the mixture, creating a creamy texture for your Brownie Refrigerator Cake.
Step 2: Combine the Cream Cheese and Sweetened Condensed Milk
In a large mixing bowl, combine the softened cream cheese and the entire can of sweetened condensed milk. Using an electric mixer, beat the mixture on medium speed for 2-3 minutes, or until it becomes smooth and creamy. The blending should create a luscious base that adds richness to the layers of your cake.
Step 3: Add the Vanilla Extract
After achieving a silky texture, add 1 teaspoon of vanilla extract to the cream cheese and sweetened condensed milk mixture. Blend it together for another 30 seconds, allowing the vanilla to enhance the flavors. The creaminess should now have a delightful aroma, setting a wonderful foundation for your dessert.
Step 4: Fold in the Whipped Topping
Gently fold in half of the thawed whipped topping (approximately 6 ounces) into the mixture using a spatula. Make sure to combine it until no streaks remain, but be careful not to overmix; you want to maintain that light and fluffy texture to perfectly balance the density of the brownie layers in your Brownie Refrigerator Cake.
Step 5: Prepare the Chocolate Pudding
In a separate medium bowl, whisk together the instant chocolate pudding mix and 1.5 cups of cold milk. Whisk vigorously for about 2 minutes, or until the mixture thickens to a pudding consistency. This will create a rich layer that complements the creaminess of the previous mixture, adding to the delight of the cake.
Step 6: Prepare the Brownie Base
If necessary, crumble your cooled brownies into smaller pieces. In a 9x13 inch dish, spread the brownie crumbles evenly across the bottom, creating a solid foundation for your cake. Ensure the brownie layer covers the bottom entirely, as this will provide a delicious base for the ensuing creamy layers.
Step 7: Layer the Cream Cheese Mixture
Carefully spread the cream cheese mixture evenly over the brownie layer. Use a spatula to ensure a smooth and even application, making sure it completely covers the brownies. This ensures that each bite of your Brownie Refrigerator Cake has both brownie and creamy goodness.
Step 8: Add the Chocolate Pudding Layer
Now, gently spread the chocolate pudding mixture over the cream cheese layer, being mindful to cover it completely. Use a spatula to achieve a smooth layer, which will create a beautiful contrast between the rich chocolate pudding and the light cream cheese in your Brownie Refrigerator Cake.
Step 9: Finish with the Remaining Whipped Topping
Spread the remaining 6 ounces of whipped topping evenly over the chocolate pudding layer. This final layer gives your dessert a lovely, airy finish. Aim for a smooth top, as this is the last layer before chilling, ensuring your Brownie Refrigerator Cake will have a flawless presentation.
Step 10: Add Optional Toppings
If desired, sprinkle chopped pecans or walnuts evenly over the whipped topping layer. For an extra touch of elegance, garnish with chocolate shavings or sprinkles. These optional toppings provide not only visual appeal but also an extra crunch when enjoyed.
Step 11: Chill the Dessert
Cover the dish tightly with plastic wrap or aluminum foil to prevent any odors from affecting your dessert. Place the dish in the refrigerator and let your Brownie Refrigerator Cake chill for at least 4 hours, preferably overnight. This resting period allows the flavors to meld beautifully and ensures a refreshing treat when served.
Step 12: Serve and Enjoy
Once chilled, take your Brownie Refrigerator Cake out of the refrigerator. Cut it into squares, enjoying the beautiful layers as you serve. Each bite presents a decadent mix of flavors and textures that your family and friends will love, making it a perfect dessert for any gathering.
How to Store and Freeze Brownie Refrigerator Cake
Fridge: Store your Brownie Refrigerator Cake covered in plastic wrap or aluminum foil in the refrigerator for up to 5 days. This ensures it stays fresh and maintains its creamy texture.
Freezer: For longer storage, freeze slices individually wrapped in plastic wrap and then in a freezer-safe bag. It will keep well for up to 2 months, allowing for a delicious treat whenever you're craving cake!
Thawing: When ready to enjoy, move the frozen slices to the fridge and let them thaw overnight. This method helps retain the cake's delightful layers and flavors.
Reheating: Since this is a no-bake dessert, there's no need to reheat. Serve chilled directly from the fridge for the best experience!
Expert Tips for Brownie Refrigerator Cake
Baking Versatility: Use either homemade or store-bought brownies; just ensure they are completely cooled for optimal layering in your Brownie Refrigerator Cake.
Cream Cheese Consistency: Always soften cream cheese before mixing; this avoids lumps and achieves that creamy texture we all crave.
Whipped Topping Folding: When folding in the whipped topping, do it gently to maintain its airy texture, ensuring delicious layers of flavor without deflation.
Flavor Infusion: For an extra flavor boost, consider adding a splash of your favorite liqueur or flavored extract to the cream cheese mixture.
Setting Time: Don’t rush the chilling process—letting your Brownie Refrigerator Cake sit overnight magnifies the flavors, enhancing the overall experience.
Make Ahead Options
Making the Brownie Refrigerator Cake ahead of time is a fantastic way to save precious minutes on busy days! You can easily prepare the brownie base and the cream cheese mixture up to 24 hours in advance. Simply bake and crumble the brownies, then layer them in your dish. Prepare the cream cheese mixture and refrigerate it separately until you are ready to assemble. This will keep the creaminess intact. When you're set to serve, finish by layering in the chocolate pudding and whipped topping, then let it chill for at least 4 hours (or overnight) to allow those delicious flavors to meld together. This way, your dessert will be just as luscious and delightful, providing a stress-free treat that your family will adore!
Brownie Refrigerator Cake Variations
Feel free to explore these delightful tweaks that will make your Brownie Refrigerator Cake uniquely yours!
-
Nut-Free: Omit the pecans and walnuts for a kid-friendly version that's just as tasty.
-
Gluten-Free: Substitute gluten-free brownies and use a gluten-free chocolate pudding mix for a deliciously safe treat.
-
Vegan: Replace cream cheese with vegan cream cheese and use coconut whipped cream instead of regular whipped topping. Enjoy a dairy-free delight!
-
Minty Fresh: Add a few drops of peppermint extract to the cream cheese mixture for a refreshing twist that delights the senses.
-
Extra Chocolate: For chocolate lovers, sprinkle chocolate chips between layers or on top of the whipped topping for a decadent crunch.
-
Fruit Layer: Incorporate a layer of sliced strawberries or raspberries between the cream cheese and chocolate pudding layers for a fruity balance.
-
Spicy Kick: Mix in a pinch of cayenne pepper or espresso powder with the chocolate pudding for an unexpected and delightful heat.
-
Coffee Lovers: Swap in cold brew coffee for the cold milk in the pudding mix to add a rich, coffee-infused twist to your dessert.
With these variations, your Brownie Refrigerator Cake can be tailored to satisfy a range of tastes and dietary needs, making it an ever-popular choice for any occasion!
What to Serve with Brownie Refrigerator Cake
Indulge in a delightful array of flavors as you create a full meal alongside this tempting dessert masterpiece.
-
Fresh Berries: Bright, juicy strawberries or raspberries add a refreshing contrast, balancing the rich chocolate and creaminess. Their natural sweetness enhances every bite, making your dessert experience even more delightful.
-
Creamy Vanilla Ice Cream: A scoop of velvety vanilla ice cream complements the rich brownie layers with its cool creaminess, creating a wonderful temperature contrast. It’s a classic pairing that any chocoholic will adore.
-
Rich Coffee: A warm cup of freshly brewed coffee offers a perfect kick to this luscious dessert. The bitterness of the coffee expertly balances the sweetness, allowing the flavors of the cake to shine even brighter.
-
Chocolate Covered Almonds: These crunchy, chocolatey bites add texture and a nutty flavor that pairs wonderfully with the smooth layers of the Brownie Refrigerator Cake. Enjoy them as a fun finger food alongside!
-
Caramel Sauce Drizzle: A drizzle of warm caramel sauce adds a luscious sweetness, enhancing the decadent flavors of the cake. It’s an extra touch that turns a delicious dessert into an unforgettable treat.
-
Whipped Cream Topping: Light and airy, a dollop of extra whipped cream on top adds an appealing texture and an additional hint of sweetness, making each bite absolutely blissful.
-
Mint Tea: For a refreshing drink option, serve a cup of fragrant mint tea. Its bright, herbaceous notes provide a lovely contrast to the richness of the dessert, cleansing the palate beautifully.
-
Chocolate Hazelnut Spread: Serve a small side of chocolate hazelnut spread; its nutty, rich flavor is an indulgent complement to the brownie cake, inviting a luscious spoonful combination with every bite!
Brownie Refrigerator Cake Recipe FAQs
How do I choose the right brownies for the base of my Brownie Refrigerator Cake?
Absolutely! For the best results, opt for brownies that are fudgy rather than cakey, as they provide a richer base. Whether you use homemade or store-bought brownies, just ensure they are completely cooled before crumbling for optimal layering.
How should I store my Brownie Refrigerator Cake, and how long will it last?
Very good question! Store your Brownie Refrigerator Cake covered in plastic wrap or aluminum foil in the refrigerator for up to 5 days. This keeps it fresh and maintains the creamy texture. It’s a perfect make-ahead dessert!
Can I freeze leftover Brownie Refrigerator Cake? If so, how?
Yes, you can freeze it! For longer storage, slice the cake into squares, then wrap each piece tightly in plastic wrap before placing them in a freezer-safe bag. It can be frozen for up to 2 months, making it convenient for future cravings.
What’s the best way to thaw frozen Brownie Refrigerator Cake?
To thaw, simply move the frozen slices from the freezer to the fridge and let them sit overnight. This gradual thawing helps preserve the structure and flavors of your dessert, ensuring you enjoy every delicious layer.
Are there any dietary considerations I should keep in mind when making this dessert?
Absolutely! If you're making this for guests, ask about allergies first. The main allergens here are dairy (cream cheese and whipped topping) and nuts (if added). For a dairy-free version, you can opt for cream cheese alternatives and coconut whipped topping. Always provide clear information to your guests!
What should I do if my pudding mixture doesn’t thicken properly?
If your pudding mixture isn't thickening, it may need more mixing. Try whisking it a little longer, remembering it typically thickens within 2 minutes. If it still doesn't set, consider adding a bit more cold milk and whisk until it reaches the right consistency. Patience is key here!

Indulge in Decadence with Brownie Refrigerator Cake
Equipment
- mixing bowl
- electric mixer
- spatula
- whisk
- 9x13 inch Dish
Ingredients
Brownie Base
- 1 batch Baked brownies homemade or store-bought, cooled
Cream Cheese Mixture
- 8 ounces Cream cheese softened
- 1 can Sweetened condensed milk
- 1 teaspoon Vanilla extract
- 12 ounces Frozen whipped topping divided into two portions
Chocolate Layer
- 1 box Instant chocolate pudding mix quality brand
- 1.5 cups Cold milk
Optional Additions
- 1 cup Chopped pecans or walnuts for topping
- Chocolate shavings or sprinkles for garnish
Instructions
Step-by-Step Instructions
- Soften the cream cheese by allowing it to sit at room temperature for about 30 minutes.
- Combine softened cream cheese and sweetened condensed milk in a large mixing bowl and beat until smooth.
- Add vanilla extract to mixture and blend for another 30 seconds.
- Fold in half of the thawed whipped topping gently until no streaks remain.
- In a separate bowl, whisk together the instant chocolate pudding mix and cold milk until it thickens.
- Crumble cooled brownies into a 9x13 inch dish to create a solid base.
- Spread the cream cheese mixture evenly over the brownie layer.
- Gently spread the chocolate pudding mixture over the cream cheese layer.
- Spread remaining whipped topping evenly over the chocolate pudding layer.
- Optional: Sprinkle chopped nuts and garnish with chocolate shavings or sprinkles.
- Cover with plastic wrap and refrigerate for at least 4 hours, preferably overnight.
- Cut into squares and serve chilled, enjoying the delicious layers.