As I stood in my kitchen, the comforting aroma of warm honey wafted through the air, igniting a wave of nostalgia and memories of family gatherings. This is where my love for homemade treats flourishes, and today, I’m excited to share my delightful Salted Honey Pie recipe with you. This dessert is not only incredibly easy to make—perfect for busy weeknights—but it also offers a delightful twist that transforms your average pie into something truly special. The sweet yet slightly salty flavor profile makes it a crowd-pleaser that impresses at any gathering, all while being a lovely homage to classic flavors. Are you ready to whip up something unforgettable that will have everyone asking for seconds? Let’s dive into this delicious journey together!
Why is Salted Honey Pie a Must-Try?
Irresistible flavor: The delightful combination of sweet honey and a touch of salt creates an unforgettable taste that will entice your taste buds.
Effortless preparation: With just 15 minutes of prep time, this pie fits perfectly into your busy schedule while still resulting in a show-stopping dessert.
Family-friendly favorite: Both adults and kids are sure to love this unique twist on a classic dish, making it ideal for family gatherings.
Versatile serving options: Dress it up with your choice of toppings like whipped cream, fresh berries, or toasted nuts for a personalized touch.
Perfect for sharing: Whether it's a holiday celebration or a casual get-together, this Salted Honey Pie is bound to be the star of the dessert table, leaving everyone asking for the recipe.
Salted Honey Pie Ingredients
• Divine flavors await with this simple list!
For the Crust
- Pre-made pie crust – Save time with a store-bought crust that’s ready to fill.
For the Filling
- Large eggs – They add richness and help bind the filling.
- Honey – This is the star ingredient, bringing natural sweetness to the pie.
- Salt – Just a touch enhances the honey's flavor beautifully.
- Vanilla extract – A splash of vanilla brings warmth and depth to the sweetness.
- Heavy cream – For a luscious, creamy texture that melts in your mouth.
- Melted butter – Boosts richness and adds a slight nuttiness to the filling.
For the Topping
- Flaky sea salt – A sprinkle on top elevates the flavor profile of the pie.
- Extra honey – Drizzle on top for an extra touch of sweetness and shine.
Optional Garnishes
- Toasted nuts – Adds a delightful crunch and nuttiness if desired.
- Whipped cream – A classic pairing that adds a light, fluffy contrast.
- Vanilla ice cream – Creamy sweetness that pairs wonderfully with warmth.
- Fresh berries – Use seasonal favorites for a burst of fruity freshness.
- Edible flowers – Perfect for an eye-catching presentation.
- Fresh herbs – A surprising twist that enhances flavor and looks stunning.
Step‑by‑Step Instructions for Salted Honey Pie
Step 1: Preheat and Prepare the Crust
Begin by preheating your oven to 375°F (190°C). While it heats, take your pre-made pie crust and roll it out evenly into a pie dish, ensuring it's smooth and flush against the sides. Use a fork to prick the base, preventing bubbles during baking. Blind bake the crust for about 10-12 minutes until it turns lightly golden and set aside to cool slightly.
Step 2: Whisk the Filling Ingredients
In a medium bowl, combine 3 large eggs, 1 cup of honey, ½ teaspoon of salt, and 1 teaspoon of vanilla extract. Using a whisk, blend these ingredients together until they’re fully combined and appear fluffy, which should take around 2-3 minutes. This forms the delightful base for your Salted Honey Pie, so ensure there are no streaks of egg visible.
Step 3: Combine Cream and Butter
Slowly introduce 1 cup of heavy cream and 2 tablespoons of melted butter to your egg mixture. Stir gently but thoroughly until the filling becomes smooth and creamy with no lumps or graininess. This step is crucial for that luscious texture of your pie. Once mixed, you’re ready to fill your crust!
Step 4: Fill and Bake the Pie
Carefully pour the filling into the baked pie crust, ensuring it remains evenly distributed throughout. Place the pie in the oven and bake at 325°F (160°C) for about 40-45 minutes. Keep an eye on it—look for the edges to be set while the center jiggles slightly, indicating the perfect doneness for your Salted Honey Pie.
Step 5: Cool and Chill
After baking, allow the pie to cool completely at room temperature, which can take about 1 hour. Once cooled, transfer it to the refrigerator and chill for at least 3 hours, or until fully set. Chilling is essential for achieving the ideal sliceable texture and intensifying the flavors of your pie.
Step 6: Add the Finishing Touches
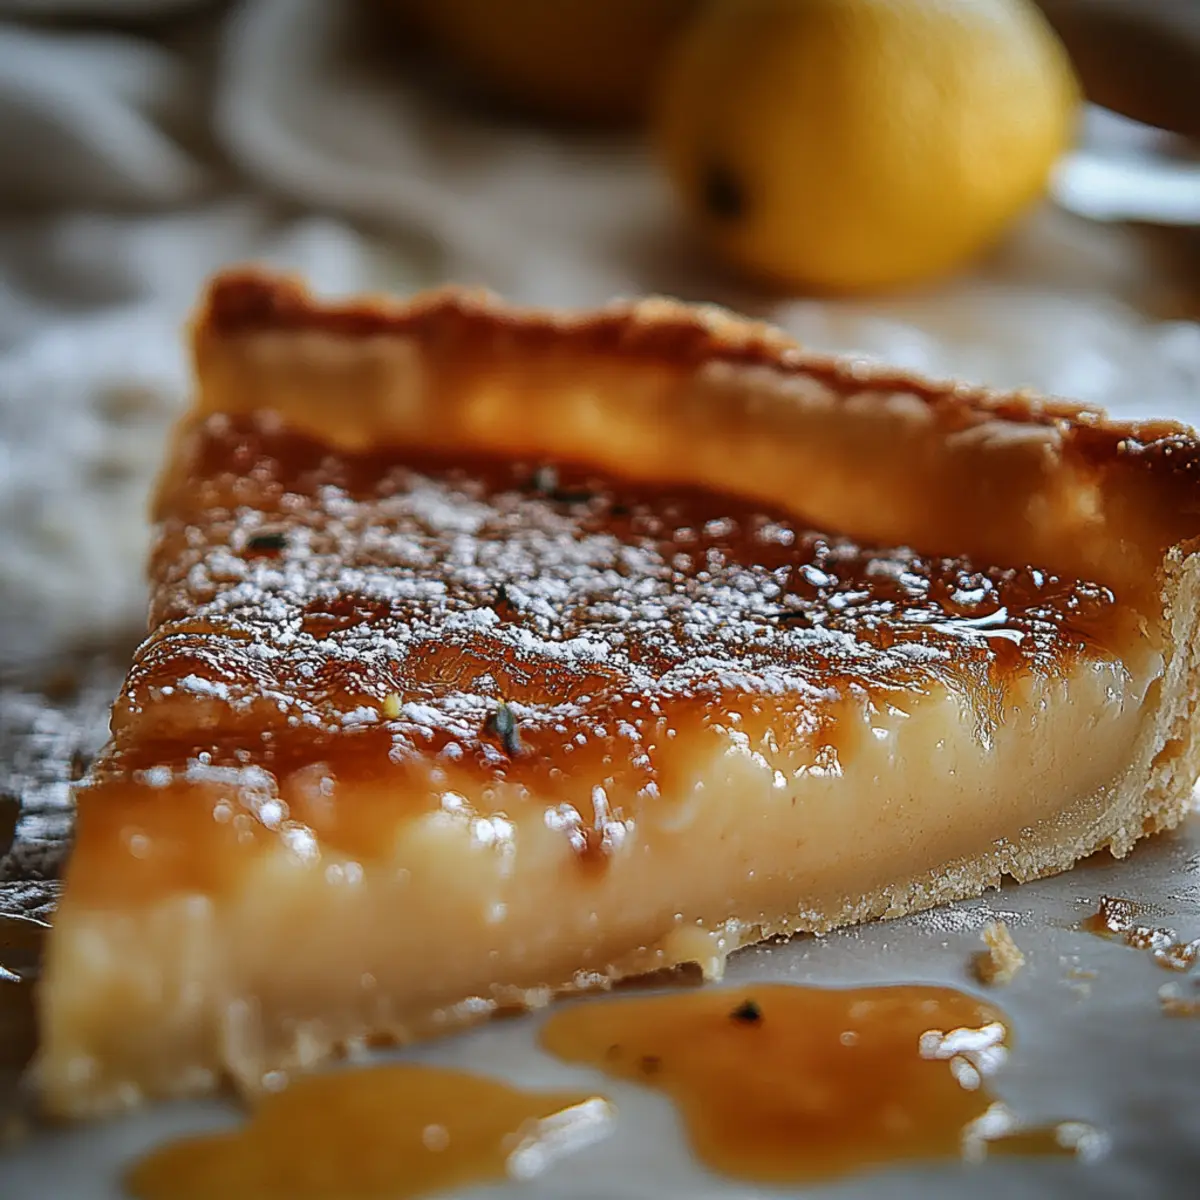
When ready to serve, take the pie from the fridge and sprinkle a generous pinch of flaky sea salt on top. Drizzle extra honey to amplify the sweetness and shine. For an added touch of texture, consider garnishing with toasted nuts if you like, which complements the flavors beautifully, making your Salted Honey Pie even more inviting.
Step 7: Serve with Delight
Slice the pie and serve it with a dollop of whipped cream, a scoop of vanilla ice cream, or a handful of fresh berries to brighten up each plate. The combination creates a delightful dessert experience, perfect for sharing with friends and family at any gathering, ensuring your Salted Honey Pie is the star of the show!

What to Serve with Salted Honey Pie
Indulging in a luscious slice of this pie is just the beginning; pair it with delightful accompaniments to create a memorable meal experience.
-
Creamy Mashed Potatoes: The smooth and buttery texture of mashed potatoes provides a lovely contrast to the sweetness of the pie, creating a balanced plate.
-
Fresh Berries: A side of juicy berries adds vibrant color and acidity, perfectly cutting through the honey’s richness. The burst of freshness juxtaposes the pie beautifully.
-
Vanilla Ice Cream: A scoop of creamy vanilla ice cream melts blissfully atop the warm pie, enhancing its flavors and creating an indulgent dessert experience.
-
Whipped Cream: Adding a dollop of light and airy whipped cream offers a classic pairing while accentuating the pie's honey notes for an extra touch of decadence.
-
Edible Flowers: These charming decorations not only beautify your presentation but also add a subtle, delicate flavor that complements the pie visually and gastronomically.
-
Toasted Nuts: Sprinkle some toasted nuts over your slice for a crunchy texture that provides an exciting contrast to the silky filling.
-
Refreshing Herbal Tea: Serve alongside a warm cup of herbal tea, which can cleanse the palate and provide a soothing finish to your meal.
-
Sparkling Water: A glass of sparkling water adds a refreshing effervescence and lightness, making it a perfect palate cleanser between bites of sweet pie.
Make Ahead Options
These Salted Honey Pies are perfect for busy home cooks looking to save time! You can prepare the pie crust and filling up to 24 hours in advance—simply blind bake the crust, let it cool, and store it wrapped in plastic in the fridge. For the filling, whisk together the eggs, honey, salt, and vanilla a day ahead and refrigerate it in an airtight container. To maintain quality, avoid adding any toppings until you're ready to serve. When it’s time to bake, simply pour the chilled filling into your pre-baked crust and bake as directed. This way, you'll have a delicious dessert ready to impress with minimal effort!
How to Store and Freeze Salted Honey Pie
Fridge: Store leftover Salted Honey Pie in an airtight container in the refrigerator for up to 3 days to maintain its creamy texture and flavor.
Freezer: To freeze, wrap the cooled pie tightly in plastic wrap and aluminum foil. It can last for up to 2 months, but for the best quality, try to consume it sooner.
Reheating: If you want to enjoy the pie warm, thaw it in the refrigerator overnight, then rewarm in a low oven at 325°F (160°C) for about 10 minutes before serving.
Serving Tip: Before serving, always check the pie's doneness and refresh any toppings like flaky sea salt and honey, to bring back the fresh flavor.
Expert Tips for Perfect Salted Honey Pie
Chill Time Is Key: Make sure to refrigerate the pie for at least 3 hours after baking. This allows the filling to fully set and enhances the flavor.
Watch the Baking Time: Avoid overbaking! The pie should jiggle slightly in the center when you take it out. If it appears too firm, it may be overcooked.
Use Quality Honey: The quality of honey impacts the flavor greatly. Choose a pure, high-quality honey for the best taste in your Salted Honey Pie.
Whip It Good: Ensure your cream is well whipped before adding to the mixture. This will help achieve that luscious, creamy texture everyone will love.
Garnish Generously: Don’t skip the flaky sea salt on top! It elevates the sweetness and balances the flavors beautifully in your pie.
Save Some Toppings: Consider offering toppings like nuts or berries on the side, letting guests customize their slices for a fun, interactive experience!
Salted Honey Pie Variations
Feel free to get creative and tailor this delightful pie to your taste buds with these fun ideas!
- Nut-Free: Omit any nuts and consider adding a sprinkle of cinnamon for a warm, cozy flavor contrast.
- Dairy-Free: Swap heavy cream with coconut cream for a rich, dairy-free option that still delivers on taste.
- Gluten-Free: Use a gluten-free pie crust to make this recipe suitable for those avoiding gluten while keeping it delicious.
- Fruit-Infused: Add a cup of fresh fruit, like blackberries or peaches, to the filling for a burst of natural sweetness and vibrant color.
- Herb-Infused: Stir in a teaspoon of finely chopped fresh rosemary or thyme for a unique savory twist that balances the honey beautifully.
- Spicy Kick: For an unexpected twist, add a pinch of cayenne pepper or black pepper to the filling to play off the sweetness.
- Chocolate Drizzle: Pour a rich dark chocolate ganache over the cooled pie for an indulgent touch and delightful contrast of flavors.
- Lemon Zest: Brighten up the filling with a teaspoon of lemon zest for a citrusy lift that complements the honey's sweetness beautifully.

Salted Honey Pie Recipe FAQs
What is the best honey to use for Salted Honey Pie?
Absolutely! Opt for a high-quality, pure honey for the best flavor. Local, raw honey can elevate your pie and provide a unique taste that truly stands out. The more floral notes in your honey, the richer and more nuanced the finished pie will be!
How should I store leftover Salted Honey Pie?
Very simple! Keep your leftover Salted Honey Pie in an airtight container in the refrigerator. It will stay fresh for up to 3 days, maintaining its creamy texture and flavor. Always make sure it’s well-covered to prevent it from absorbing any odors.
Can I freeze Salted Honey Pie?
Certainly! To freeze your Salted Honey Pie, first let it cool completely. Then, wrap the pie tightly in plastic wrap and aluminum foil to protect it from freezer burn. It will stay good for up to 2 months. When you're ready to enjoy it again, simply thaw it overnight in the refrigerator before reheating!
Why is my Salted Honey Pie not set after baking?
If your pie isn’t setting, you may not have baked it long enough. The edges should be firm, while the center should still jiggle slightly. If you find it's undercooked, return it to the oven for an additional 5-10 minutes. Keep a close eye, as overbaking can lead to a dry texture.
Can I make Salted Honey Pie ahead of time?
Absolutely! You can bake and cool your Salted Honey Pie a day ahead. After cooling, store it in the refrigerator overnight before serving. This will give the flavors time to meld and enhance the overall taste, making it even more delightful!
Is Salted Honey Pie safe for pets?
It’s best to keep Salted Honey Pie away from pets. Ingredients like honey and heavy cream are not inherently toxic, but they can upset their stomachs. If your furry friend has any allergies or sensitivities, it’s always wise to consult your veterinarian before sharing any human food.

Irresistibly Sweet Salted Honey Pie You’ll Love to Share
Equipment
- mixing bowl
- whisk
- pie dish
- Oven
Ingredients
For the Crust
- 1 each Pre-made pie crust Store-bought crust
For the Filling
- 3 large eggs Adds richness
- 1 cup honey Star ingredient
- 0.5 teaspoon salt Enhances honey's flavor
- 1 teaspoon vanilla extract Brings warmth
- 1 cup heavy cream For a creamy texture
- 2 tablespoons melted butter Boosts richness
For the Topping
- 1 pinch flaky sea salt Elevates flavor
- 2 tablespoons extra honey For sweetness
Optional Garnishes
- 1 cup toasted nuts For crunch
- 1 cup whipped cream Classic pairing
- 1 cup vanilla ice cream Creamy sweetness
- 1 cup fresh berries Fruity freshness
- 1 handful edible flowers For decoration
- 1 handful fresh herbs Enhances flavor
Instructions
Instructions
- Preheat your oven to 375°F (190°C). Roll out the pre-made pie crust and prick the base with a fork. Blind bake for 10-12 minutes until lightly golden.
- In a medium bowl, whisk together 3 large eggs, 1 cup of honey, 0.5 teaspoon of salt, and 1 teaspoon of vanilla extract until fluffy.
- Gradually mix in 1 cup of heavy cream and 2 tablespoons of melted butter until the filling is smooth and creamy.
- Pour the filling into the baked crust and bake at 325°F (160°C) for 40-45 minutes until edges are set and center jiggles slightly.
- Let the pie cool completely at room temperature for 1 hour, then chill in the refrigerator for at least 3 hours until set.
- Before serving, sprinkle flaky sea salt on top and drizzle with extra honey. Garnish with optional toppings as desired.
- Slice and serve with whipped cream, vanilla ice cream, or fresh berries for a delightful dessert experience.