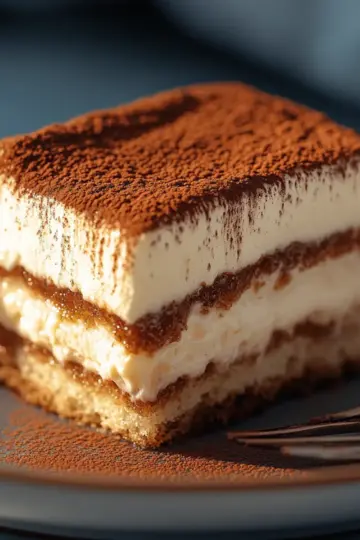
As I stood in my kitchen, the sweet aroma of ripe bananas filled the air, beckoning me to create something magical. That's when I decided it was the perfect time to whip up my beloved Banana Pudding. This dessert is a nostalgic favorite, reminding me of sunny family gatherings filled with laughter and joy. With just a handful of ingredients, including creamy pudding, rich cream cheese, and fluffy whipped topping, this recipe is a dream come true for anyone craving a comforting treat. Not only does it come together in just 20 minutes, but it can also be made ahead of time—a true game-changer for busy days. So, whether you're looking to impress your guests or indulge in a slice of childhood delight, this Banana Pudding will quickly become your go-to dessert. Are you ready to dive into layers of creamy goodness?
Why Is This Banana Pudding Irresistible?
Mouthwatering Layers: This Banana Pudding features delectable layers of creamy goodness, rich cream cheese, and sweet bananas that create a heavenly dessert experience.
Quick Preparation: With just 20 minutes of prep time, you can whip up this show-stopping treat, making it perfect for last-minute gatherings or any time you're craving something sweet.
Make-Ahead Convenience: Chilling it overnight enhances the flavors, allowing you to prepare it ahead of time and save precious moments on busy days.
Crowd-Pleaser: This dessert is a guaranteed hit at parties, evoking nostalgia and sparking joy among guests of all ages—everyone loves a classic!
Versatile Delight: Whether served at a summer barbecue or holiday dinner, this dessert is adaptable for any occasion, ensuring you always have the perfect ending to your meal.
Banana Pudding Ingredients
Prepare to create a delightful dessert your loved ones will remember!
For the Base
• Vanilla wafers – These provide a crunchy contrast to the creamy layers.
• Ripe bananas – Choose 6 to 8 for the best flavor and sweetness.
For the Pudding Mixture
• Milk – 2 cups of whole milk helps to create a rich, creamy texture for your banana pudding.
• French vanilla pudding mix – This boxed mix adds a decadent flavor; you can use regular vanilla if preferred.
• Cream cheese – 1 (8 oz) package ensures a smooth and creamy consistency in the pudding.
• Sweetened condensed milk – 1 (14 oz) can adds a touch of sweetness that balances all flavors beautifully.
For the Topping
• Frozen whipped topping – A 12 oz container, thawed, gives that fluffy finish; feel free to substitute with homemade whipped cream for extra flavor.
Your banana pudding will impress with these simple yet essential ingredients!
Step‑by‑Step Instructions for Banana Pudding
Step 1: Prepare the Base
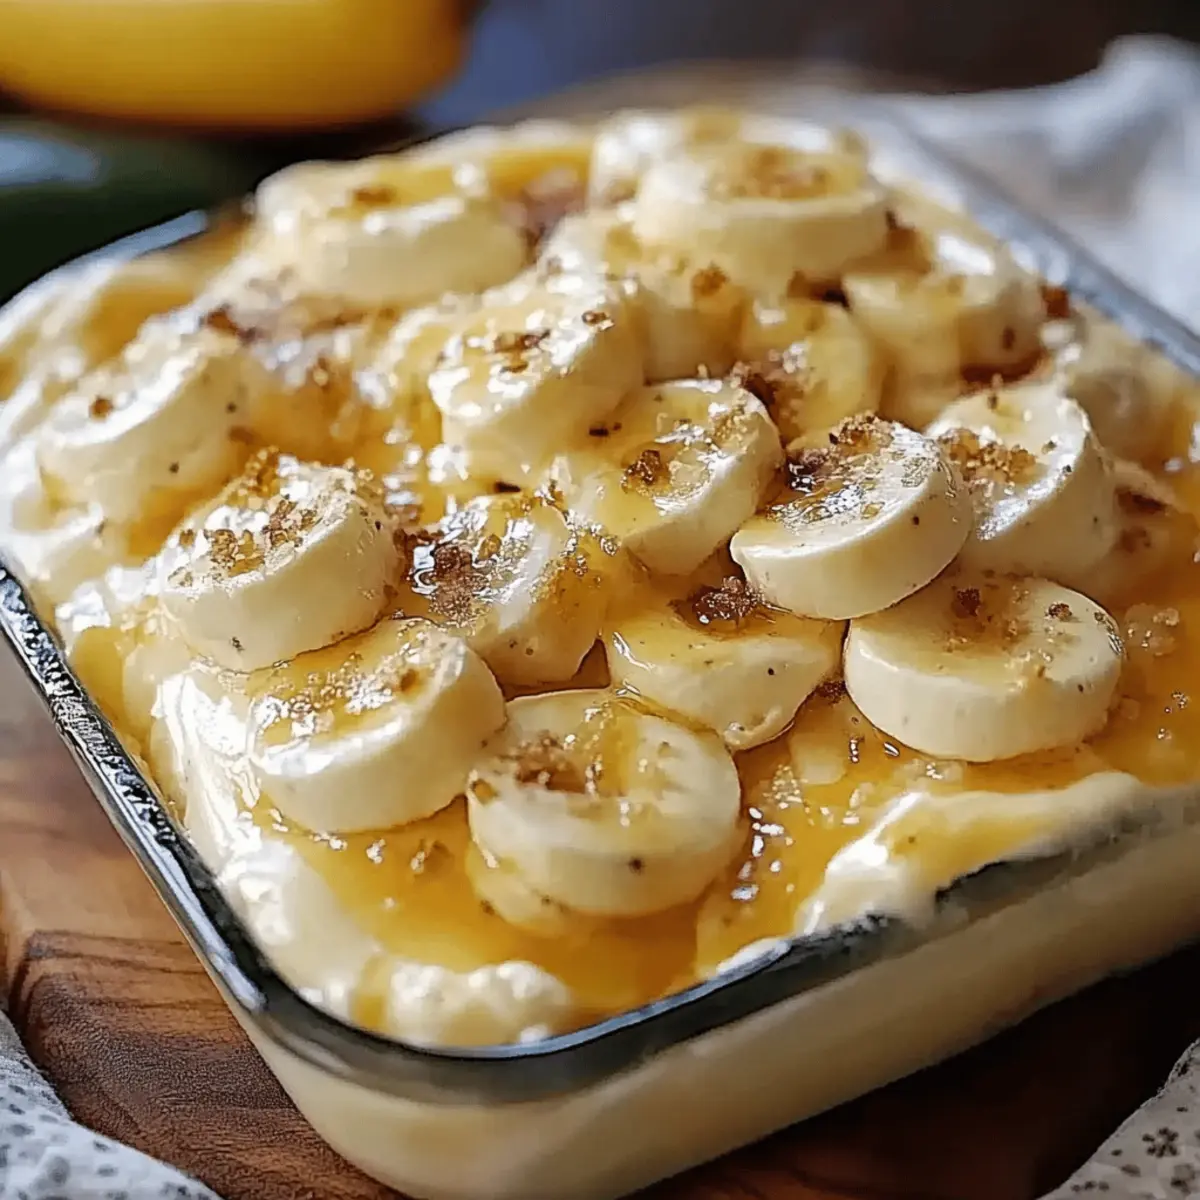
Begin by lining a 13×9-inch baking dish with half of the vanilla wafers, ensuring they're arranged in a single layer. Next, evenly layer the sliced ripe bananas over the wafers, allowing their sweet aroma to mingle with the crunchy texture. This will set the foundation for your delightful banana pudding.
Step 2: Create the Pudding Mixture
In a medium mixing bowl, combine 2 cups of cold milk with the French vanilla pudding mix. Using an electric mixer, blend them together on medium speed for about 2 minutes, or until the mixture is smooth and has thickened slightly. You’ll notice a fluffy consistency forming, which will be the heart of your creamy banana pudding.
Step 3: Mix the Cream Cheese
In another bowl, beat 8 oz of cream cheese along with a 14 oz can of sweetened condensed milk. Use an electric mixer on medium speed until the mixture is creamy and completely smooth, which should take about 2-3 minutes. This rich mixture will add a luscious texture to your banana pudding, enhancing its overall flavor.
Step 4: Fold in the Whipped Topping
Gently fold the thawed 12 oz container of frozen whipped topping into the cream cheese mixture with a spatula. Take your time with this step, as you want to maintain the light and airy quality of the topping while incorporating it fully. This folding technique ensures that your banana pudding will be delightfully creamy and fluffy.
Step 5: Combine Pudding and Cream Cheese Mixtures
Carefully combine the pudding mixture with the cream cheese and whipped topping mixture. Stir gently until fully blended, ensuring there are no lumps and the mixtures are harmoniously combined. This creamy blend is crucial for giving your banana pudding its signature texture and flavor.
Step 6: Assemble the Layers
Pour the combined creamy mixture over the wafer and banana layers in the baking dish. Use a spatula to spread it evenly, making sure that the mixture covers the bananas and wafers completely. This will create a rich layer of flavor that every bite of your banana pudding can enjoy.
Step 7: Add the Final Topping
After the creamy mixture is spread, top it off with the remaining vanilla wafers. Arrange them neatly on the surface, pressing them down slightly for an even layer. This crispy topping adds a delightful crunch and visual appeal to your finished banana pudding.
Step 8: Chill and Set
Refrigerate the assembled banana pudding for at least a few hours or preferably overnight. The chilling time allows all flavors to meld together beautifully while the pudding sets to a perfect consistency. You’ll know it’s ready when it’s chilled throughout and has a luscious, firm texture waiting to be savored.
Banana Pudding Variations & Substitutions
Feel free to let your creative juices flow and customize this beloved dessert in delightful ways!
- Dairy-Free: Substitute the milk with almond or coconut milk and use dairy-free cream cheese for a luscious treat everyone can enjoy.
- Nutty Addition: Add a handful of crushed walnuts or pecans between the layers for a crunchy texture that complements the creaminess beautifully.
- Chocolate Twist: Mix in chocolate pudding instead of French vanilla for a decadent chocolate-banana fusion that will wow any chocolate lover.
- Coconut Flavor: Use coconut milk and fold in shredded coconut to the creamy mixture for a tropical twist that transports you to paradise with each bite.
- Layered Delight: Alternate layers with crushed cookies or fresh berries for added texture and a pop of freshness, making every spoonful a new experience.
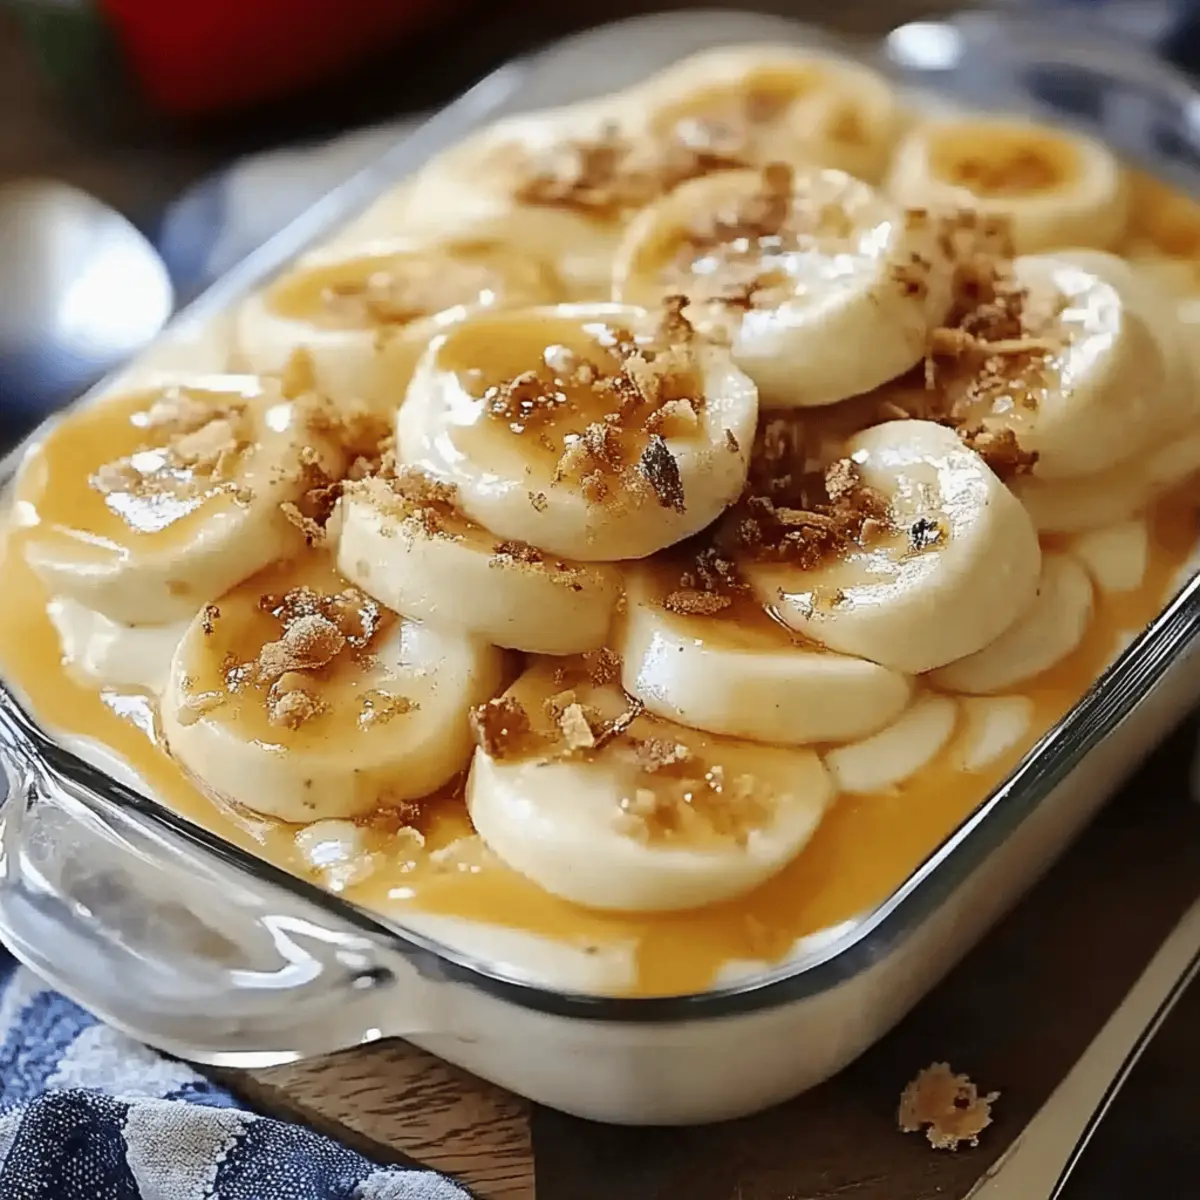
- Heated Up: Drizzle a touch of caramel or chocolate sauce over the top to introduce a sweet richness that elevates your dessert to a whole new level.
- Spiced Upgrade: Incorporate a dash of cinnamon or nutmeg into the pudding mixture to warm the flavors and give your banana pudding an inviting, spiced aroma.
- Frozen Treat: Turn your banana pudding into a frozen dessert by layering it in popsicle molds; a perfect summer treat that your family will adore!
Expert Tips for Banana Pudding
Choose Ripe Bananas: Opt for bananas that are spotty and ripe for maximum sweetness and flavor in your banana pudding.
Layer Carefully: Make sure your layers of bananas and wafers are even; this not only looks appealing but ensures every bite has balance and texture.
Avoid Mixing Errors: When combining the ingredients, be gentle to avoid deflating the whipped topping. A light folding method keeps your pudding airy and rich.
Chill Completely: Allow enough chilling time—overnight is best! This enhances flavors and gives your banana pudding the perfect, creamy texture.
Serve with Love: Always garnish with extra banana slices or a dollop of whipped cream right before serving to impress your guests and elevate the presentation.
Make Ahead Options
These Banana Pudding layers are perfect for meal prep enthusiasts! You can prepare the vanilla wafer and banana layers up to 24 hours in advance by assembling them in the baking dish, ensuring the bananas are evenly coated with the pudding mixture to prevent browning. Additionally, the creamy pudding mixture can be made up to 3 days ahead; simply store it in an airtight container in the refrigerator. When you're ready to serve, layer the creamy mixture over the wafers and bananas, top with the remaining wafers, and refrigerate until chilled. This prep strategy not only saves time but also enhances the flavors, resulting in a delicious dessert that’s just as delightful on day two!
What to Serve with Banana Pudding
Imagine the joy of a gathering, where the sweet scent of banana pudding floats through the air, creating the perfect canvas for an unforgettable meal.
- Graham Cracker Crust Pie: A delightful crunch complements the pudding’s creamy layers, offering a textural contrast that enhances every bite. Serve it alongside for an interesting spin on classic desserts.
- Fresh Fruit Salad: Choose seasonal fruits like berries and melons to add a light and refreshing counterpart, balancing the richness of the pudding. Their vibrant colors also make for an appealing plate!
- Chocolate Chip Cookies: The sweet, buttery flavor of these cookies pairs beautifully with the soft layers of banana pudding, providing a comforting blend of nostalgia. Just imagine the joy of endless dipping!
- Caramel Sauce Drizzle: A warm, homemade caramel can be drizzled over banana pudding, adding a luscious sweetness that will create a heavenly experience. It's an irresistible indulgence that pleases both young and old.
- Vanilla Ice Cream: A scoop of creamy ice cream adds a delightful chill and texture to the meal while perfectly balancing the warmth of the dish. The classic flavors meld beautifully!
- Iced Tea: A refreshing glass of sweetened iced tea offers a perfect cleansing swipe between bites, enhancing the overall enjoyment of dessert. Consider garnishing it with a slice of lemon for extra zest.
- Chocolate Mousse: Rich and airy chocolate mousse serves as an elegant dessert option that complements the banana pudding’s sweetness and creaminess nicely. A delightful alternative when you want to impress!
- Peach Cobbler: Serve warm peach cobbler for a comforting and cozy pairing. The fruity filling creates a wonderful contrast with the banana layers, transporting your taste buds to a summertime picnic.
How to Store and Freeze Banana Pudding
Fridge: Store the banana pudding in an airtight container in the fridge for up to 3 days to maintain freshness and flavor.
Freezer: If you need to store banana pudding for longer, you can freeze it—just be aware that the texture may change upon thawing. Use a freezer-safe container and enjoy within 1 month.
Reheating: For best results, thaw frozen banana pudding in the refrigerator overnight before serving. Avoid reheating in the microwave to preserve its creamy texture.
Layer Care: When storing, avoid adding banana slices on top until right before serving to prevent browning. This ensures a fresh and delicious presentation every time!

Banana Pudding Recipe FAQs
What type of bananas should I use for banana pudding?
Absolutely! For the best flavor and sweetness, choose bananas that are fully ripe, with some brown spots on the skin. This indicates they’re sweet and ready to enhance your banana pudding's taste.
How should I store leftover banana pudding?
Very! Place any leftover banana pudding in an airtight container and store it in the refrigerator for up to 3 days. This will help maintain its freshness and creamy texture while preventing it from absorbing any odors from the fridge.
Can I freeze banana pudding?
Yes, you can! To freeze banana pudding, transfer it to a freezer-safe container. Ensure it’s tightly sealed and enjoy it within 1 month. When you’re ready to serve, let it thaw overnight in the refrigerator instead of using the microwave, which can affect its consistency.
What should I do if my banana pudding is too runny?
If your banana pudding turns out too runny, don’t worry! This can happen if the pudding mixture wasn’t mixed long enough or if the bananas released too much moisture. To fix it, try chilling the pudding longer to allow it to set. If you prefer, you can also add a little more instant pudding mix to thicken it, mixing it in gradually while ensuring it stays creamy.
Are there any dietary considerations for banana pudding?
Definitely! If anyone has dairy allergies, consider using dairy-free milk and cream cheese alternatives for a delicious vegan version. Additionally, always ensure there are no added allergens in your pudding mix and toppings to accommodate everyone at your gathering.
Can I make banana pudding a day in advance?
Yes, indeed! Making banana pudding a day in advance is highly recommended as it allows the flavors to meld beautifully. Just be sure to cover it tightly with plastic wrap to keep it fresh in the refrigerator until you’re ready to serve.

Indulgent Banana Pudding That Will Wow Your Taste Buds
Equipment
- 13×9-inch baking dish
- mixing bowls
- electric mixer
- spatula
Ingredients
For the Base
- 2 cups Vanilla wafers Provides crunchy contrast
- 6-8 pieces Ripe bananas Choose for best flavor
For the Pudding Mixture
- 2 cups Whole milk Creates a rich texture
- 1 box French vanilla pudding mix Decadent flavor
- 1 8 oz Cream cheese Smooth and creamy consistency
- 1 14 oz Sweetened condensed milk Adds sweetness
For the Topping
- 1 12 oz Frozen whipped topping Thawed for fluffy finish
Instructions
Step-by-Step Instructions
- Line a 13×9-inch baking dish with half of the vanilla wafers.
- Layer the sliced ripe bananas over the wafers.
- In a bowl, combine 2 cups of milk with the pudding mix and blend until smooth.
- In another bowl, beat cream cheese with sweetened condensed milk until creamy.
- Fold the whipped topping into the cream cheese mixture gently.
- Combine the pudding mixture with the cream cheese mixture until well blended.
- Pour the combined mixture over the layers in the baking dish.
- Top with remaining vanilla wafers.
- Refrigerate for at least a few hours or overnight.