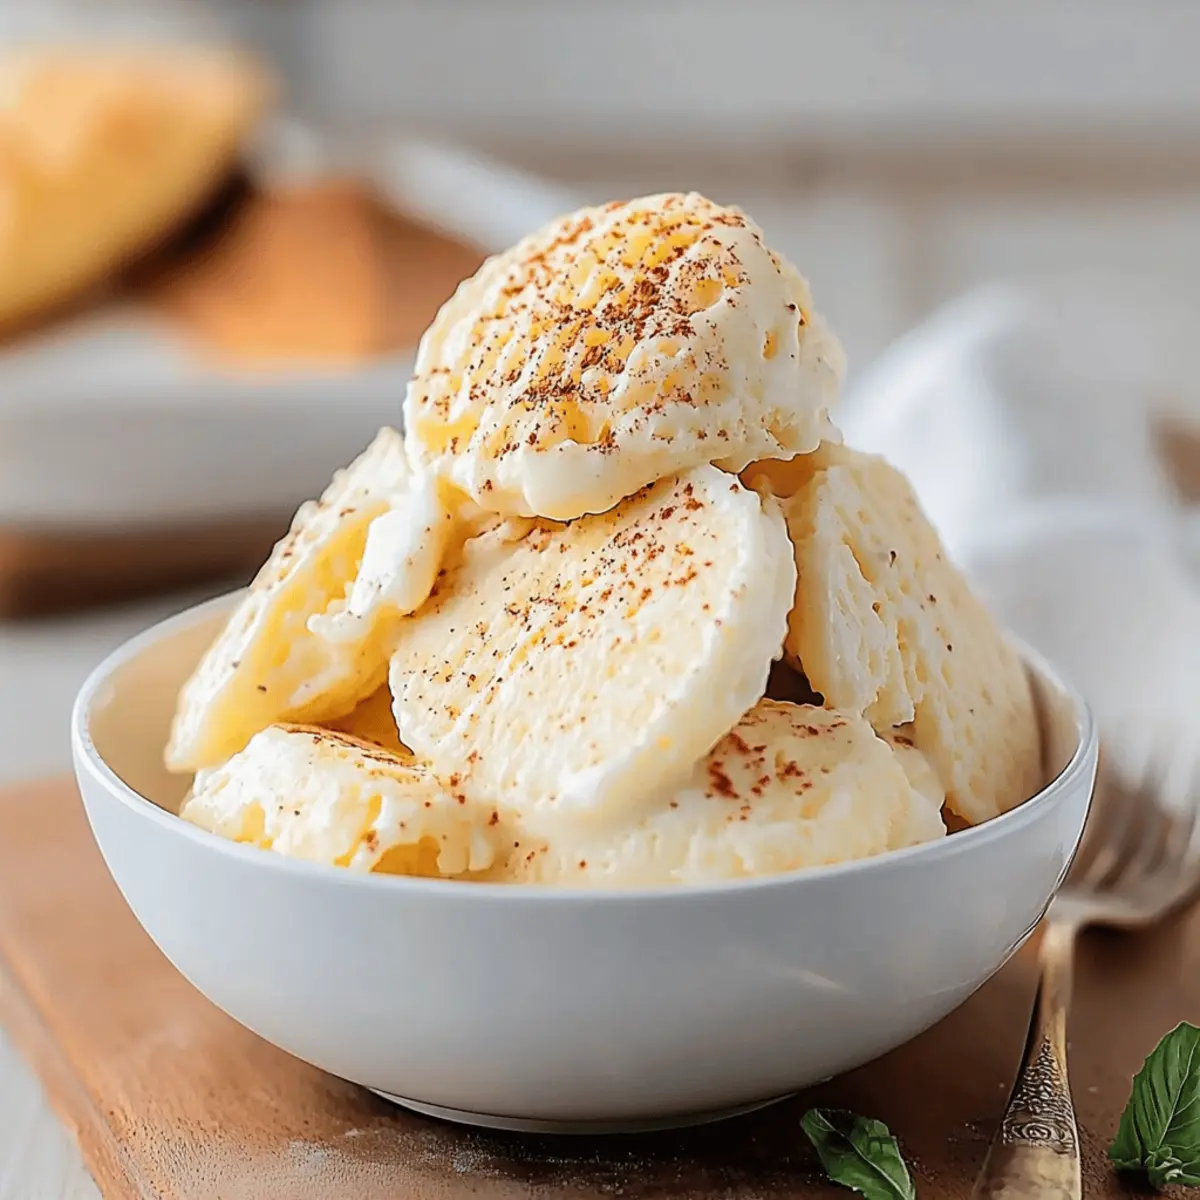
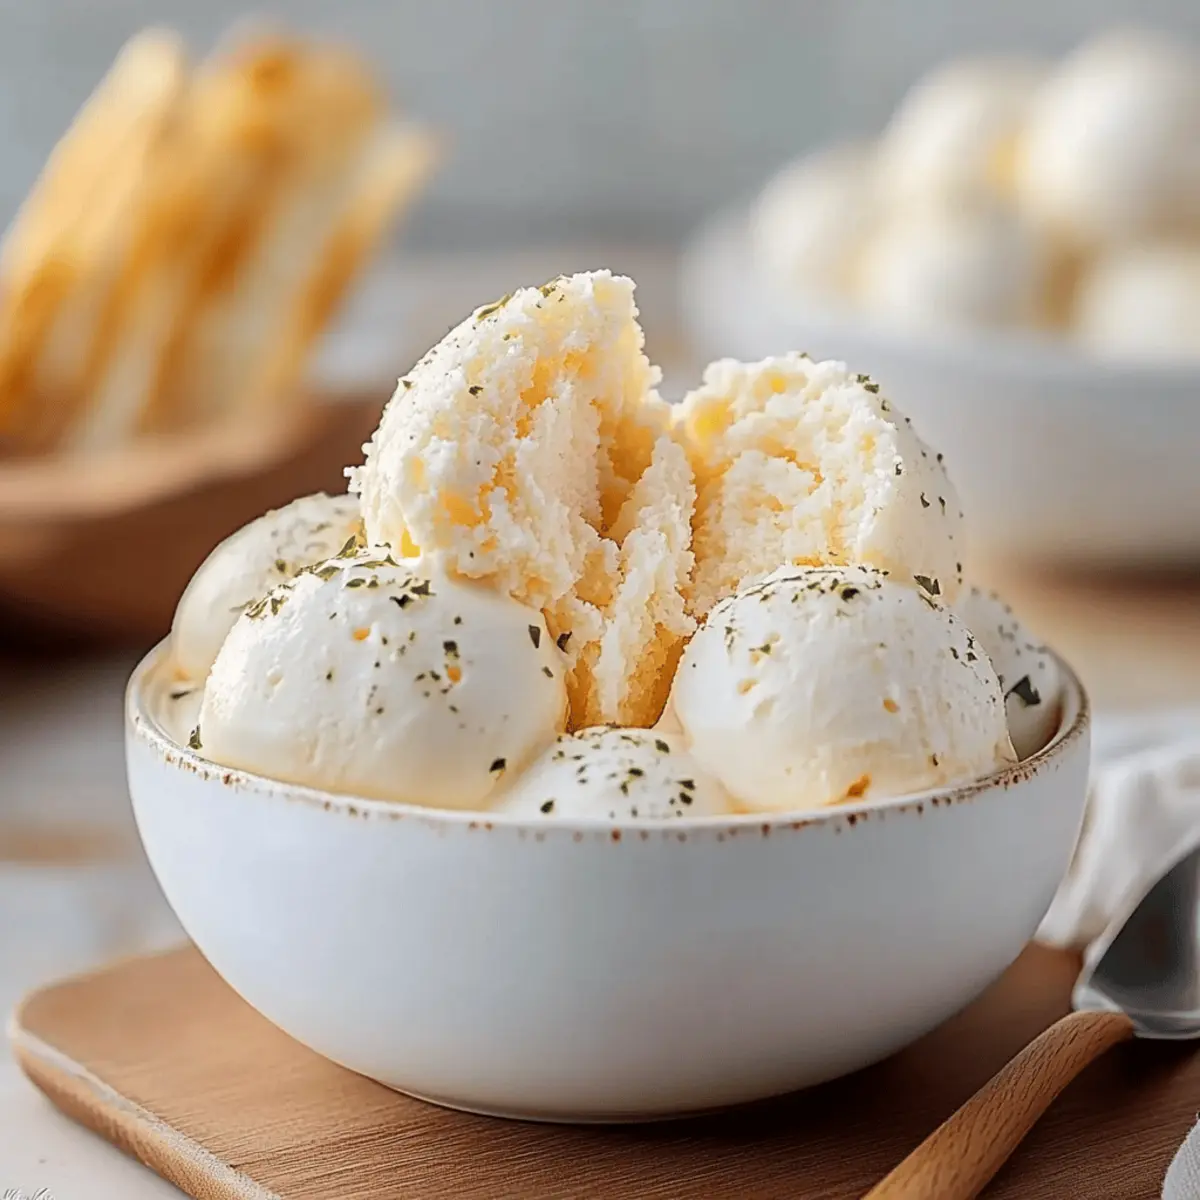
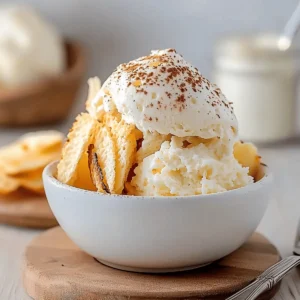
As I stood in my kitchen, the kitchen timer ticking away and the sun streaming through the window, I felt a wave of excitement. The promise of creamy, luscious Vanilla Ice Cream made without sugar was just moments away! This Sugar Free Vanilla Ice Cream is not only a blissful indulgence but also a guilt-free way to satisfy that sweet tooth without the extra calories. Perfect for warm summer evenings or a cozy winter treat, it’s incredibly easy to whip up at home with just a handful of ingredients. Plus, it’s a fantastic crowd-pleaser, making it a stellar choice for gatherings or simply a quiet night in. Are you ready to cool down and delight your taste buds with a scoop of homemade goodness? Let’s dive in!

Why Choose Sugar-Free Vanilla Ice Cream?
Healthful Indulgence: Enjoy the creamy taste of vanilla ice cream without the sugar rush; it's sweetened with erythritol for a guilt-free delight.
Easy Preparation: With just a few simple steps and minimal cooking time, you can create a homemade treat that rivals store-bought versions.
Versatile Delight: Perfect on its own or as a topping for your favorite desserts, this ice cream adapts to all occasions.
Kid-Friendly: Your little ones won’t notice the difference, making it an ideal way to introduce healthier treats.
Crowd-Pleaser: Whether hosting friends or treating yourself, this luscious ice cream is sure to be a hit with everyone!
Vanilla Ice Cream Ingredients
For the Ice Cream Base
• Heavy cream – adds richness and creaminess to your vanilla ice cream.
• Unsweetened almond milk – a great dairy-free alternative; you can use other plant-based milks if preferred.
• Erythritol – a sugar-free sweetener to satisfy your sweet tooth without the calories; adjust to taste!
• Vanilla extract – brings out the warm, inviting flavor of vanilla that everyone loves.
• Sea salt – enhances the overall flavor and balances the sweetness.
• Xanthan gum (optional) – helps achieve a smoother texture, especially if you plan to store it longer.
Now that you have all your ingredients ready, let’s turn them into a delicious batch of homemade Vanilla Ice Cream!
Step-by-Step Instructions for Sugar Free Vanilla Ice Cream
Step 1: Combine the Base Ingredients
In a medium saucepan, pour 2 cups of heavy cream and 1 cup of unsweetened almond milk. This combination creates a luscious base for your Vanilla Ice Cream. Stir gently to blend the ingredients, ensuring an even mixture.
Step 2: Add Sweeteners and Seasoning
Next, incorporate 1 cup of erythritol and ¼ teaspoon of sea salt into the saucepan. Stir continuously over medium heat for about 5-7 minutes, allowing the sweetener to completely dissolve without letting the mixture boil. Watch for bubbles to form just before boiling; it's essential to keep the heat steady.
Step 3: Infuse the Flavor
Once the sweetener has dissolved, remove the saucepan from heat and immediately stir in 1 tablespoon of vanilla extract. The warm mix will release the full aroma of vanilla, making your kitchen smell delightful. This step is crucial to infusing that creamy vanilla flavor into your ice cream base.
Step 4: Optional Thickener
If you desire a smoother texture, whisk in ¼ teaspoon of xanthan gum while still warm until it's fully dissolved. This optional ingredient helps improve the ice cream's consistency, especially if you're storing it for later. Make sure the mixture remains smooth and silky.
Step 5: Chill the Mixture
Pour your ice cream base into a clean container, let it cool to room temperature, and then cover it tightly. Refrigerate the mixture for at least 4 hours, or better yet, overnight. This step is crucial as it helps the flavors meld beautifully, setting the stage for delicious Vanilla Ice Cream.
Step 6: Prepare the Ice Cream Maker
Before churning, ensure your ice cream maker bowl is adequately frozen according to the manufacturer's instructions, usually for 15-24 hours. This step is vital as a well-frozen bowl will help achieve that creamy texture we all love in Vanilla Ice Cream.
Step 7: Stir and Pour
Once chilled, take the ice cream base from the refrigerator and give it a good stir to ensure it's well mixed. Carefully pour the mixture into your frozen ice cream maker bowl, being cautious not to overfill. This is where the magic happens as it transforms into ice cream!
Step 8: Churn to Perfection
Turn on your ice cream maker and churn according to the manufacturer’s instructions, typically for about 20-30 minutes. Keep an eye on the mixture as it thickens; it should reach a soft-serve consistency by the end of the churning process.
Step 9: Freeze for Firmness
Once churning is complete, transfer the soft vanilla ice cream to a freezer-safe container. Smooth the top and cover it tightly, then place it in the freezer. Allow it to firm up for at least 2-3 hours, or longer if you prefer an even firmer scoop of Vanilla Ice Cream.
Step 10: Serve and Enjoy
When you're ready to indulge, remove the container from the freezer and let it sit at room temperature for a few minutes to soften slightly. Scoop into bowls or cones and enjoy the homemade richness of your Sugar Free Vanilla Ice Cream! Any leftovers can be stored in the freezer for up to 2 weeks.
What to Serve with Sugar Free Vanilla Ice Cream
Indulging in a scoop of creamy delight opens up a world of delicious possibilities to elevate your dessert experience.
-
Fresh Berries: The burst of juicy strawberries, blueberries, or raspberries adds a refreshing contrast to the creamy richness of the ice cream, enhancing its flavor beautifully.
-
Chocolate Sauce: A warm drizzle of rich chocolate sauce creates a decadent, melty contrast that complements the vanilla perfectly, making each bite an indulgent journey.
-
Nuts and Seeds: Toasted almonds or walnuts provide a delightful crunch and a nutty flavor, balancing the smoothness of the ice cream delightfully. Try roasting them for additional depth!
-
Homemade Banana Bread: The moist, sweet bread pairs exceptionally well with creamy ice cream, creating a nostalgic combination that warms the heart with every bite.
-
Coconut Whipped Cream: Light and fluffy, this dairy-free topping adds a tropical flair that dances on your taste buds, wonderfully enhancing the vanilla flavor while keeping things light.
-
Coffee: A warm cup of coffee offers a caffeinated kick alongside your ice cream, yielding a delightful balance between sweet and bitter that makes for an uplifting pairing.
-
Chocolate Chip Cookies: Soft, chewy cookies add a delightful texture and flavor contrast that your family will adore. It’s a classic duo that never fails to satisfy!
-
Fruit Salad: A light, refreshing fruit salad introduces bright flavors and textures, creating a wonderful, vibrant balance with your sugar-free vanilla ice cream.
-
Berry Sorbet: For a lighter, fruity companion, a scoop of tangy berry sorbet elevates the dessert experience, making it a refreshing choice on a warm day.
Vanilla Ice Cream Variations
Feel free to play around with this recipe to create your perfect scoop of joy!
-
Dairy-Free: Substitute heavy cream with coconut cream for a rich, tropical twist.
Coconut cream adds a delightful, creamy texture and an exotic flavor that dances on your palate. Perfect for coconut lovers! -
Chocolate Swirl: Add ½ cup of unsweetened cocoa powder for a chocolatey delight.
Imagine the luscious blend of vanilla and chocolate creating a delectable marriage of flavors that will satisfy both cravings in one scoop. -
Minty Fresh: Incorporate 1 teaspoon of peppermint extract for a refreshing mint version.
This bright and invigorating twist is perfect for a summer treat, leaving your taste buds tingly and satisfied after every bite. -
Fruit-Infused: Blend 1 cup of pureed strawberries or blueberries into the base.
The natural sweetness and vibrant colors of the fruit elevate your ice cream to a fruity paradise, perfect for a delightful summer evening! -
Nutty Crunch: Mix in ½ cup of toasted almonds or walnuts for added texture.
With each scoop, get that satisfying crunch that complements the creaminess, taking your dessert experience to a whole new level of deliciousness. -
Spicy Kick: Add a pinch of cayenne or chili powder for a spicy-sweet surprise.
This bold twist challenges your taste buds and makes each scoop an exciting adventure! It’s perfect for those who love to live on the edge. -
Caramel Delight: Drizzle in sugar-free caramel sauce just before serving for a decadent finish.
The rich, gooey caramel will elevate your vanilla ice cream to a gourmet level, leaving you wanting more with each heavenly bite. -
Coffee Lovers: Stir in ½ cup of brewed espresso for a coffee-flavored ice cream.
This invigorating twist transforms your dessert into an afternoon pick-me-up, combining richness and flavor that coffee aficionados will adore!
Make Ahead Options
These delightful Sugar Free Vanilla Ice Cream is perfect for busy home cooks looking to save time! You can prepare the ice cream base up to 24 hours in advance by following the initial steps through chilling the mixture. Simply refrigerate the cooled mixture for at least 4 hours, or preferably overnight, to enhance the flavors. Additionally, you can freeze the churned ice cream for up to 2 weeks. Just be sure to store it in an airtight container to maintain its creamy texture and prevent freezer burn. When you're ready to serve, simply let it sit at room temperature for a few minutes to soften slightly, ensuring each scoop is just as delicious as when freshly made!
How to Store and Freeze Vanilla Ice Cream
Fridge: Store any leftover vanilla ice cream in the refrigerator for up to 2 weeks if you plan to consume it quickly. However, for the best texture, keep it in the freezer.
Freezer: For optimum freshness and texture, freeze your vanilla ice cream in an airtight container. It will maintain its quality for up to 2 weeks.
Reheating: When ready to enjoy, let the ice cream sit at room temperature for a few minutes to soften slightly before scooping. This ensures a smooth serve every time.
Covering: If you need to repack it, press a piece of parchment paper or plastic wrap directly onto the surface of the ice cream before sealing the container. This helps prevent ice crystals from forming, keeping your vanilla ice cream creamy and delicious.
Expert Tips for Sugar-Free Vanilla Ice Cream
• Quality Ingredients: Use high-quality heavy cream and pure vanilla extract to enhance the flavor of your Vanilla Ice Cream. Subpar ingredients can affect the final taste.
• Chilling is Key: Refrigerate your ice cream base overnight for best results; this allows flavors to meld and improves the overall texture.
• Watch the Heat: When heating the mixture, keep the temperature steady and avoid boiling. Overheating can cause separation or a grainy texture.
• Optional Xanthan Gum: Adding xanthan gum can elevate the texture, making your ice cream creamier, especially important if you store it for longer.
• Frozen Bowl: Ensure your ice cream maker bowl is fully frozen before churning. A poorly frozen bowl will result in less creamy Vanilla Ice Cream.
• Serve Time: Let your ice cream sit out for a few minutes before serving to soften slightly. This makes scooping easier and ensures a perfect serve every time!
Sugar Free Vanilla Ice Cream Recipe FAQs
How do I choose the best ripe ingredients for my Vanilla Ice Cream?
Absolutely! For the best flavor, ensure your vanilla extract is pure and high quality. Fresh heavy cream is also key; look for cream with no additives or stabilizers for a rich texture. While almond milk is a great option, check for unsweetened varieties, as added sugars can change the final taste!
How should I store my leftover Vanilla Ice Cream and for how long?
You can store your leftover Vanilla Ice Cream in an airtight container in the freezer for up to 2 weeks. For optimal freshness and to prevent ice crystals, press a piece of parchment or plastic wrap against the surface before sealing the container. It's a handy tip to keep it creamy for your next scoop!
Can I freeze my Vanilla Ice Cream for longer storage?
Yes, you can freeze your Vanilla Ice Cream for up to 3 months, but be sure it's in an airtight container. If it’s been stored longer than 2 weeks, let it sit at room temperature for about 5-10 minutes before scooping. This will help to soften it for easier serving!
What should I do if my Vanilla Ice Cream is icy or grainy?
Very! If your ice cream turns out icy or grainy, the problem could be due to a few factors. Make sure to chill the mixture thoroughly before churning; this helps the flavors develop and the consistency stay smooth. Additionally, consider using xanthan gum, as it helps stabilize the texture. If it still turns out icy, just let it sit at room temperature for a few minutes before serving!
Is this Vanilla Ice Cream recipe safe for allergies or dietary restrictions?
Definitely! This Sugar Free Vanilla Ice Cream can accommodate many dietary preferences. It's dairy-free if you use almond milk, and erythritol is a suitable sweetener for many people watching their sugar intake. However, if you have a nut allergy, you can substitute with oat milk or any other safe milk alternative. Always check labels to ensure no hidden allergens are present!
Can I make Vanilla Ice Cream without an ice cream maker?
Absolutely! If you don’t have an ice cream maker, pour your chilled ice cream base into a shallow dish and place it in the freezer. Stir every 30 minutes for about 2-3 hours. This will help break up ice crystals and give you a smoother texture. It's a little more labor-intensive, but still a delightful way to enjoy homemade Vanilla Ice Cream!
Irresistibly Creamy Sugar-Free Vanilla Ice Cream Recipe
Equipment
- medium saucepan
- ice cream maker
- Clean container
Ingredients
Ice Cream Base
- 2 cups heavy cream Adds richness and creaminess
- 1 cup unsweetened almond milk Dairy-free alternative
- 1 cup erythritol Sugar-free sweetener, adjust to taste
- 1 tablespoon vanilla extract Enhances vanilla flavor
- ¼ teaspoon sea salt Balances the sweetness
- ¼ teaspoon xanthan gum Optional for smoother texture
Instructions
Instructions
- Combine the Base Ingredients: In a medium saucepan, pour 2 cups of heavy cream and 1 cup of unsweetened almond milk.
- Add Sweeteners and Seasoning: Incorporate 1 cup of erythritol and ¼ teaspoon of sea salt into the saucepan.
- Infuse the Flavor: Stir in 1 tablespoon of vanilla extract after removing from heat.
- Optional Thickener: Whisk in ¼ teaspoon of xanthan gum while still warm.
- Chill the Mixture: Pour into a clean container, cool to room temperature, and refrigerate for at least 4 hours.
- Prepare the Ice Cream Maker: Ensure your ice cream maker bowl is adequately frozen.
- Stir and Pour: Take the ice cream base from the refrigerator, stir, and pour into the frozen ice cream maker bowl.
- Churn to Perfection: Turn on your ice cream maker and churn for about 20-30 minutes.
- Freeze for Firmness: Transfer to a freezer-safe container and freeze for at least 2-3 hours.
- Serve and Enjoy: Scoop into bowls or cones and enjoy!