Last week, as I was picking up snacks for a movie night with friends, it hit me: why settle for store-bought treats when homemade bliss awaits? That's when the idea for my Snickers Tray Bake Slice transformed into a delicious reality. This no-bake dessert is not only deliciously indulgent but also a breeze to whip up, making it perfect for last-minute occasions. With a layer of rich caramel, roasted peanuts, and smooth chocolate all atop a crunchy biscuit base, it’s bound to charm everyone from kids to adults. And the best part? It’s an incredible crowd-pleaser that can easily be made ahead of time, freeing you up for whatever fun comes next. Curious how to bring this delight to your kitchen? Let's dive in!

Why is this Snickers Tray Bake Slice a must-try?
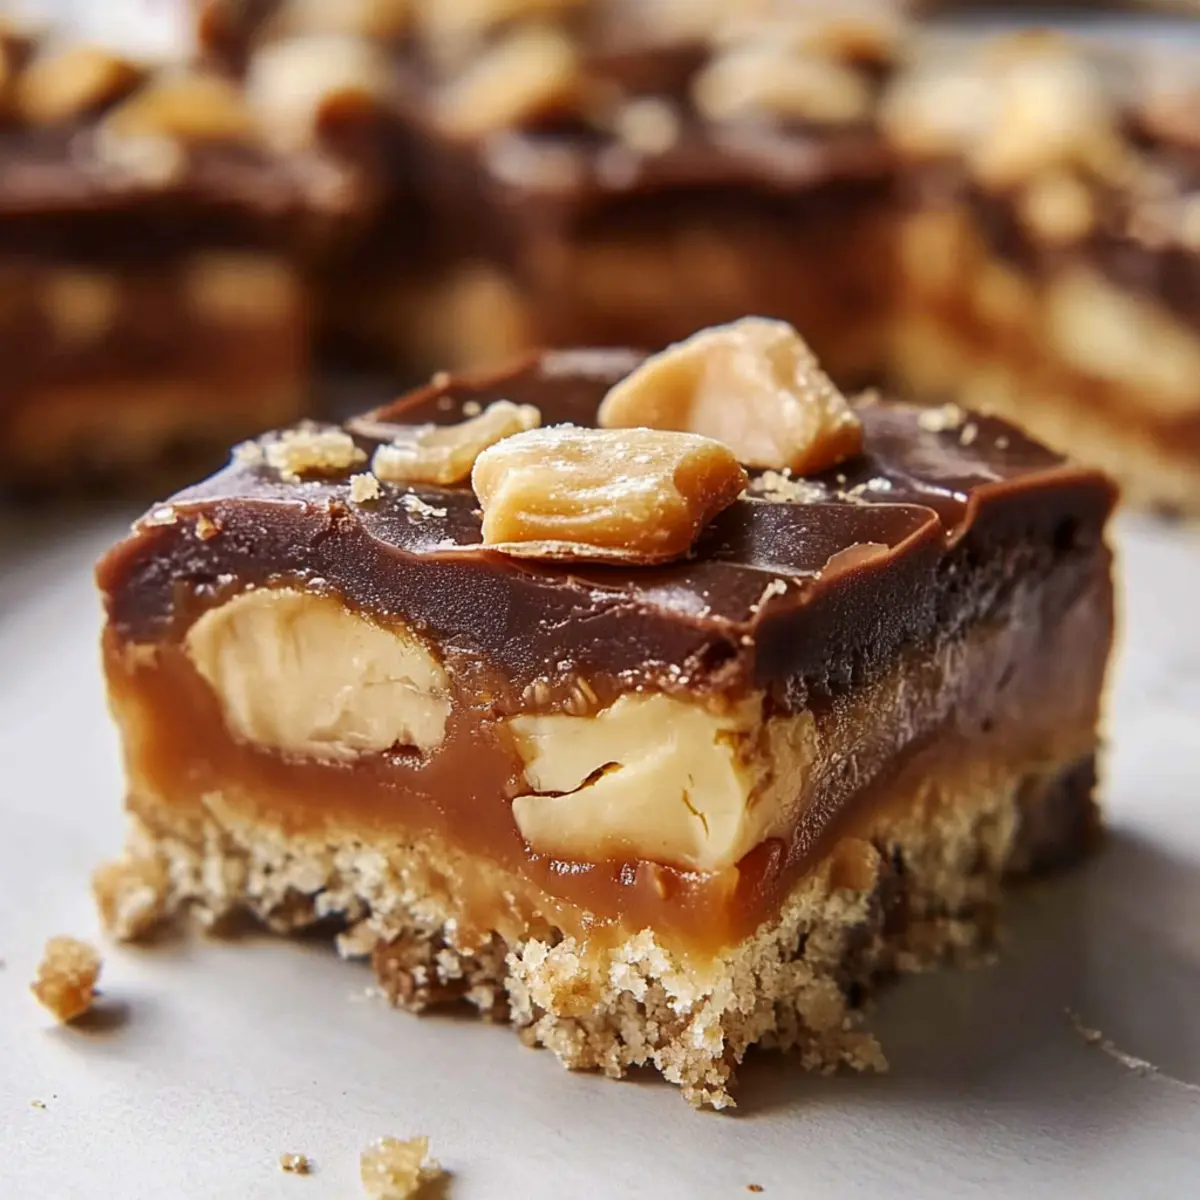
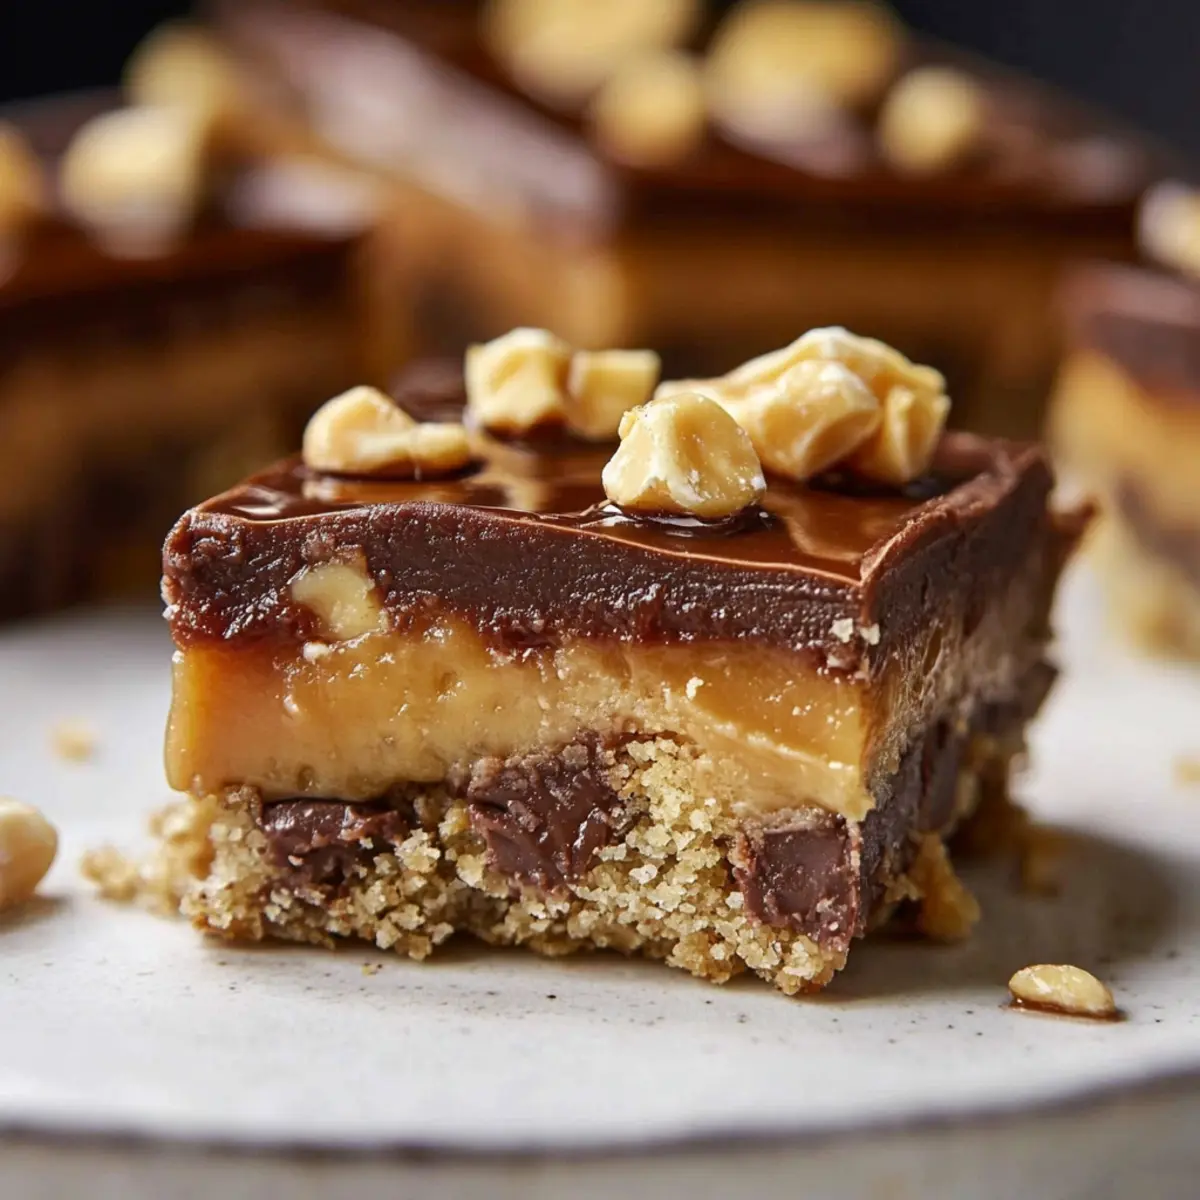
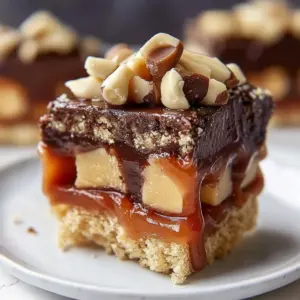
Irresistible Layers: Each bite combines a crunchy base, gooey caramel, and creamy chocolate, ensuring a delightful experience.
Quick Preparation: Ready in just 20 minutes of hands-on work, making it a perfect last-minute dessert!
No-Bake Wonder: No oven is required, so you can enjoy homemade indulgence without the heat.
Crowd-Pleasing Treat: This dessert is a hit at gatherings, pleasing even the pickiest eaters with its familiar Snickers flavor.
Make-Ahead Convenience: Prepare it in advance, chill overnight, and serve it fresh, freeing you to enjoy your time with loved ones.
Snickers Tray Bake Slice Ingredients
• Get ready to create a delicious dessert!
For the Base
- Crushed digestive biscuits or graham crackers – these add a delightful crunch that’s reminiscent of classic desserts.
- Melted butter – binds the base together, creating a rich and flavorful foundation.
- Cocoa powder – provides a hint of chocolate flavor to elevate the biscuit base.
- Sugar – a touch of sweetness to balance the flavors.
For the Caramel Layer
- Sweetened condensed milk – gives that iconic caramel creaminess that makes this dessert irresistible.
- Brown sugar – adds a deeper, more complex sweetness to the caramel.
- Butter – helps create a luscious texture when melting down the caramel.
For the Toppings
- Roasted peanuts – add a crunchy, nutty element that’s reminiscent of the beloved Snickers bar.
- Chocolate chips – ensures a rich, gooey chocolate topping that perfectly complements the dessert.
- Butter (for topping) – helps the chocolate melt smoothly, making for an easy application over the caramel layer.
Dive into these simple yet essential ingredients for your Snickers Tray Bake Slice and watch as they transform into a beloved treat!
Step‑by‑Step Instructions for Snickers Tray Bake Slice
Step 1: Prepare the Baking Tray
Start by lining a baking tray with parchment paper, ensuring it covers the bottom and sides for easy removal later. Choose a tray about 8x8 inches, as this size will yield the perfect thickness for your Snickers Tray Bake Slice. Prepping the tray now will save you time later as you layer in those delicious ingredients.
Step 2: Make the Biscuit Base
In a mixing bowl, combine the crushed digestive biscuits, melted butter, cocoa powder, and sugar. Stir until everything is well mixed, ensuring the crushed biscuits are evenly coated with the buttery goodness. Press this mixture firmly into the lined tray to create an even base, and then refrigerate for 10 minutes to allow it to set while you prepare the caramel layer.
Step 3: Cook the Caramel
In a saucepan over medium heat, combine the sweetened condensed milk, brown sugar, and butter. Stir continually for about 5–7 minutes until the mixture thickens and turns a beautiful golden caramel color. Watch for a bubbling surface as you stir; you want a smooth, velvety texture that will flow over your biscuit base.
Step 4: Add Peanuts to the Caramel
Once the caramel is ready, remove it from heat and fold in the roasted peanuts gently. This adds a delightful crunch that mimics the classic Snickers combination. Immediately pour the caramel-peanut mixture over the chilled biscuit base, spreading it evenly to cover every corner. This layer will add sweet richness to your Snickers Tray Bake Slice.
Step 5: Melt the Chocolate Topping
In a microwave-safe bowl, melt the chocolate chips with the additional butter until smooth. This should take about 1–2 minutes in the microwave, stirring every 30 seconds to prevent burning. Once melted, pour this luxurious chocolate over the caramel layer, smoothing it out with a spatula to create an enticing finish for your dessert.
Step 6: Chill the Slice
Cover the tray with plastic wrap or foil and refrigerate for at least 2 hours or until set. This chilling time is crucial as it allows the layers to firm up nicely, making it easier to cut into perfect squares later. You'll know it's ready when the chocolate topping feels solid to the touch.
Step 7: Slice and Serve
Once set, remove the Snickers Tray Bake Slice from the tray using the parchment paper for easy access. Place it on a cutting board and use a sharp knife to slice it into squares or rectangles, depending on your preference. The sight of these luscious layers will be irresistible, making them perfect for sharing or indulging yourself!
How to Store and Freeze Snickers Tray Bake Slice
Fridge: Keep leftover Snickers Tray Bake Slice in an airtight container for up to 5 days. This preserves its delightful texture and taste, making it easy to enjoy whenever cravings strike.
Freezer: For longer storage, wrap individual slices tightly in plastic wrap and then in aluminum foil. They can be frozen for up to 3 months—perfect for future indulgence!
Thawing: When ready to enjoy, thaw frozen slices in the refrigerator overnight before serving. This gentle thawing method helps maintain their delicious layers without compromising flavor.
Reheating: If you prefer a warm treat, pop a slice in the microwave for 10-15 seconds. Just enough to soften the chocolate without melting it away!
Tips for the Best Snickers Tray Bake Slice
- Biscuit Crumb Consistency: Make sure the crushed biscuits are fine; larger pieces won't bind as well, risking a crumbling base.
- Watch the Caramel: Stir continuously while making the caramel to prevent burning, ensuring a silky texture that enhances the Snickers Tray Bake Slice.
- Chilling Time: Don’t rush the chilling process; allowing it to set for at least 2 hours ensures clean cuts and firm layers.
- Chocolate Melting Technique: Melt the chocolate in short bursts to avoid scorching, ensuring a smooth topping that perfectly complements your dessert.
- Storage Tips: Store leftover slices in an airtight container in the fridge to maintain freshness, but they’re best enjoyed within a few days!
What to Serve with Snickers Tray Bake Slice
Creating a memorable dessert experience can be just as delightful as the treat itself – and this one is no exception!
-
Fresh Berries: Juicy strawberries or raspberries add a burst of freshness, perfectly balancing the rich flavors of the Snickers Tray Bake Slice.
-
Vanilla Ice Cream: Creamy and cool, a scoop of vanilla ice cream enhances the sweetness, making each bite even more indulgent.
-
Coffee or Espresso: A warm cup of coffee complements the chocolate and caramel beautifully, enhancing your dessert experience with a touch of warmth.
-
Chocolate Sauce Drizzle: A drizzle of warm chocolate sauce elevates your slice into a decadent treat and adds a luxurious touch.
-
Whipped Cream: Light and airy, whipped cream adds a fluffy element that contrasts the dense layers of the dessert, balancing the textures perfectly.
-
Salted Caramel Sauce: Pouring a bit of salted caramel over your slice adds a unique flavor twist, highlighting the nutty and chocolaty goodness.
-
Nutty Trail Mix: A side of crunchy nutty trail mix provides a delightful contrast, adding texture and a savory note to the meal.
With these pairing options, your Snickers Tray Bake Slice will shine at any gathering, leaving everyone craving for more!
Snickers Tray Bake Slice Variations
Feel free to let your creativity shine as you make this delicious Snickers Tray Bake Slice uniquely yours!
- Gluten-Free: Use gluten-free biscuits or a blend of ground nuts as the base to accommodate dietary needs.
- Nut-Free: Substitute roasted peanuts with sunflower seeds or crunchy cookie pieces for a delightful twist. This keeps the texture interesting while ensuring those with nut allergies can enjoy every bite.
- Vegan: Replace butter with coconut oil and use dairy-free chocolate chips for a plant-based version everyone can savor. It’s amazing how simple swaps can create a rich and indulgent treat!
- Salted Caramel Boost: Add a sprinkle of sea salt on top of the melted chocolate before it sets for an enticing sweet-and-salty flavor contrast. This little addition elevates the dessert in ways that are simply unforgettable.
- Flavor Infusion: Stir in a teaspoon of vanilla extract or almond extract into the chocolate topping for an aromatic twist that enhances the overall experience. It’s a small change that makes a big difference!
- Layered Fruit: Incorporate slices of banana or a layer of strawberries on top of the caramel before adding the chocolate, adding freshness and a pop of color to your indulgence. It brings a delightful balance of tastes and textures.
- Spicy Kick: For those who love heat, add a dash of cayenne pepper to the chocolate topping for a surprising, warm finish. It’s a bold choice that turns up the excitement with each bite!
- Delicious Drizzle: Drizzle melted peanut butter or caramel sauce over the chocolate layer for an extra indulgent finish. Not only does it look enticing, but it also adds another delicious flavor dimension to your treat!
Make Ahead Options
These Snickers Tray Bake Slices are perfect for busy home cooks looking to save time! You can prepare the biscuit base and caramel layer up to 24 hours in advance. Simply refrigerate them separately after you complete each layer, ensuring the biscuit base remains crisp and the caramel retains its luscious texture. Once you're ready to finish, just melt the chocolate topping and pour it over the set caramel layer. Chill the tray bake for at least 2 hours until fully set before slicing. This way, you can have a delightful dessert ready to impress your friends and family with minimal last-minute effort!
Snickers Tray Bake Slice Recipe FAQs
How do I choose the right biscuits for the base?
Absolutely! For the best results, use crushed digestive biscuits or graham crackers. Both options provide a wonderful crunch, but digestive biscuits deliver a slightly richer flavor. Ensure they're finely crushed, as larger pieces may lead to a crumbly base that won't hold up well.
How should I store leftover Snickers Tray Bake Slice?
Keep your leftover Snickers Tray Bake Slice in an airtight container in the fridge for up to 5 days. This helps maintain its delightful crunch and creamy texture. A little tip: if you notice any dark spots on the slices, that's a sign they might be getting old, so enjoy them sooner rather than later!
Can I freeze Snickers Tray Bake Slice?
Absolutely! To freeze your slices, wrap each piece tightly in plastic wrap, followed by aluminum foil. This prevents freezer burn and keeps them fresh for up to 3 months. When you’re ready to indulge, simply thaw them in the refrigerator overnight—this method ensures the delightful layers retain their texture.
What should I do if my caramel is too runny?
If your caramel doesn’t thicken properly, don’t worry! Simply return it to the saucepan over medium heat and continue to cook while stirring for a few more minutes until it reaches a thick, golden state. A visual cue is when bubbles start to form, and it coats the back of a spoon. This ensures a luscious caramel layer to complement your Snickers Tray Bake Slice!
Are there any dietary considerations for this recipe?
Yes, this recipe contains dairy and nuts, so if you or your loved ones have allergies, be cautious. For a nut-free version, you can try substituting the roasted peanuts with sunflower seeds or pumpkin seeds. Just remember that this will change the flavor profile, but it’s a great alternative!
Indulgent Snickers Tray Bake Slice for Sweet Tooth Bliss
Equipment
- mixing bowl
- Saucepan
- microwave-safe bowl
- Baking Tray
Ingredients
For the Base
- 200 grams crushed digestive biscuits or graham crackers
- 100 grams melted butter for binding the base
- 2 tablespoons cocoa powder
- 50 grams sugar
For the Caramel Layer
- 1 can sweetened condensed milk
- 100 grams brown sugar
- 50 grams butter for caramel
For the Toppings
- 100 grams roasted peanuts
- 150 grams chocolate chips
- 20 grams butter for melting with chocolate
Instructions
Step-by-Step Instructions
- Prepare the baking tray by lining it with parchment paper to cover the bottom and sides.
- Make the biscuit base by mixing the crushed biscuits, melted butter, cocoa powder, and sugar, then press into the tray and refrigerate for 10 minutes.
- Cook the caramel by combining sweetened condensed milk, brown sugar, and butter in a saucepan over medium heat, stirring until thickened.
- Add roasted peanuts to the caramel and pour the mixture over the chilled biscuit base, spreading evenly.
- Melt the chocolate chips and additional butter in the microwave until smooth, then pour over the caramel layer.
- Chill the slice for at least 2 hours until set.
- Once set, slice into squares or rectangles and serve.